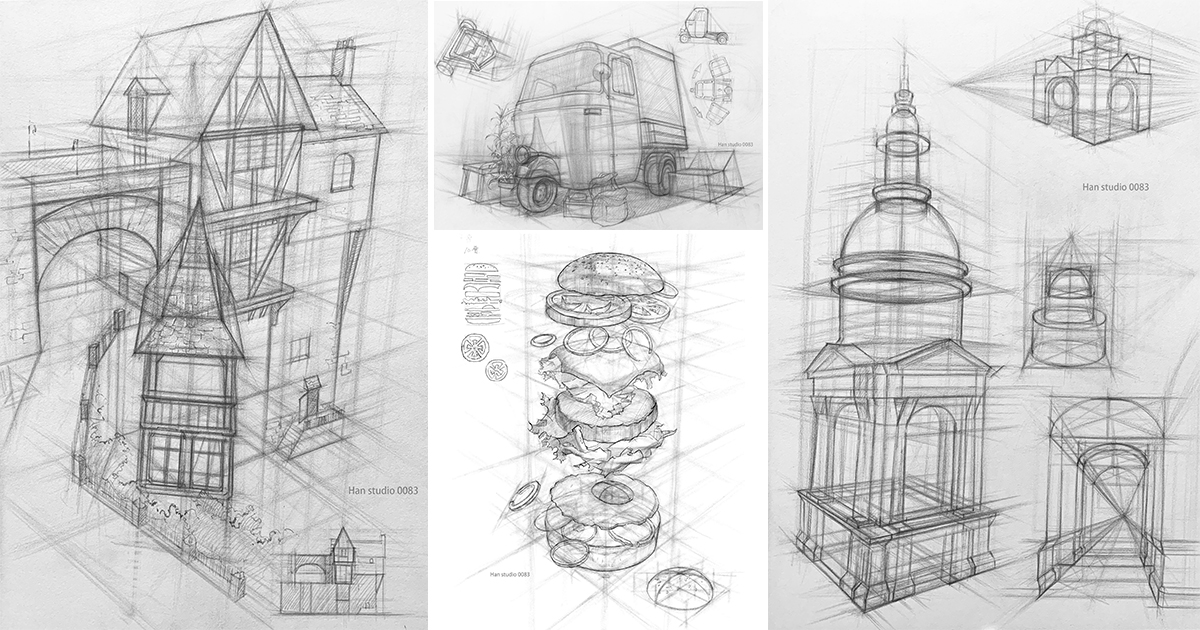
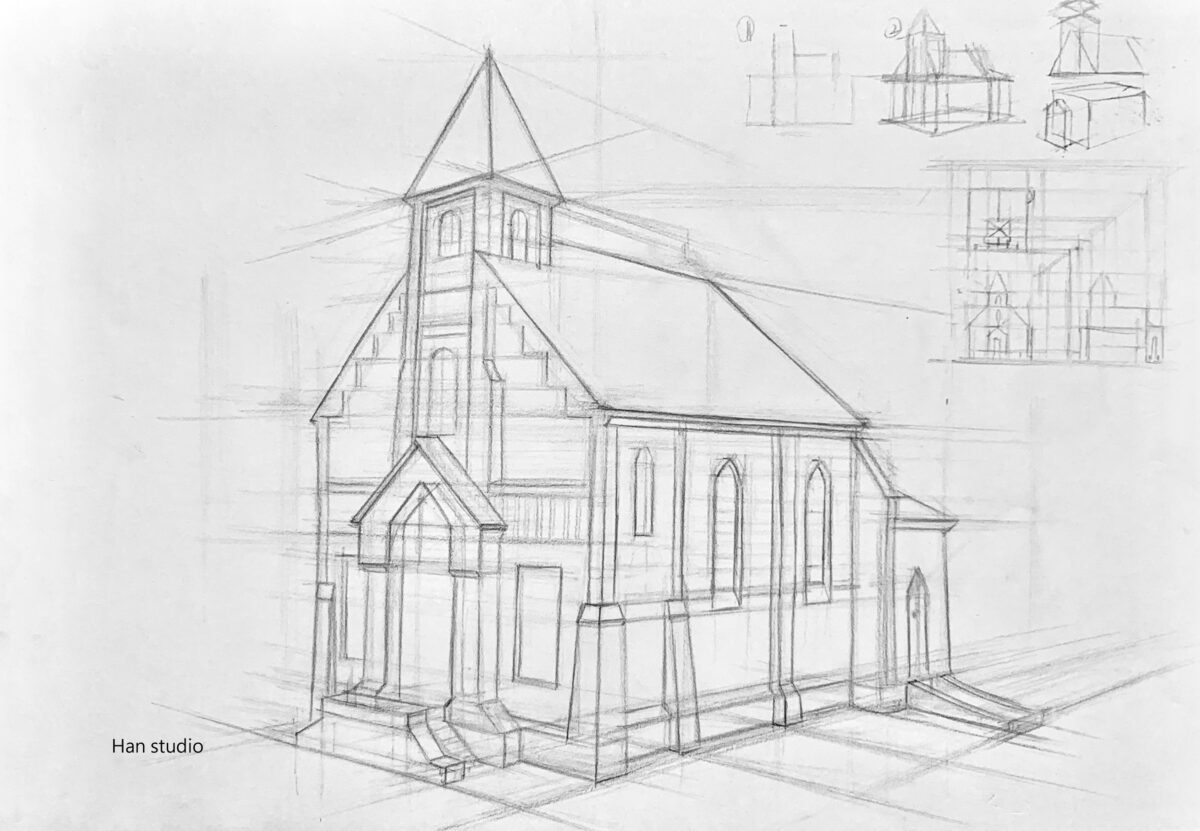
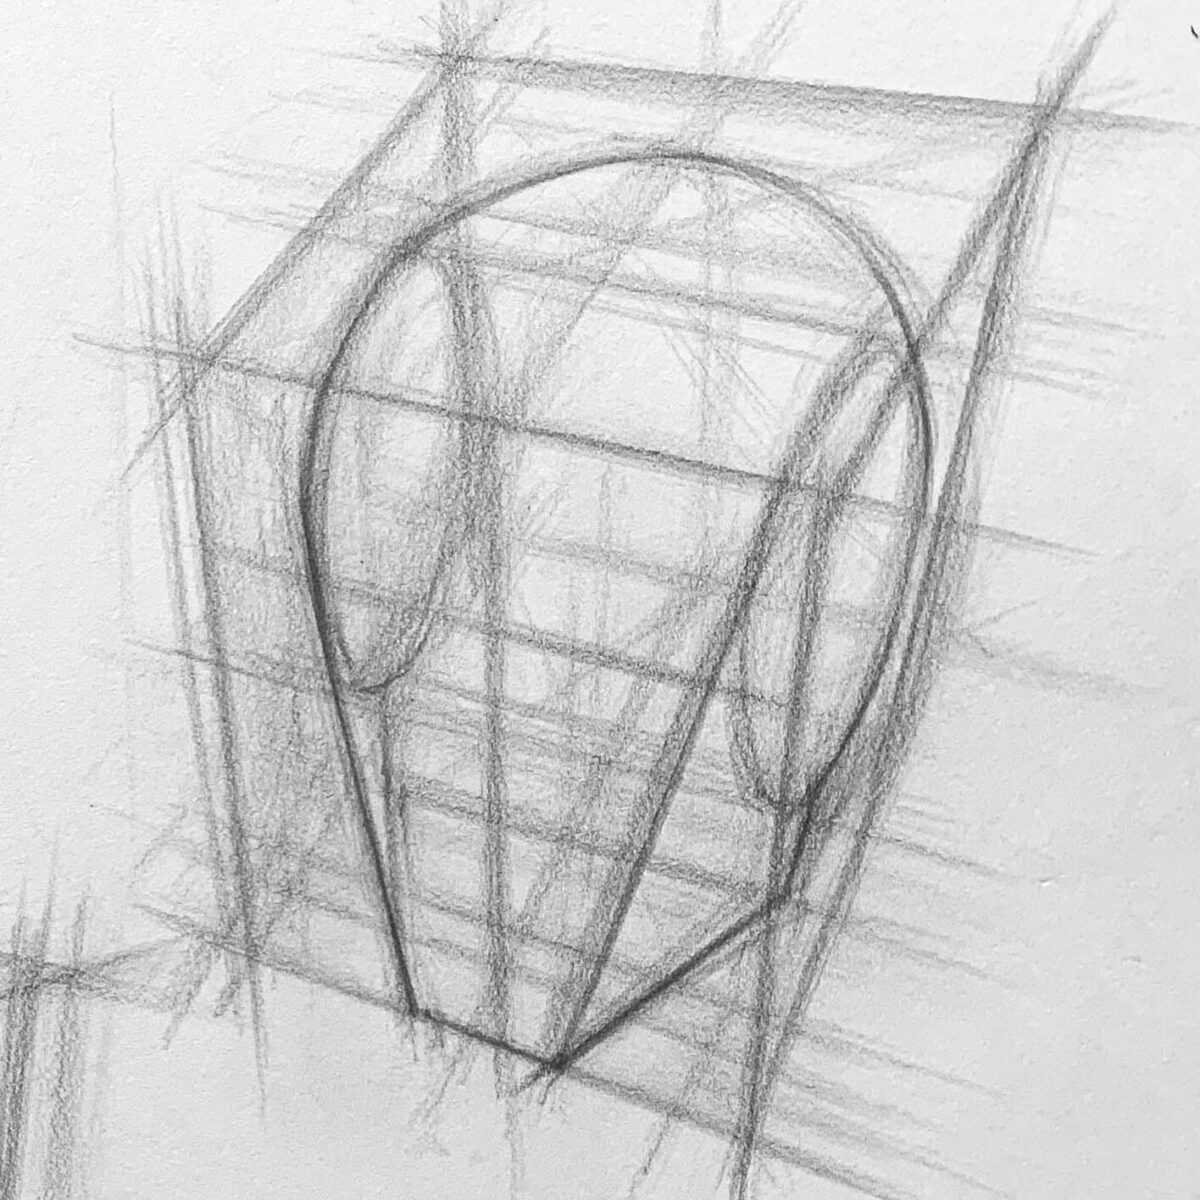
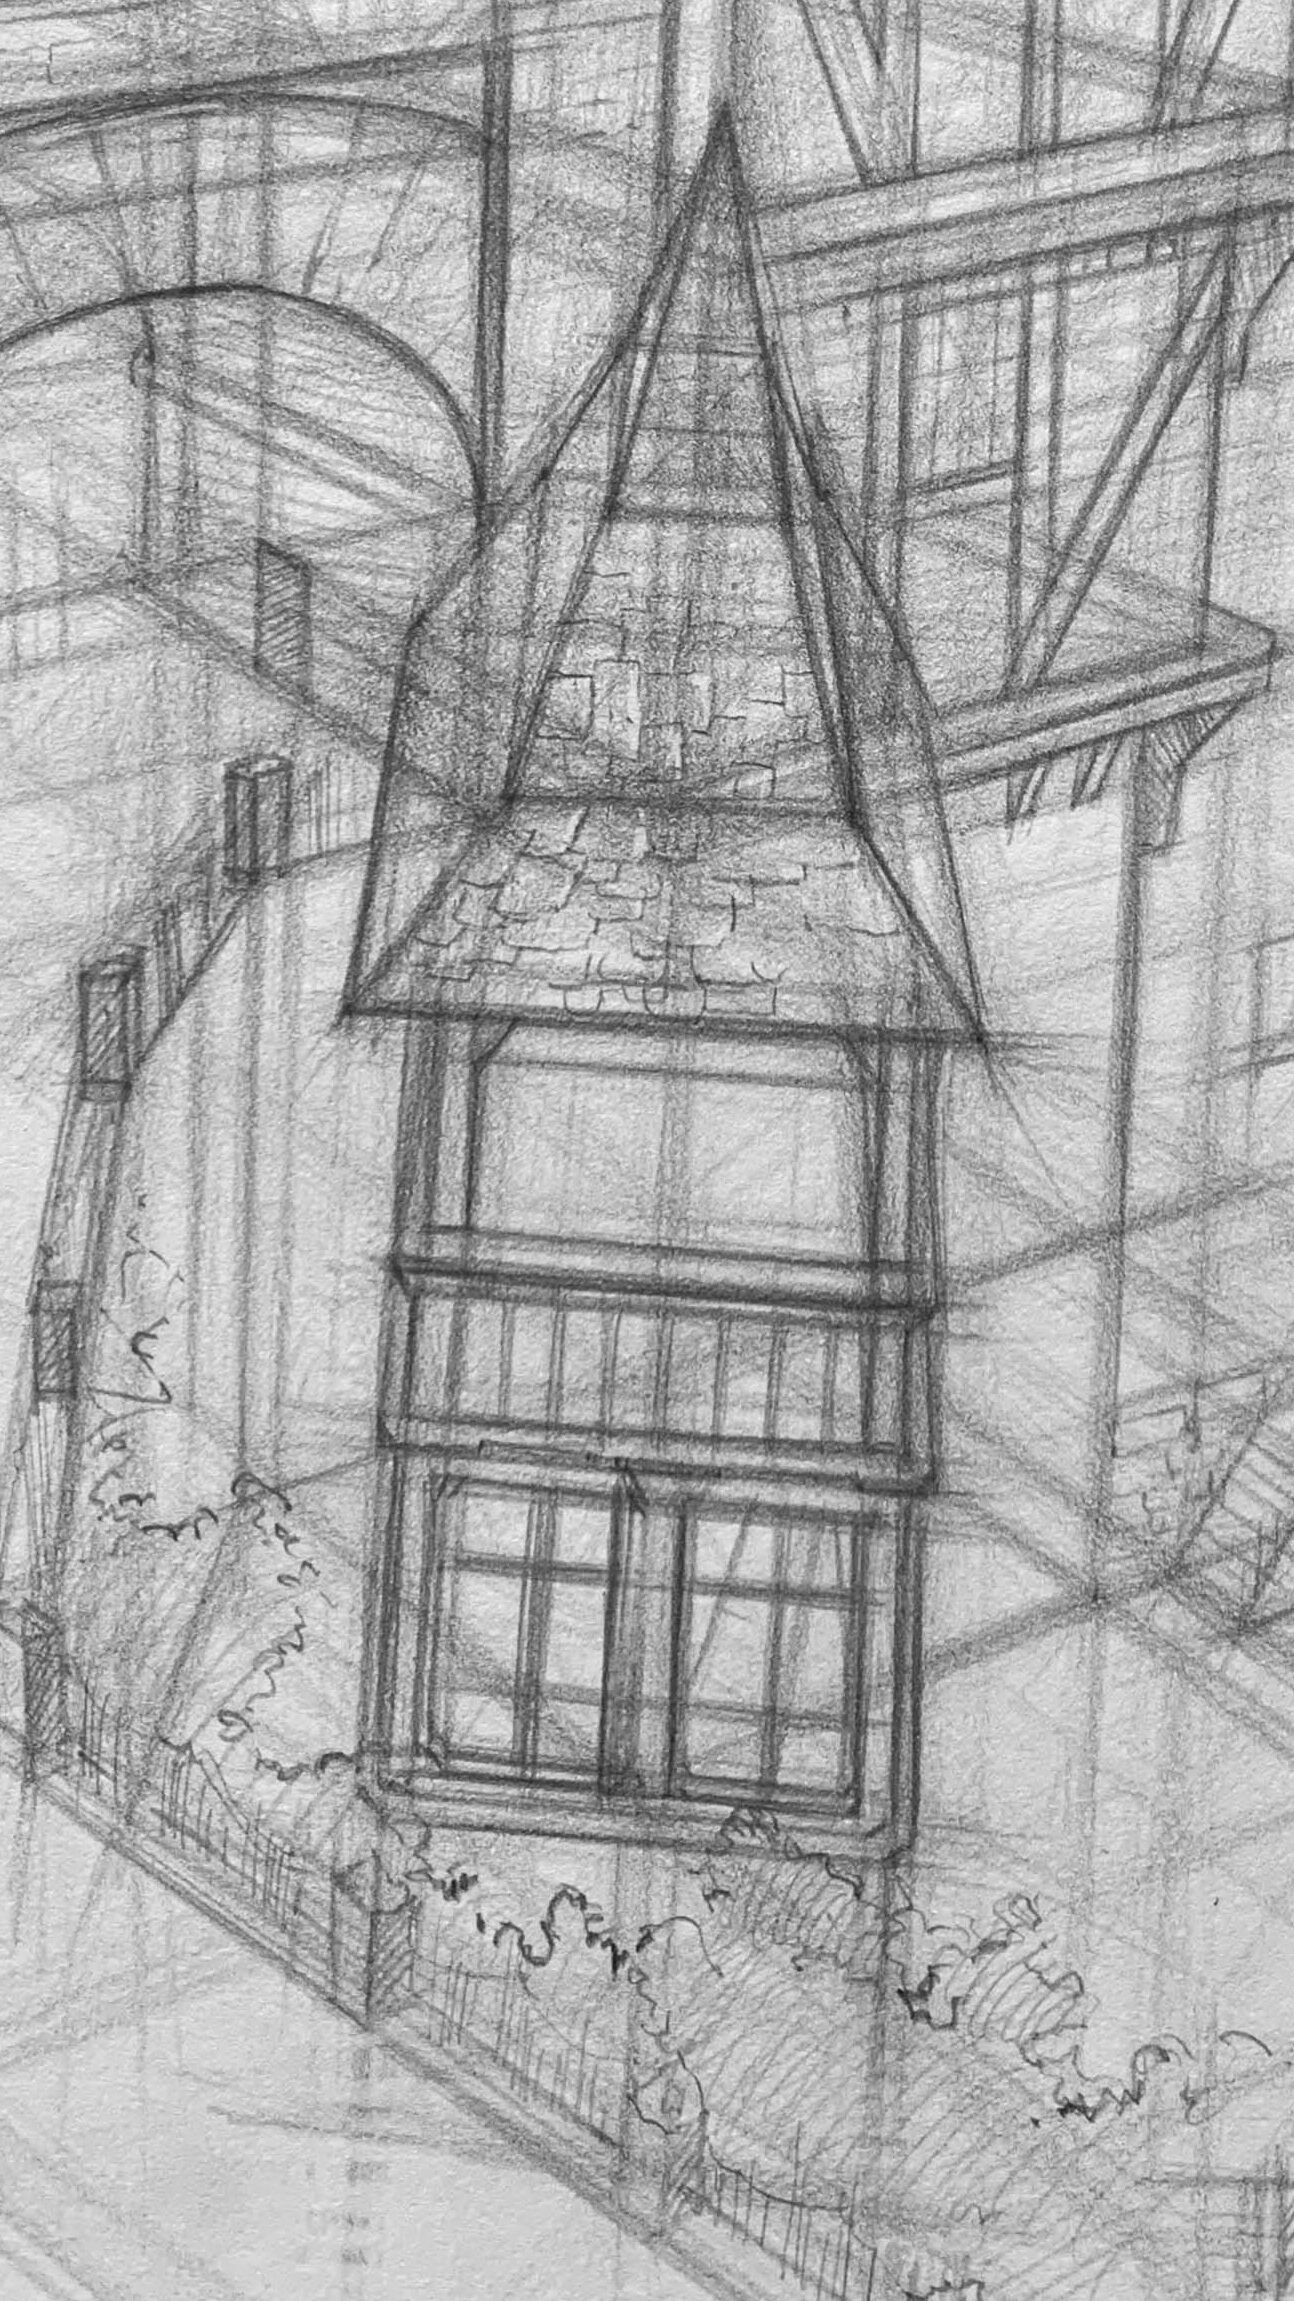
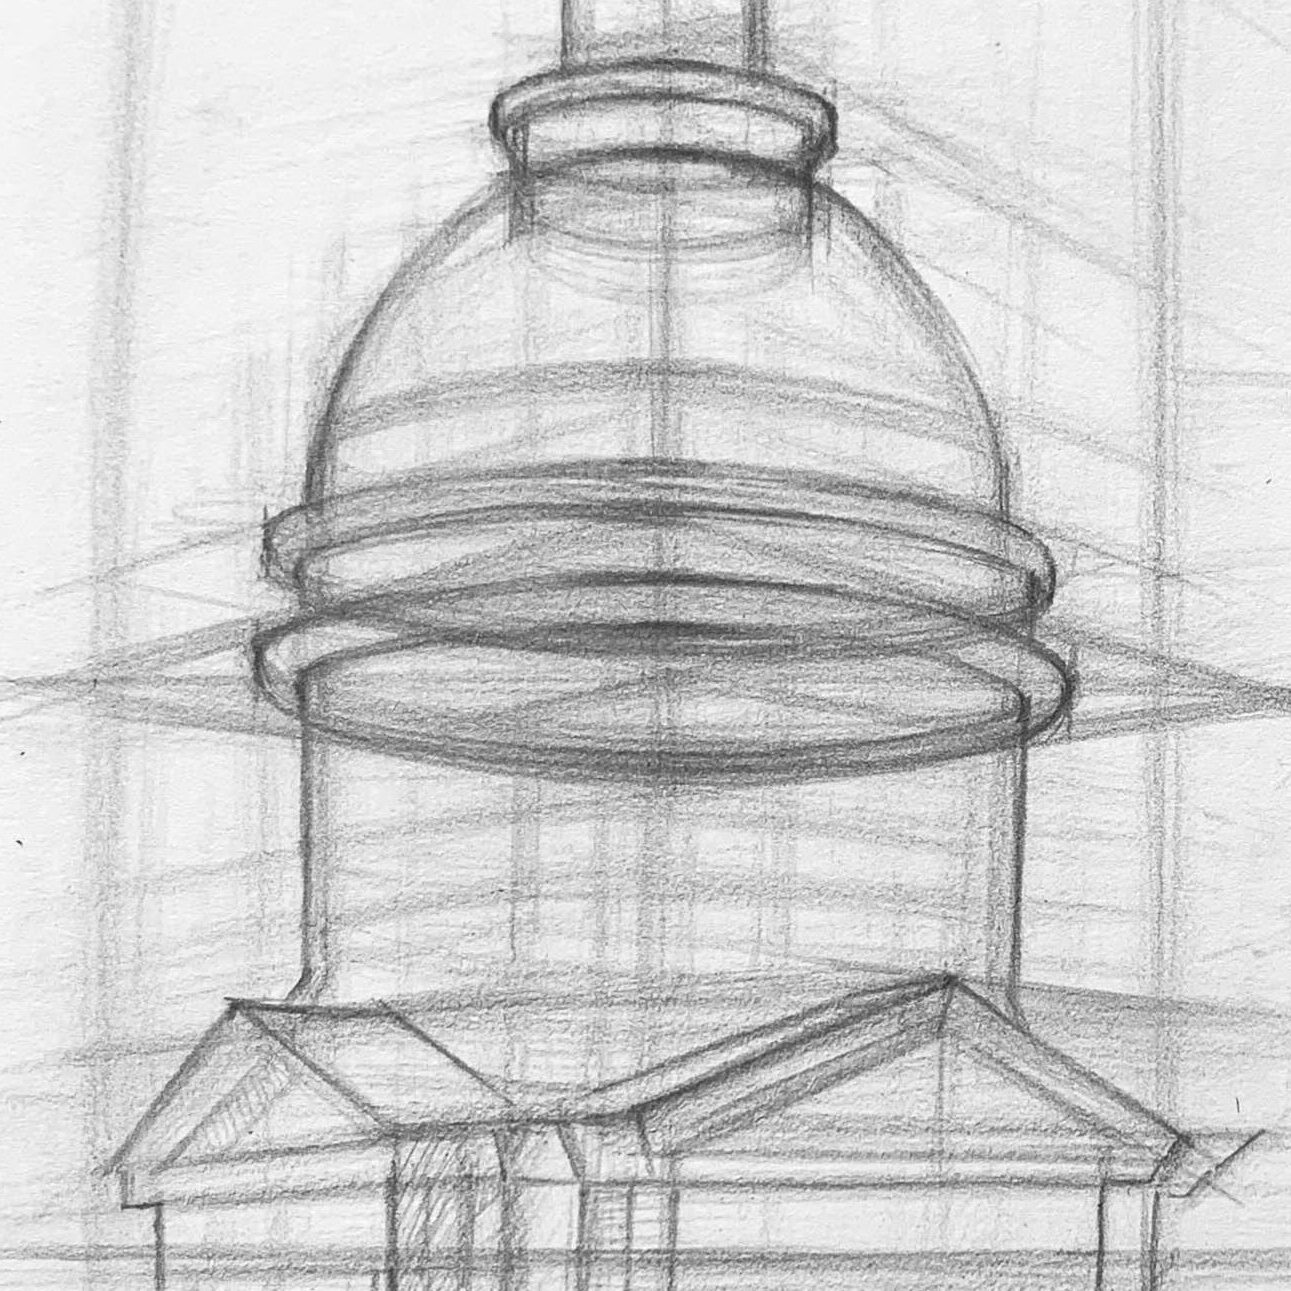
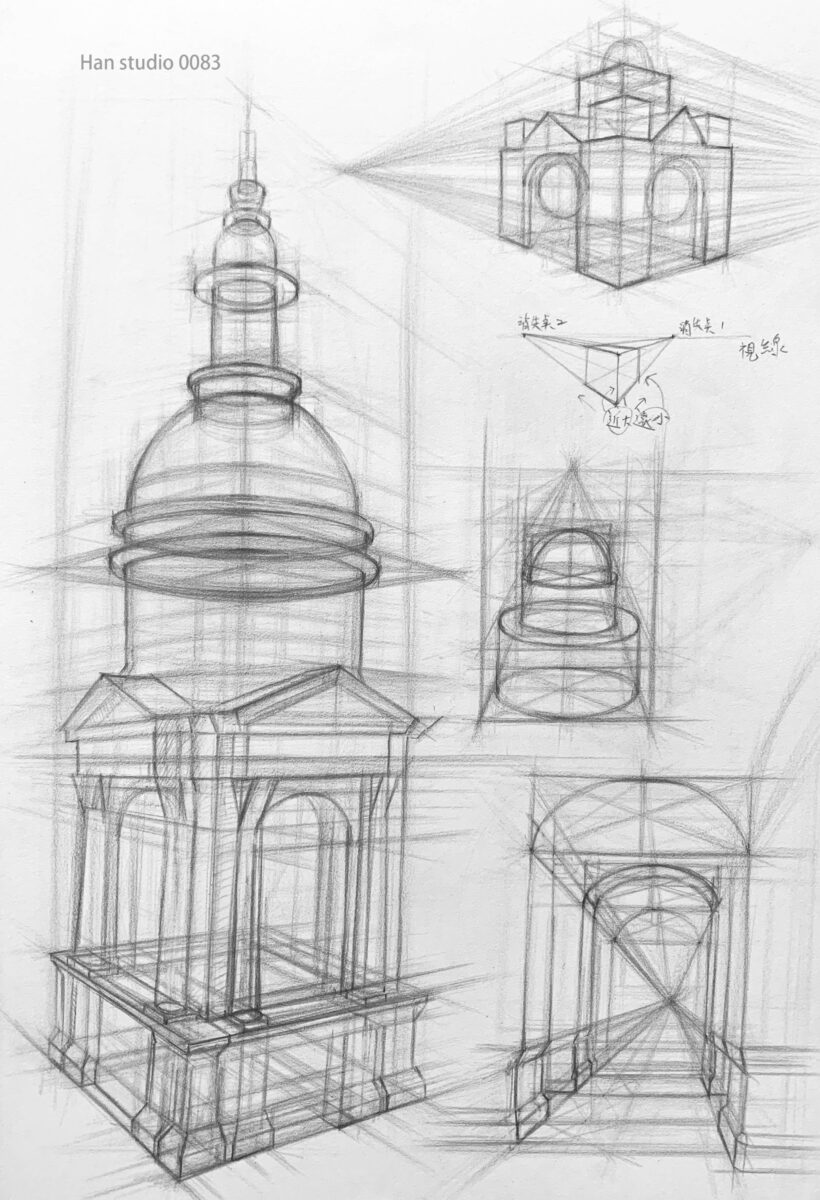
This week, I drew a foreign cathedral, and I hope to visit it in person someday. I'm in awe of how much time and effort earlier generations dedicated to designing such intricate structures.
By sketching the cathedral, I learned how squares and circles can be combined to create structures. This technique can be applied to drawing spaces and buildings, and the process resembles computer modeling—defining shapes, planning spaces, and layering elements like stacking a cake. 🙋
Let’s dive in to explore how to use lines to create a sense of space!
Before You Start Drawing: Key Concepts
● What is perspective?
Perspective is a technique that makes your drawings look spatial and realistic by projecting real-world objects onto a flat surface. It helps you understand proportions and the size relationships between near and far objects.

● The role of the picture plane in perspective:
Think of the picture plane as a window that directs your view, similar to a camera lens or a canvas. 3D objects are projected onto this 2D surface, creating the image you see.
● What is a vanishing point?
In a perspective drawing, all parallel lines that recede into the distance converge at a single point called the vanishing point. This simulates the effect of objects appearing smaller as they move further away.
For example, in the upper-right illustration, lines in the same direction all converge toward their respective vanishing points on the horizon.

Line of Sight / Eye Level Height
Your eye level determines the viewing angle of the scene, whether it’s straight-on, bird’s-eye (looking down), or worm’s-eye (looking up). It defines how the scene feels to the viewer.
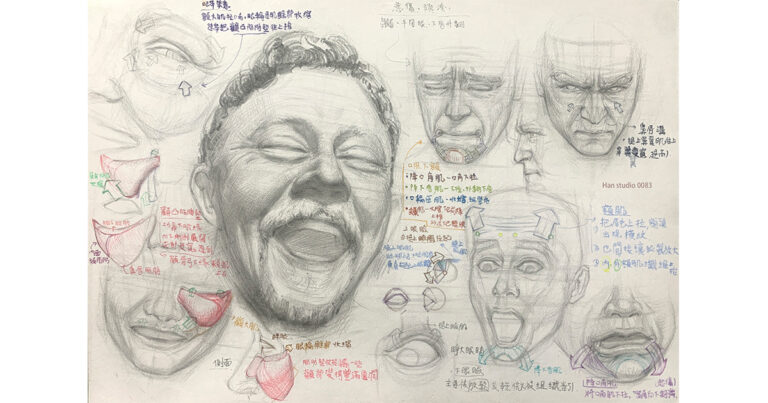
Using the head as an example:
如何判斷視平線?
幾個方法:
- 找遠方建築物的“最遠的水平線”
- 找同方向消失線並連起來
Common Types of Perspective
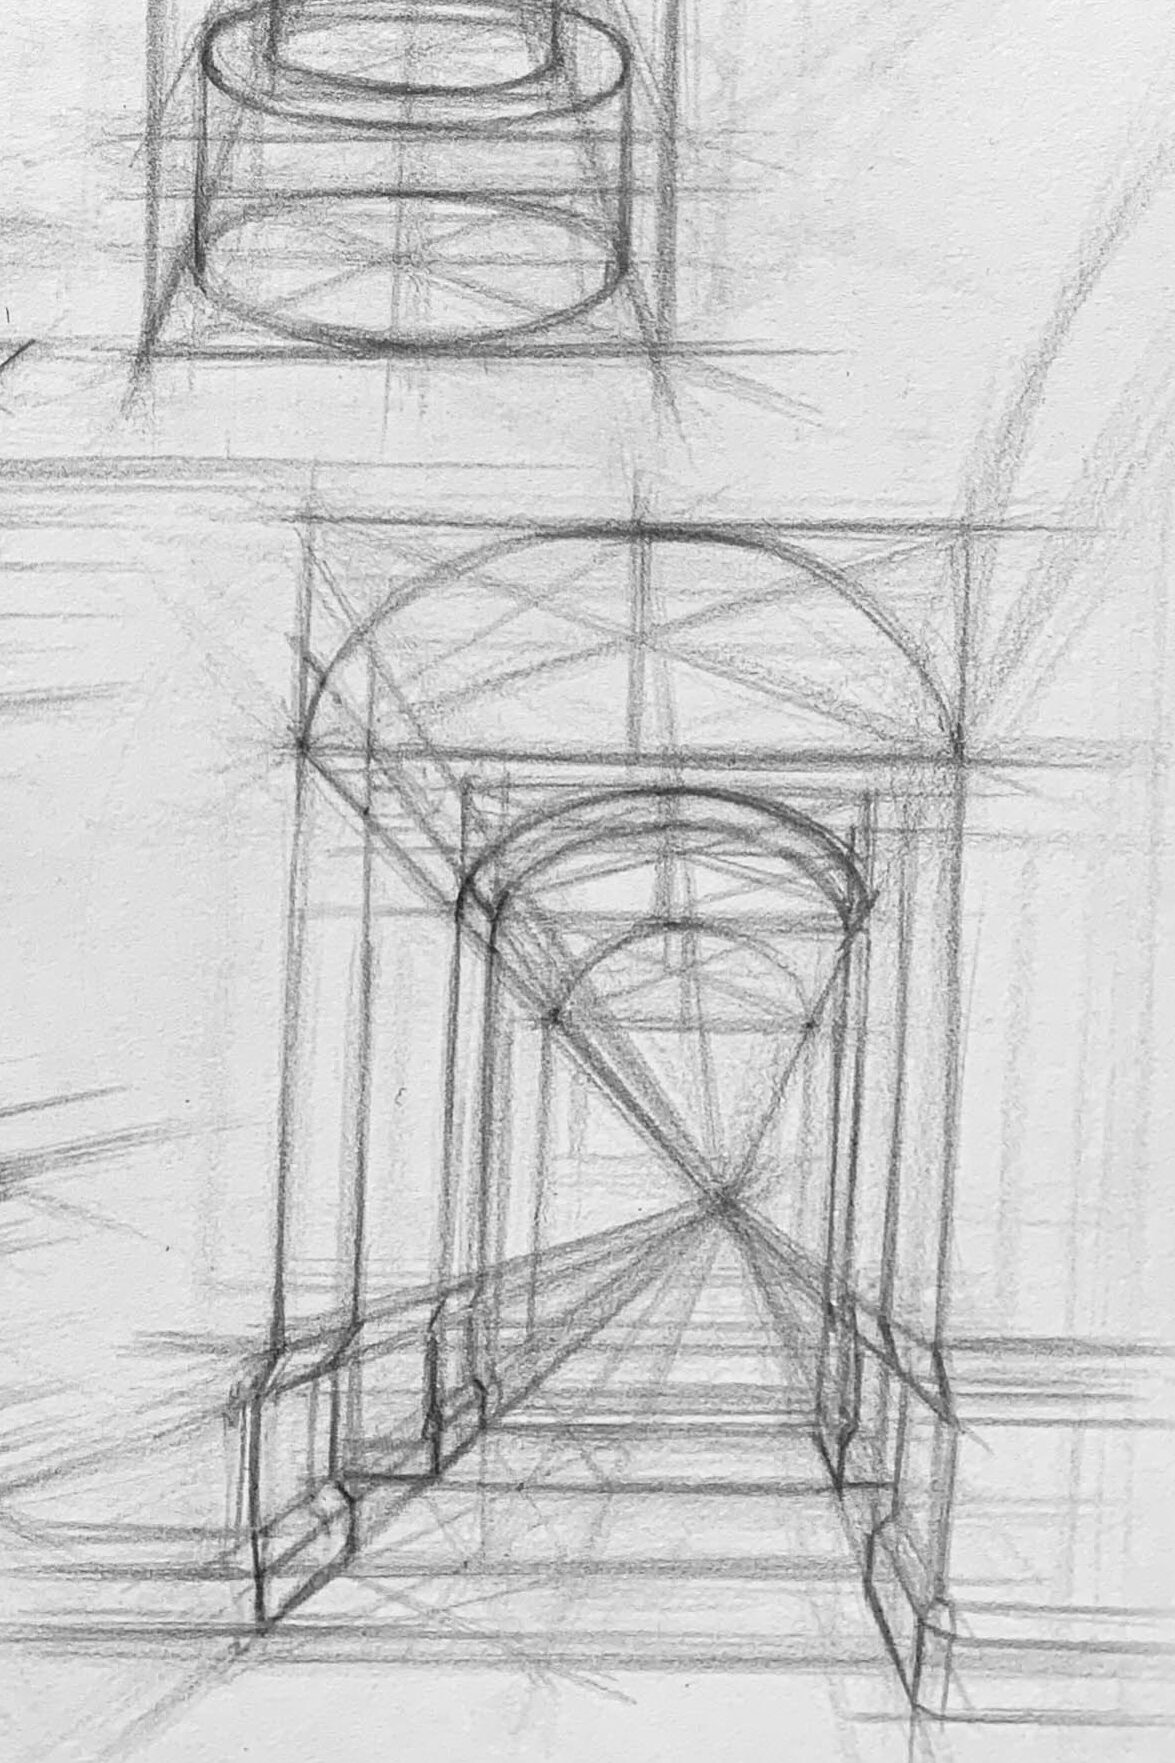
What is one-point perspective:
In a scene, only one set of parallel edges that are perpendicular to the picture plane converge toward a single vanishing point; all other horizontal lines that are parallel to the picture plane remain horizontal, and vertical lines remain vertical.
As shown in the bottom-right hallway illustration, all lines converge toward one vanishing point.
所有「往同一個方向延伸」的線,在畫面上會匯聚到同一個點,那個點叫做消失點
這個情況會發生在:
我們面對物體的正面,物體只往一個方向延伸時。

為什麼會匯聚到同一個點?
當兩條 在現實中看似平行的線 逐漸離你越來越遠時
你的眼睛能看到的「實際寬度」會:
- 近 → 看起來寬
- 遠 → 看起來窄
- 超遠 → 變得幾乎重疊成一點
這就是為什麼你看鐵軌、馬路、桌子的邊線,
都會越遠越靠近彼此。
在畫面的世界裡,它們就會被畫成:
從前面寬 → 往後集中 → 最後聚到同一個點
消失點為什麼在視平線上?
你眼睛水平看出去時,看見所有“水平延伸的平行線”,
它們最後會保留在這個高度上。
所以:
- 消失點永遠落在視平線上
- 消失點左右位置由你的「面朝方向」決定
一點消失適用在哪些情況?
- 當你面對物體正面
- 看到的是一個「平平的正方形/矩形」
- 深度只有「一個方向」延伸
最典型例子:
- 正面看一個箱子
- 正面看一扇門
- 正面看路上的馬路中央線
- 站在走廊中,往前看
這些場景都會有唯一一個方向的深度 → 唯一一個消失點
● Two-point perspective:
想像你站在街角,面前是一條路向左延伸,另一條路向右延伸。
路的盡頭都會「往遠方聚集在一起變成點」,在你的眼前水平的面上形成左、右兩個點:

– 沒有“正面”平行對著你
– 你看到物體的兩組水平線(往左延伸 + 右延伸)
→ 所以需要兩個消失點。

兩點消失的三大條件
- 物體有轉一個角度(沒有正面朝你)
- 左右兩方向都有深度延伸
- 物體仍水平放置、觀察者沒有歪頭
三者成立 → 兩點消失。

變形的控制:兩個消失點的距離決定透視強度
這是兩點透視裡最容易讓畫面“誇張變形”的地方。
● 消失點太近 → 超廣角、變形誇張
● 消失點太遠 → 線看起來近乎平行、透視變弱
● 平衡點:消失點落在畫面左右很遠的位置
● Three-point perspective:
Now imagine looking up or down at a tall building. Not only do the horizontal edges converge toward the two vanishing points on the left and right, but the vertical edges also appear to converge—either upward or downward—toward a third vanishing point. This is what we call three-point perspective.
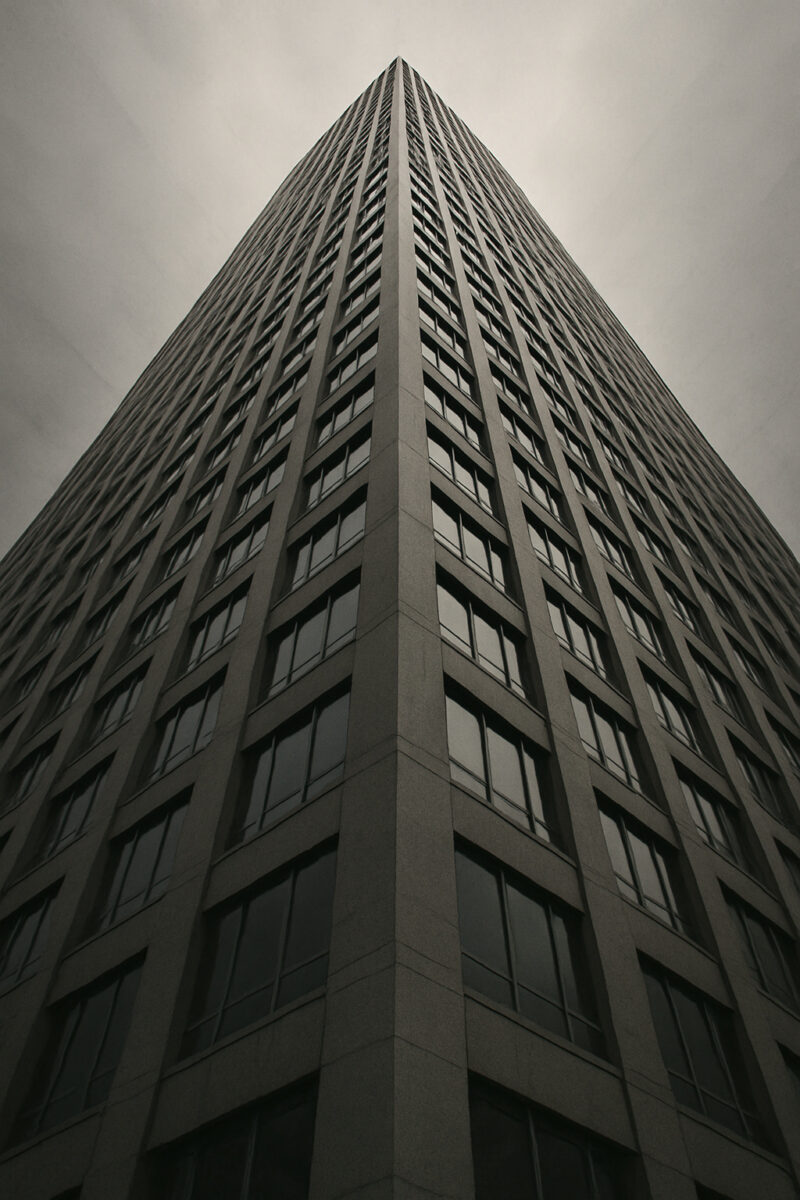
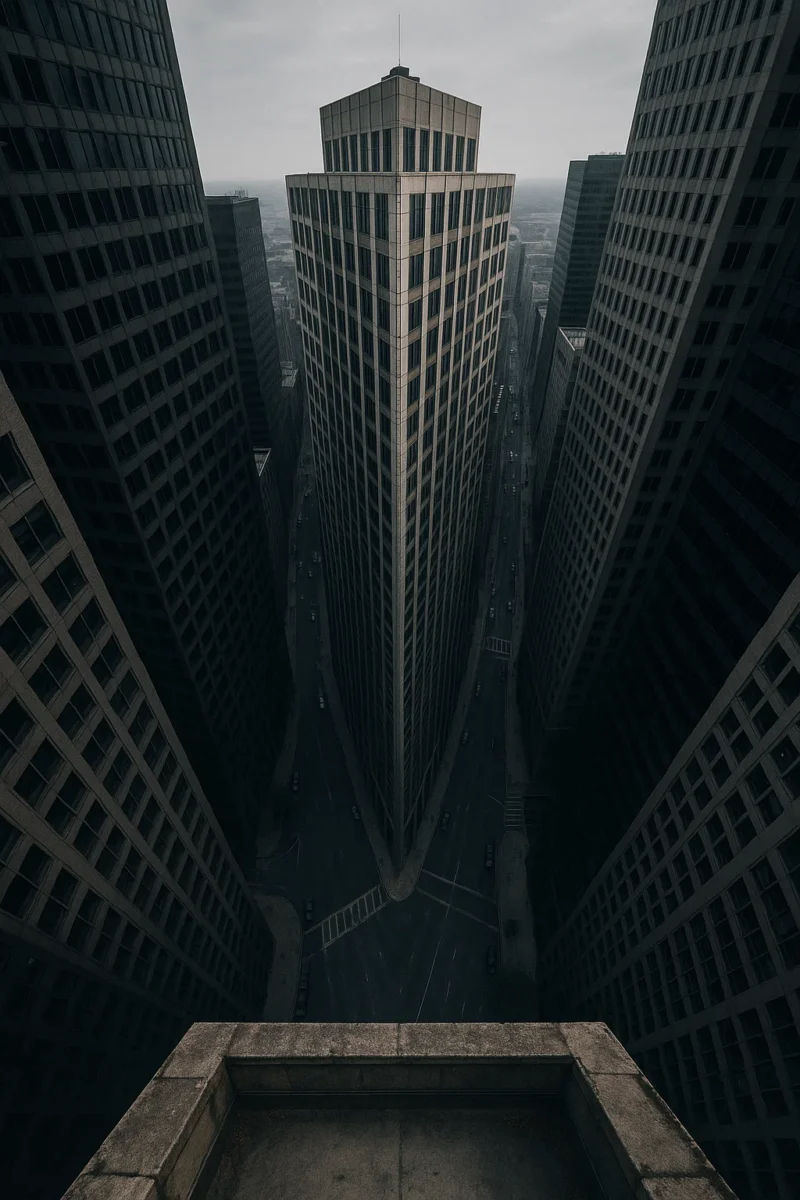
By introducing a third vanishing point along the vertical axis (above or below the horizon), you can simulate dramatic perspective angles, such as looking up at a skyscraper or down from a high viewpoint—perfect for adding tension or dynamic energy to a scene.
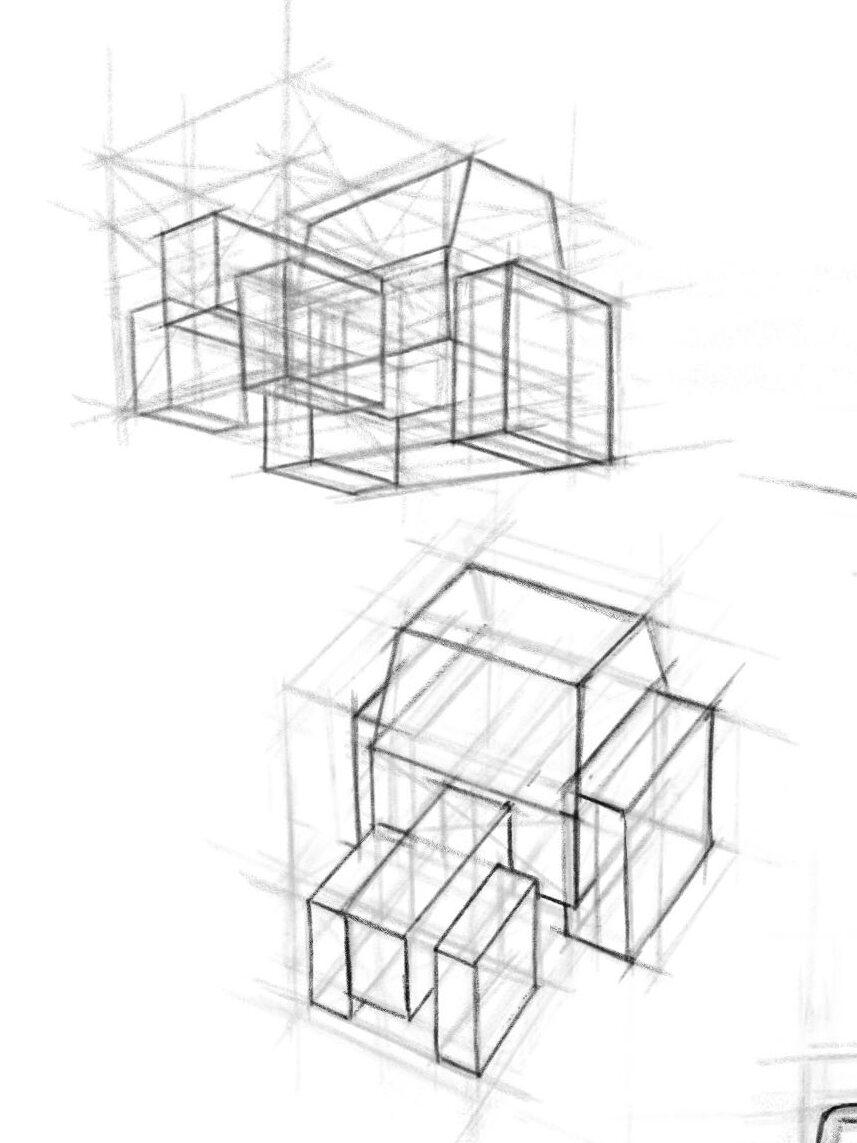
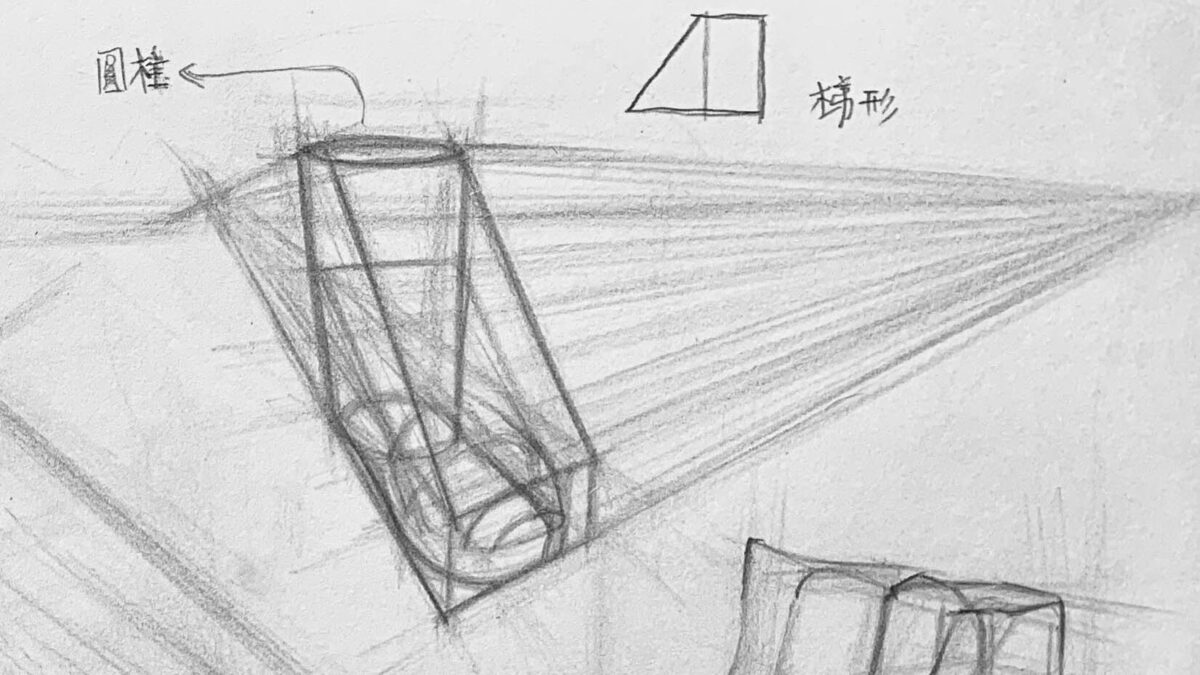
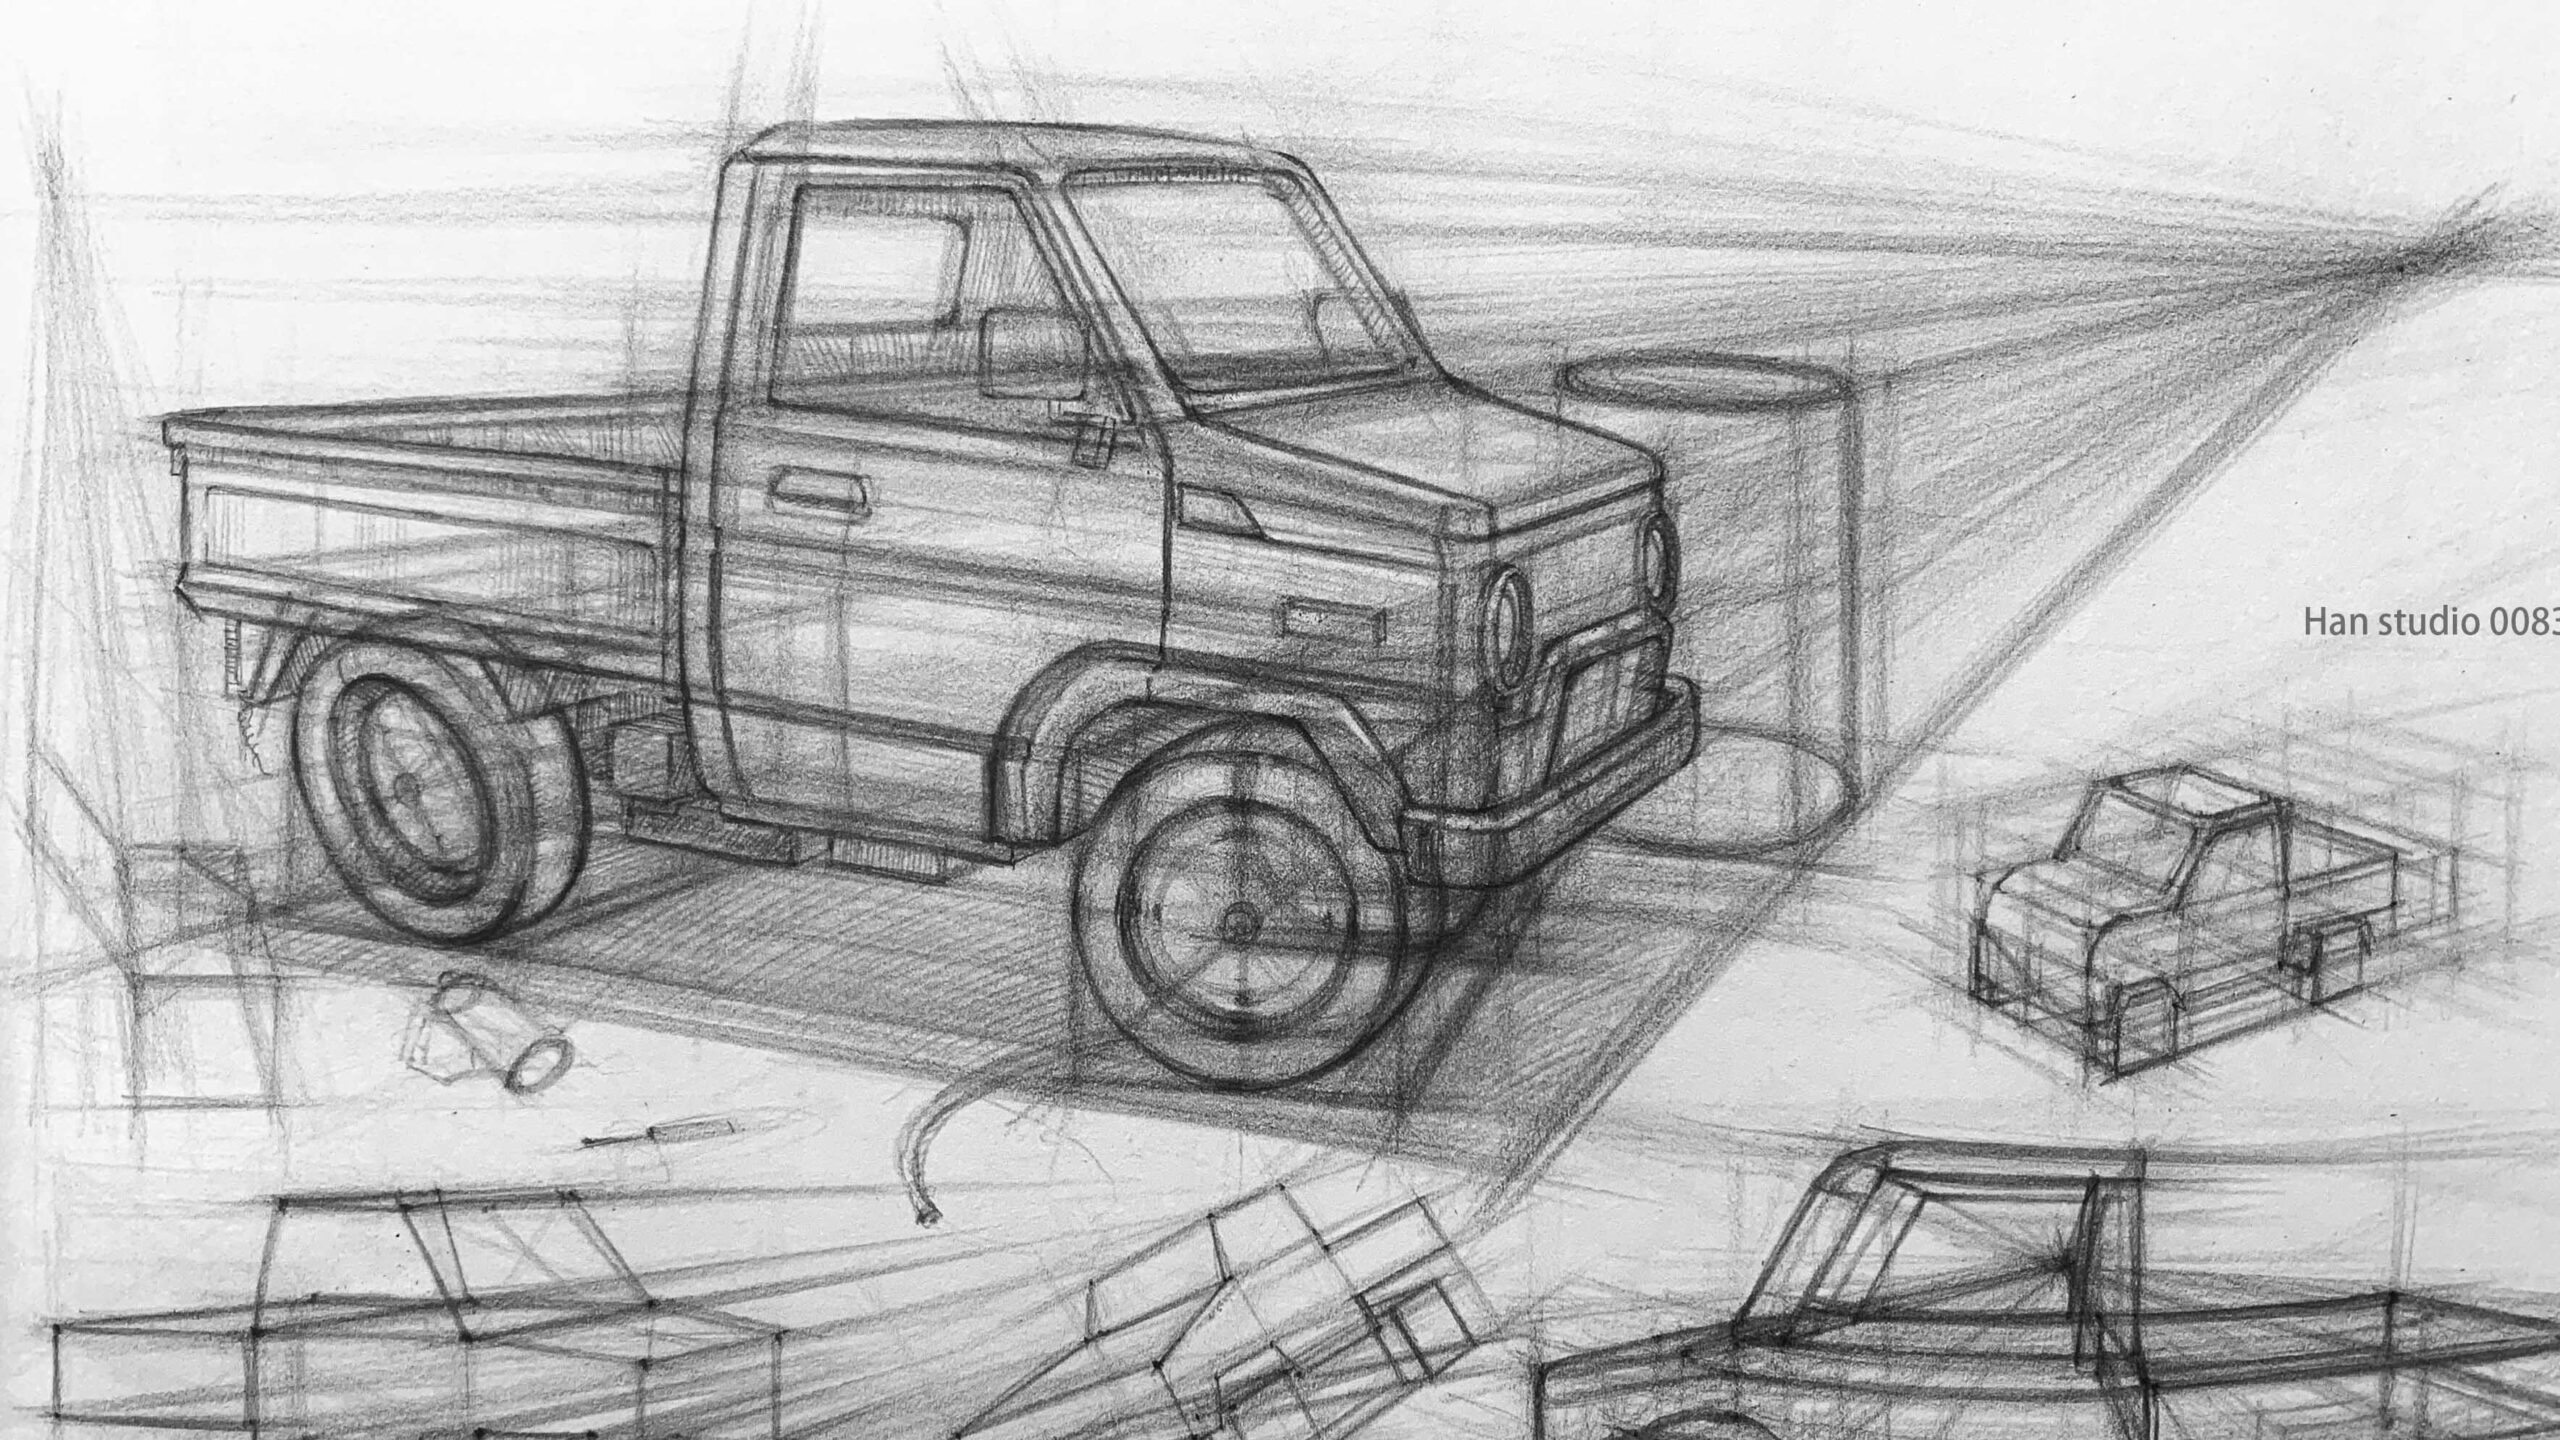
● Square perspective:
The objects we see in our daily lives can often be simplified into squares to construct shapes and proportions. By using squares, we can quickly understand structures and establish the size relationships between objects and space when drawing.

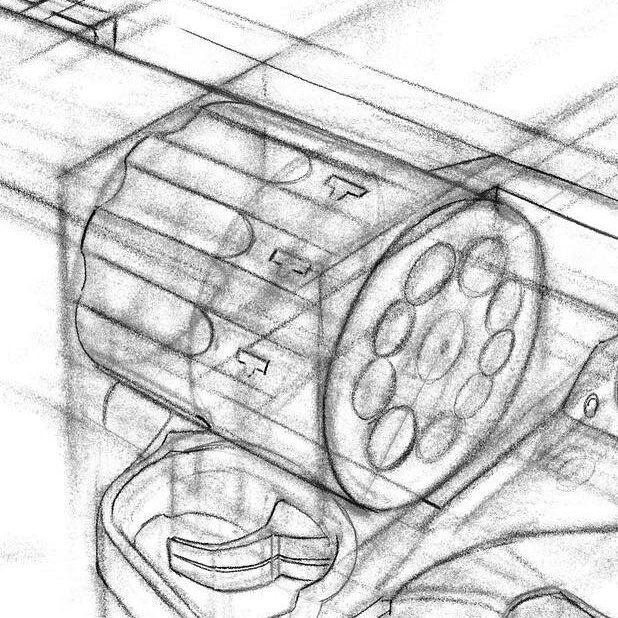
Imagine objects as constructed from squares. For example, in the "blocky character" demonstration, the width equals one square, while the height is roughly two squares plus a bit more. Stacking these "blocks" helps establish proportions (1:2.3 in this case).
This method allows you to easily calculate the object's dimensions and predict how it will look when viewed from different angles.
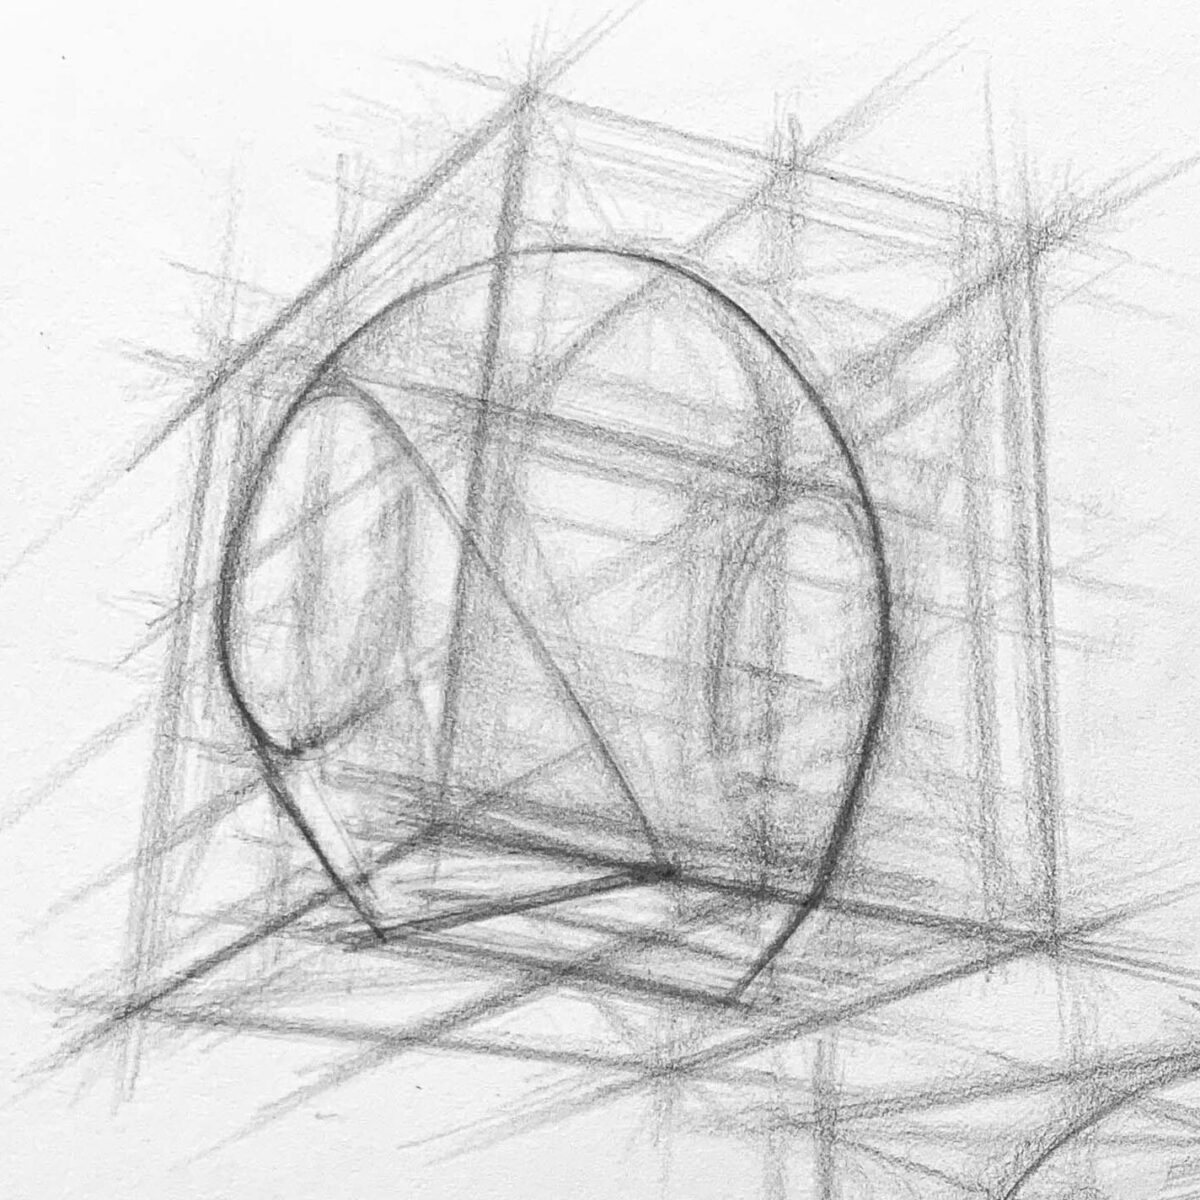
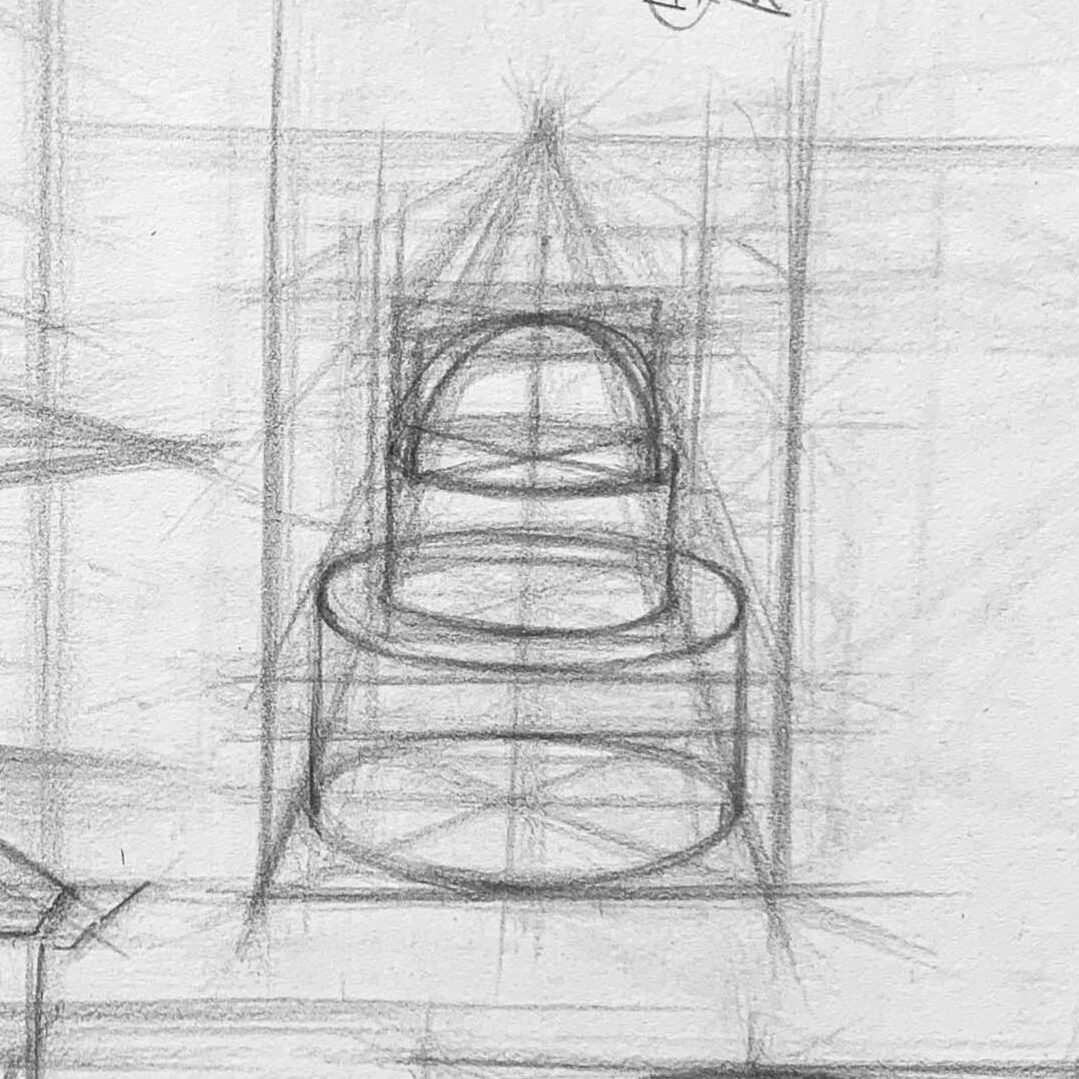
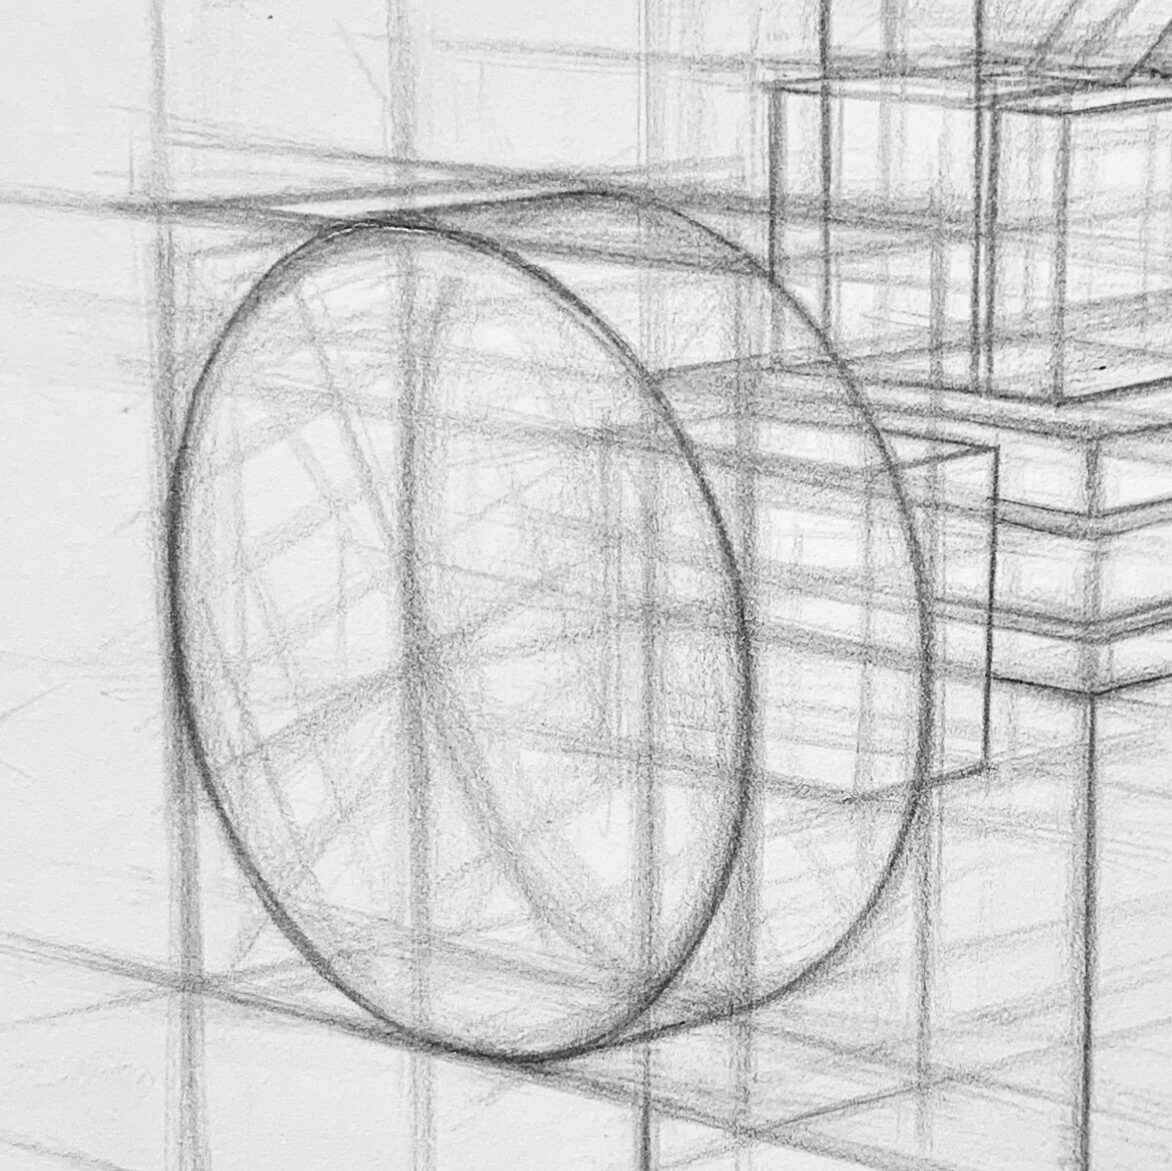
● Circular perspective:
How circles change in perspective: In perspective, circles appear as ellipses. The further the circle is from the viewer's eye level, the more it flattens into an ellipse.
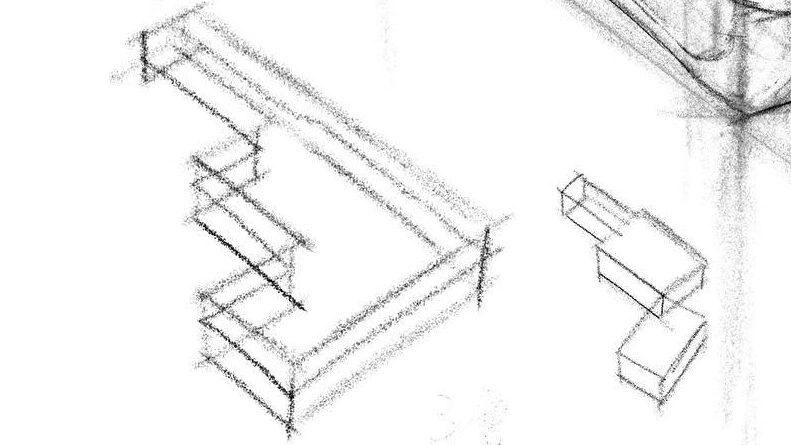
● Perspective Doubling Method
Build Rhythm in Perspective Using Square Doubling
Why Learn the "Doubling Method"?
When drawing in perspective, you may ask:
“How deep should this object or scene go?”
“How do I know where to place the next layer?”
That’s where the Square Doubling Method comes in.
It’s a relatively precise technique that helps you:
- Advance equal distances without guessing
- Create a consistent rhythm and scale across your drawing
- Build a reliable base for exploded views, stairs, corridors, rooftops, architectural modules, and more
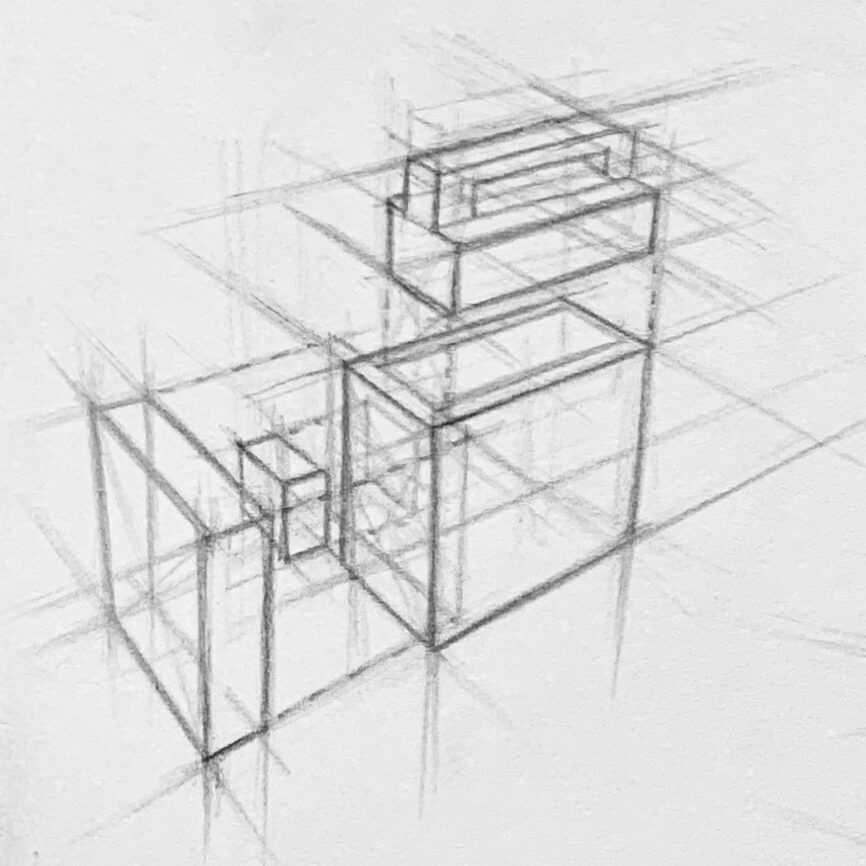
Flat Square Doubling Method:
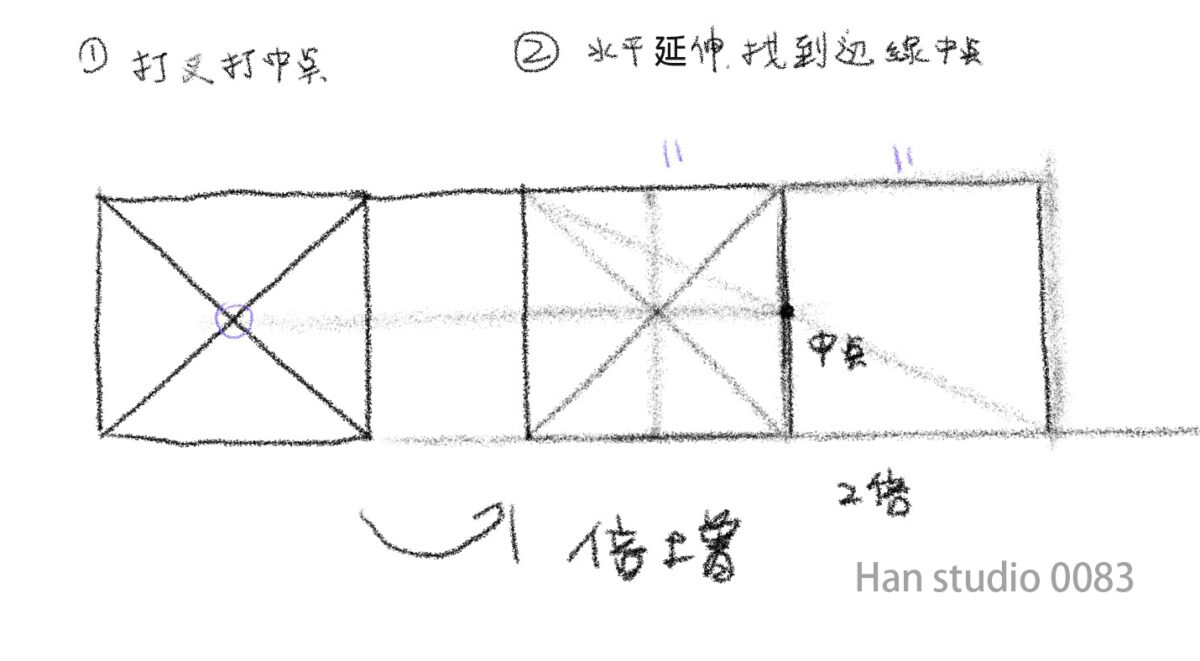
🔹Step 1:
Draw a square and add two diagonals to find the center point. This point will guide your next divisions.
🔹Step 2:
Extend the square’s edges until they intersect with the diagonals.
Each intersection lets you divide the space into equal segments, helping you build a precise layout.
Perspective Square Doubling (Using Two-Point Perspective)
- Start with one square in correct perspective + draw the diagonals.The intersection gives you the center, your key measurement point
- Extend vertically or horizontally to reach the next edge
- Draw diagonals again and repeat the process → You’ll generate a sequence of equal spaces: 2 → 4 → 8…
- Now add vanishing points and perspective lines — This grid can be extended into 3D perspective space for both flat and spatial drawings.
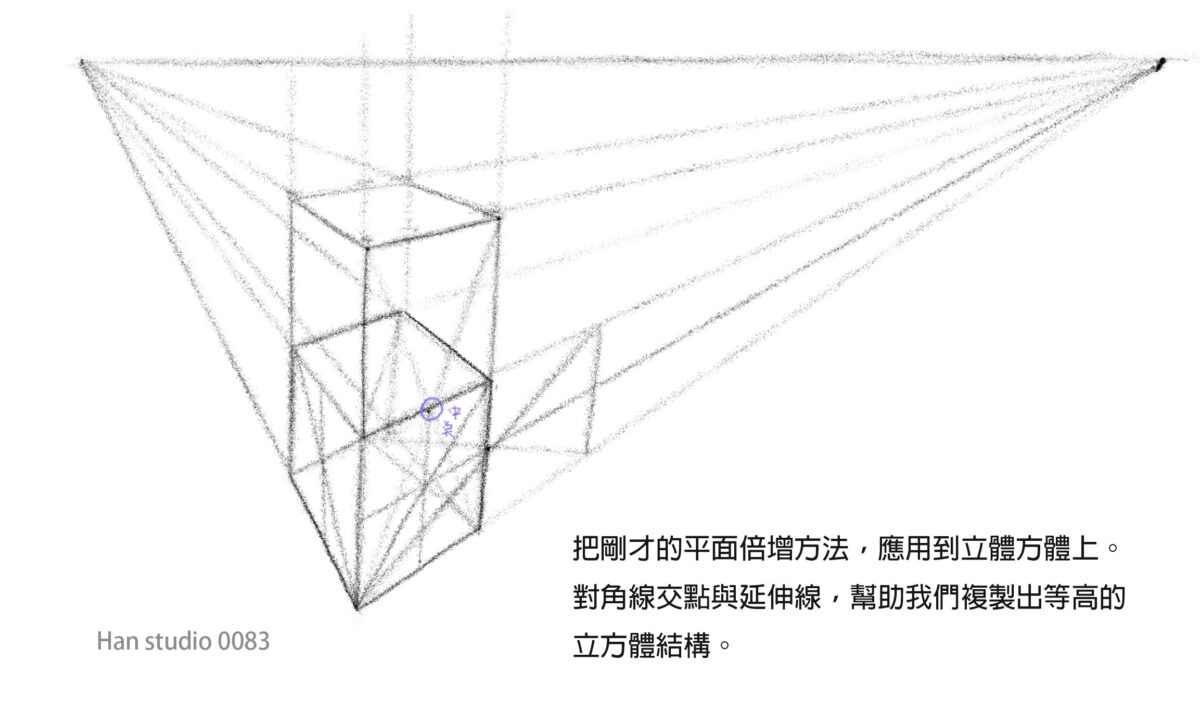
✅ Tip: As long as your first square is accurately drawn in perspective, the rest of the doubling will remain stable.
❌ Common Mistake: Skipping the center line or guessing each segment leads to distorted grids and broken proportions.
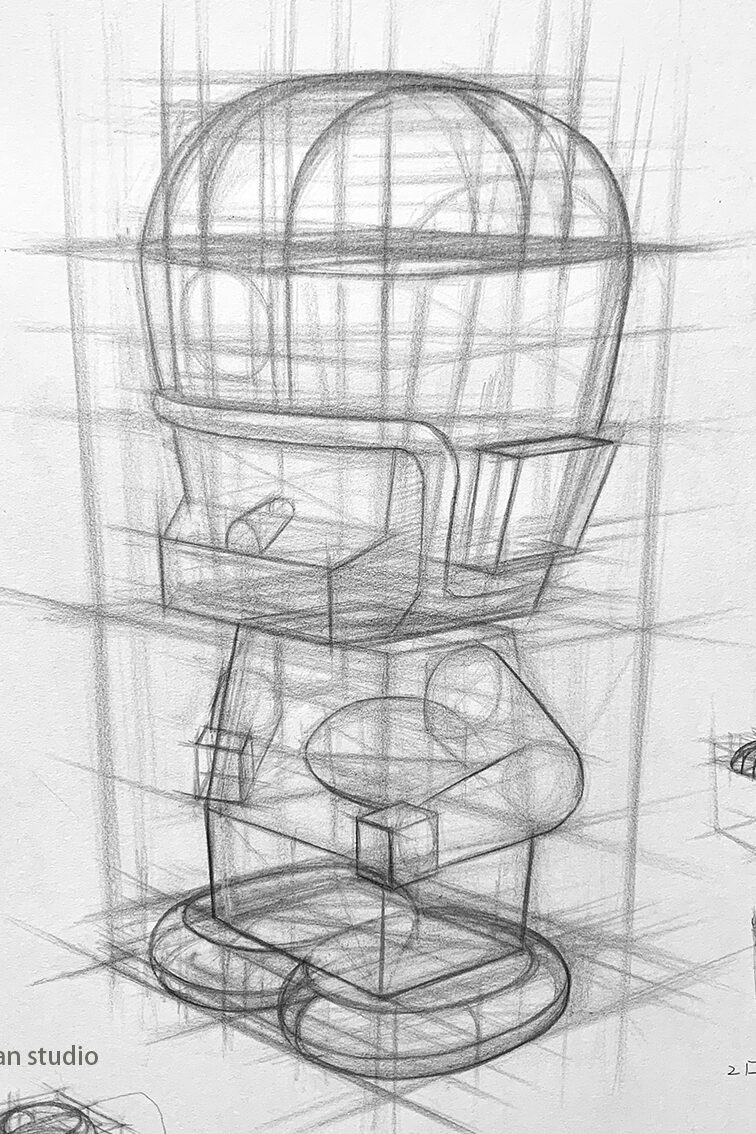
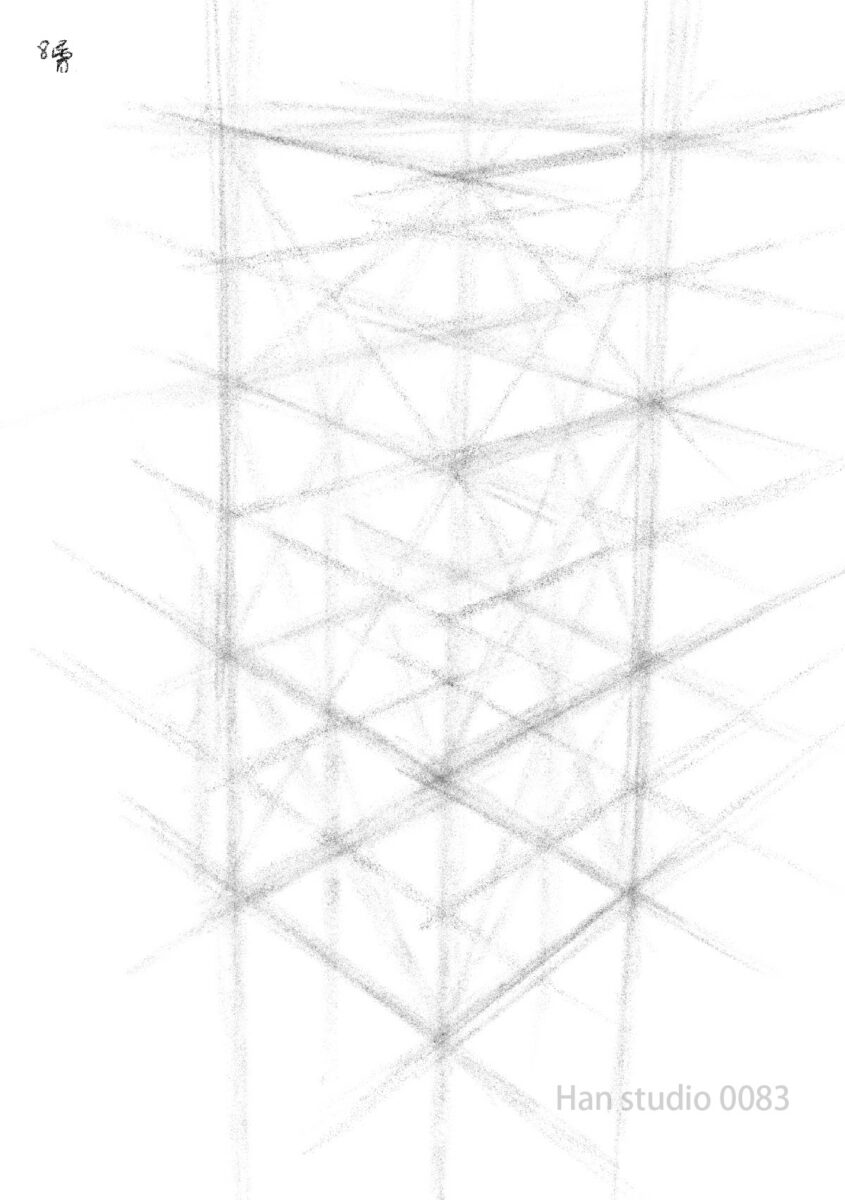
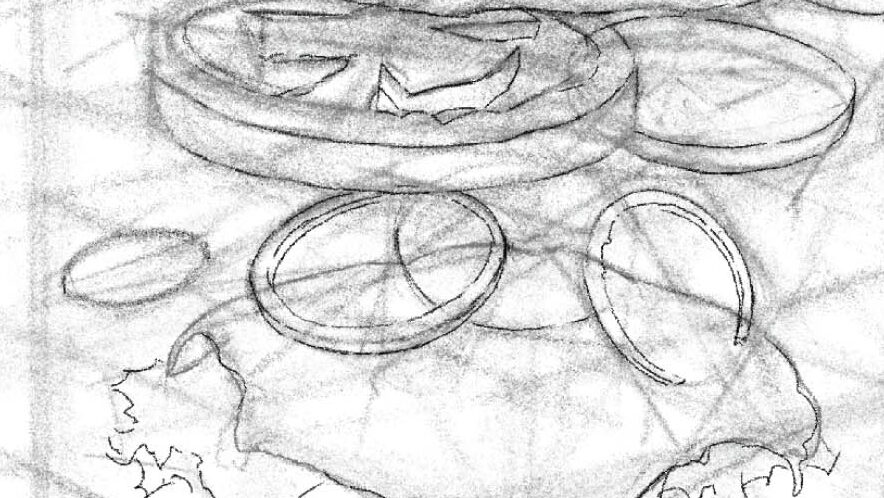
Practical Application: Drawing an Exploded Hamburger Using Perspective Squares
Exploded views may look freeform, but they follow spatial logic.
Many beginners think exploded drawings are done intuitively, but without an underlying cube-based perspective structure, elements may become misaligned or unstable.
Let’s take a burger as an example: We align each ingredient layer within 8–10 grid sections, stacking them with even spacing to form a clear exploded perspective.
Exploded Burger Drawing Steps
| Step | Key Idea |
|---|
| 1️⃣Build an 8-unit space cube | Use the doubling method to create evenly spaced layers with consistent perspective. |
| 2️⃣ Insert circular and square-shaped ingredients | Start with simple circles or squares to define the position and thickness of each layer |
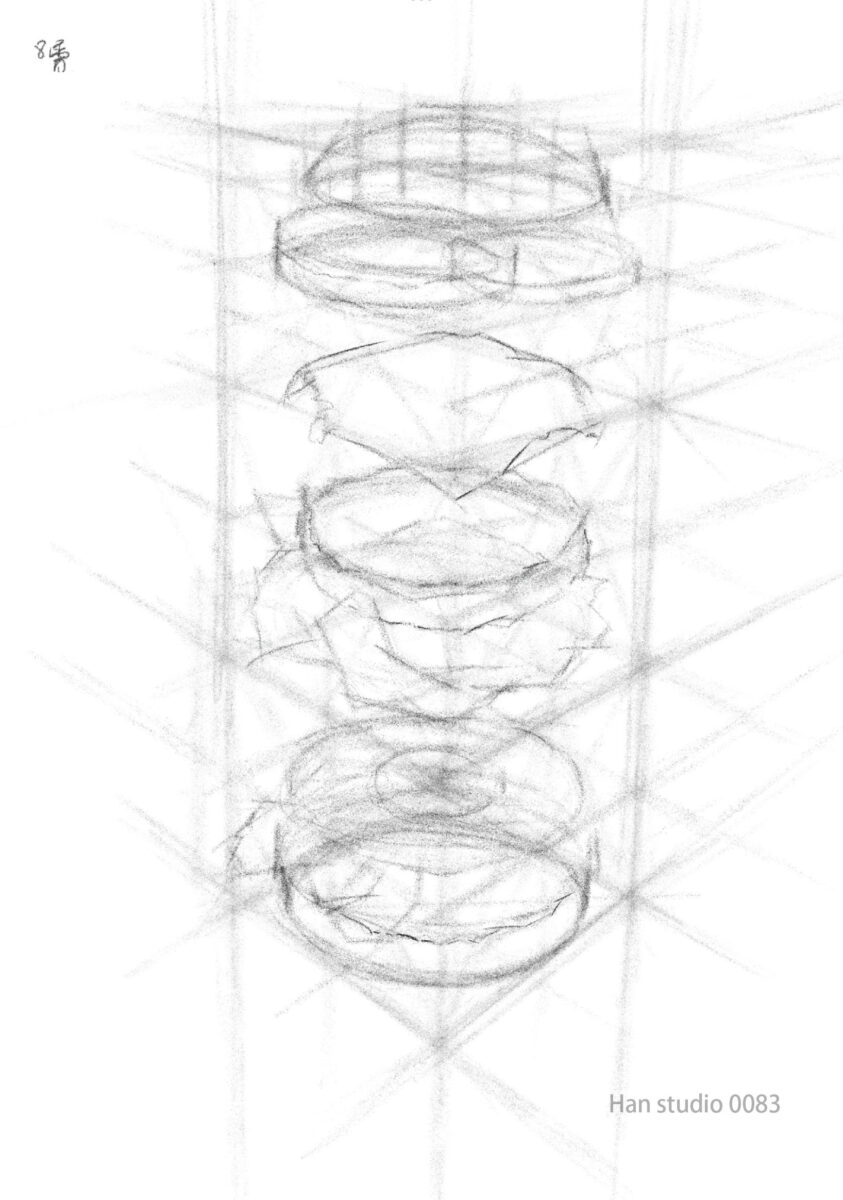
| 3️⃣Add natural deformations (e.g., melted cheese, curled lettuce). | Use the original perspective grid as a guide, while allowing slight organic shape changes |
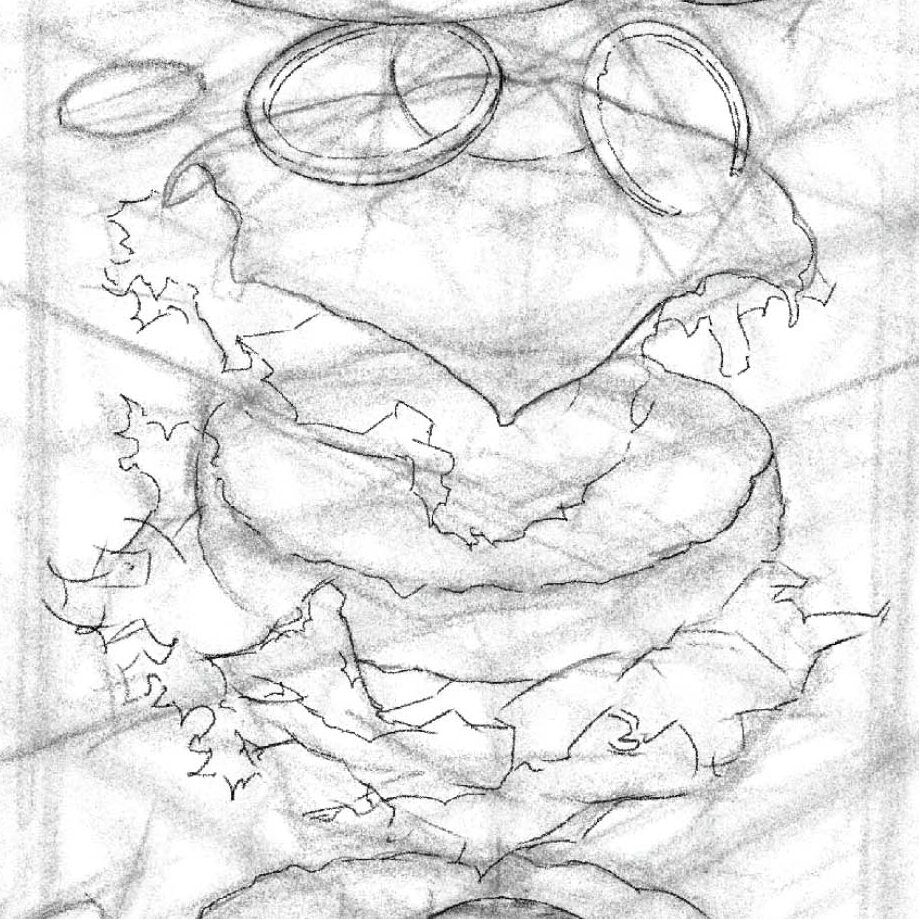
| 4️⃣Design floating components | Onion rings or tomato slices can be offset horizontally from their original layer to create visual variation |

| 5️⃣Finalize with linework and structural simplification | You can keep parts of the grid lines to enhance the perspective structure and add richness to the image |
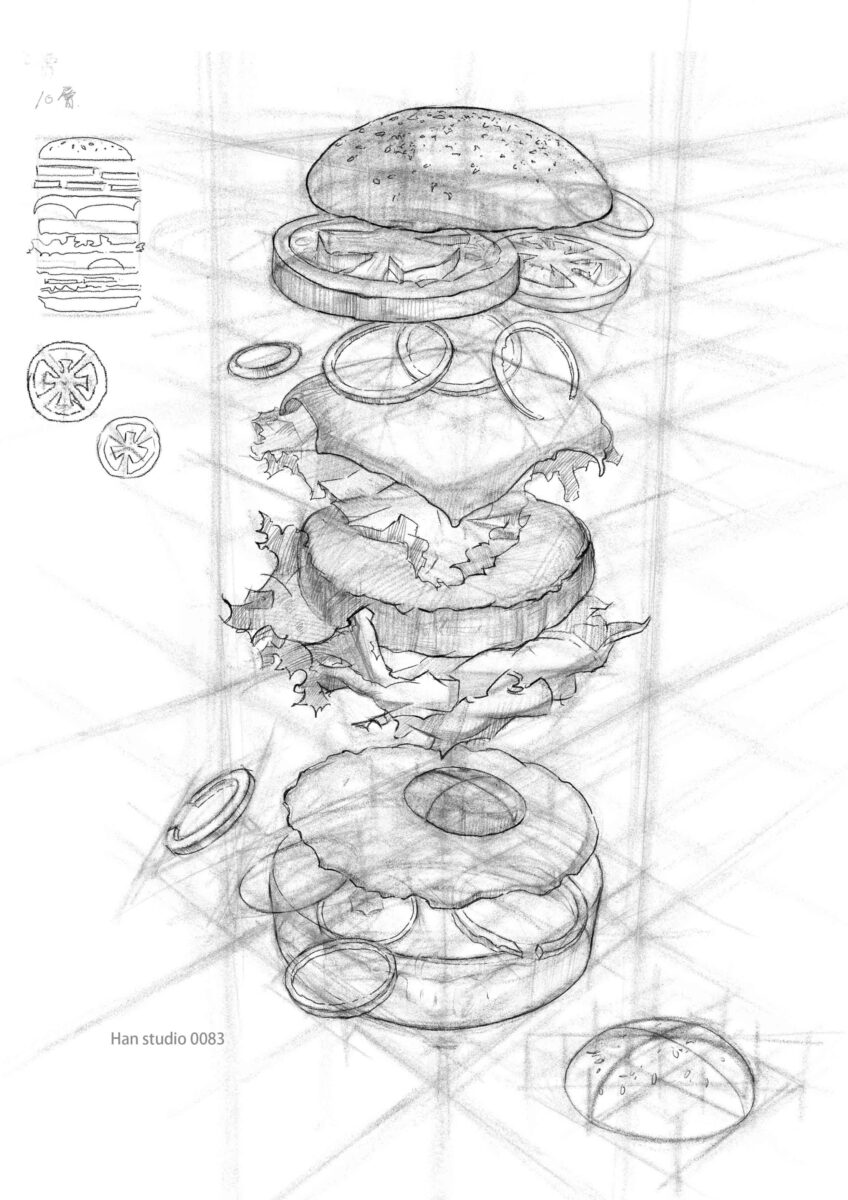
Exploded Burger Timelapse Video
These perspective tips are a great starting point. Why not try them out yourself? Practice applying these principles to capture the shapes and structures you see in daily life.
If you're interested in learning to draw but don't know where to start, or if you'd like to understand the knowledge behind drawing,
feel free to join my LINE and contact me. In my classes, I organize drawing methods in a clear and structured way.
Click here to learn more about my drawing courses!
Want to explore more articles on extended drawing techniques?
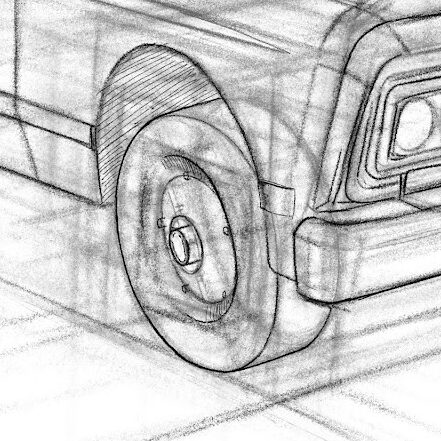
How to Draw a Car for Beginners: Using Simple Shapes
Boots Sketch Tutorial: Learn Proportions and Structural Lines
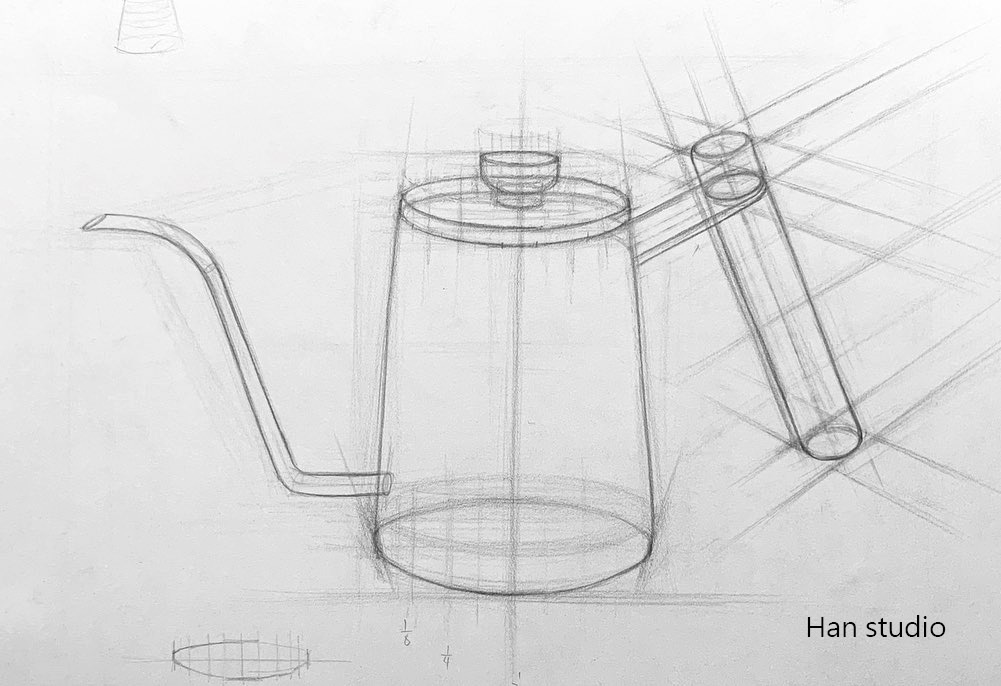
How to Master the Proportions,Shape, and Symmetry of a Teapot
Three Easy Steps to Drawing a Stuffed Duck with a Pencil
Sketching Class Fishing Boat Drawing Techniques


Leave a Reply