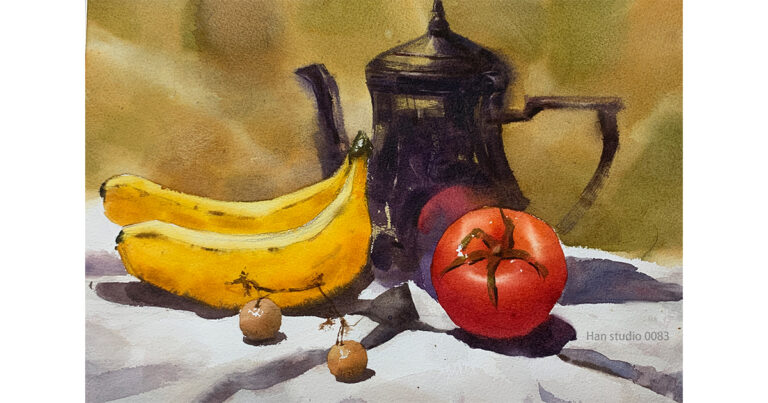
Hand Structure Sketching and Plaster Still Life Class Demonstration
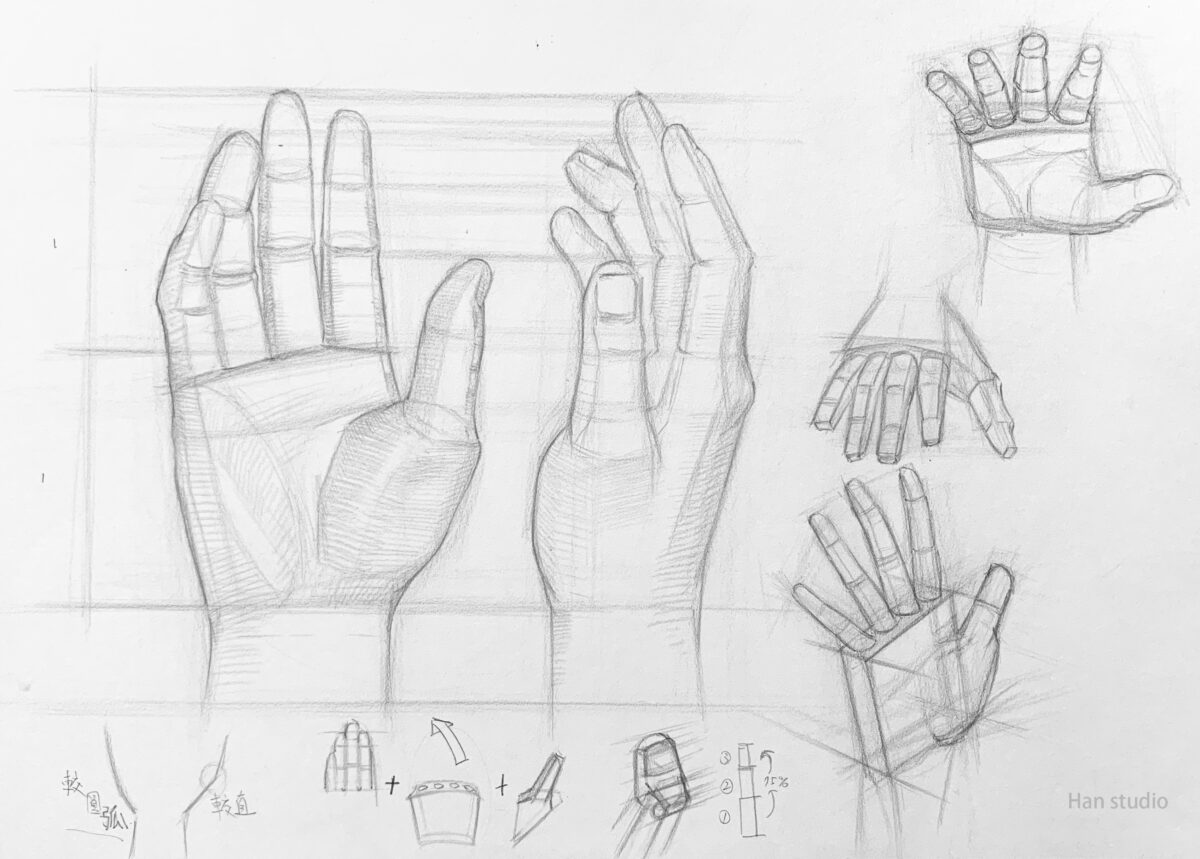
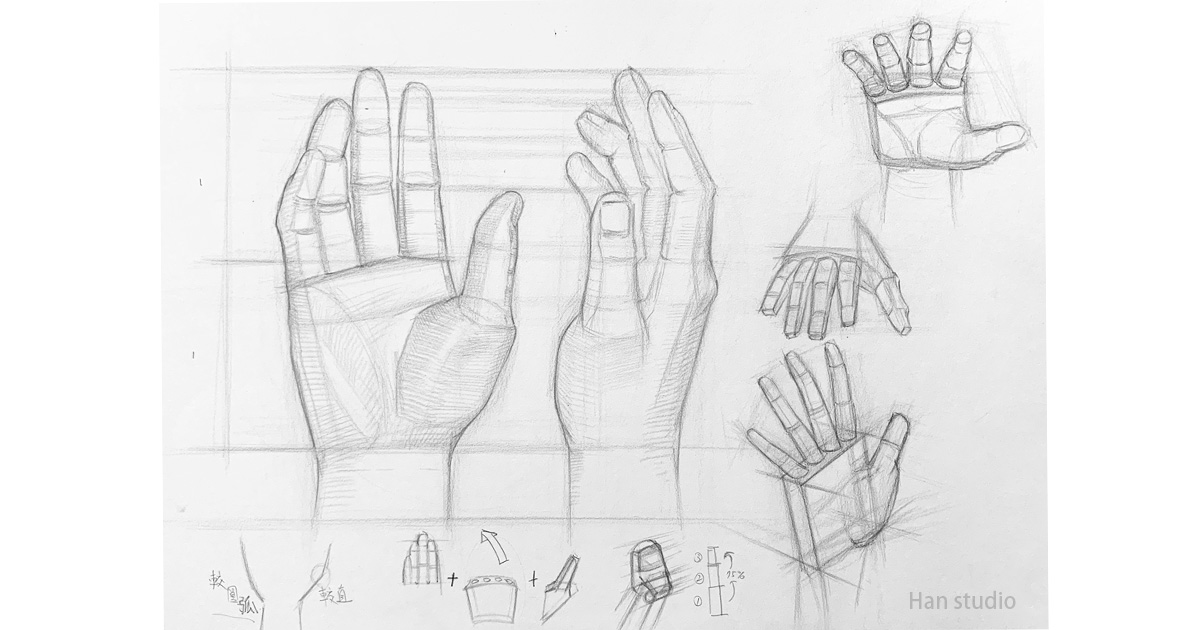
Documenting this week's teaching progress, we have an opportunity to delve into the structure of the palm. If you are interested in learning how to draw hands and understanding hand anatomy, you can refer to the first image.
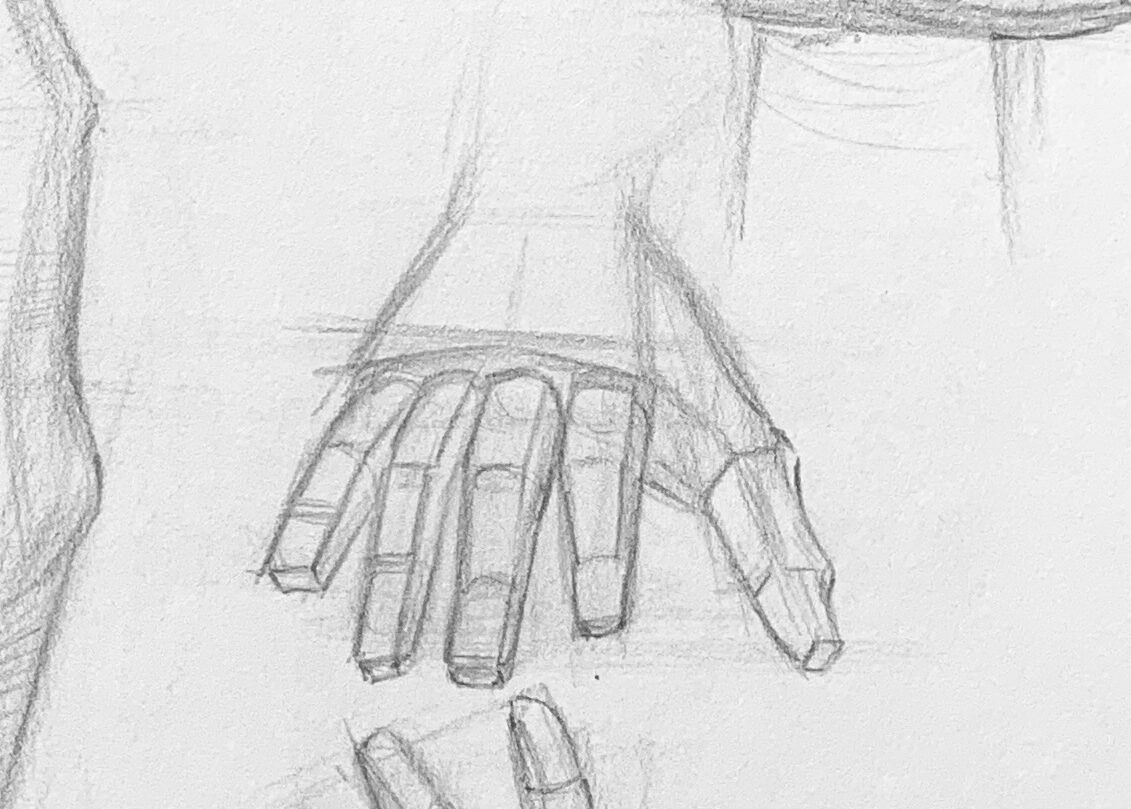
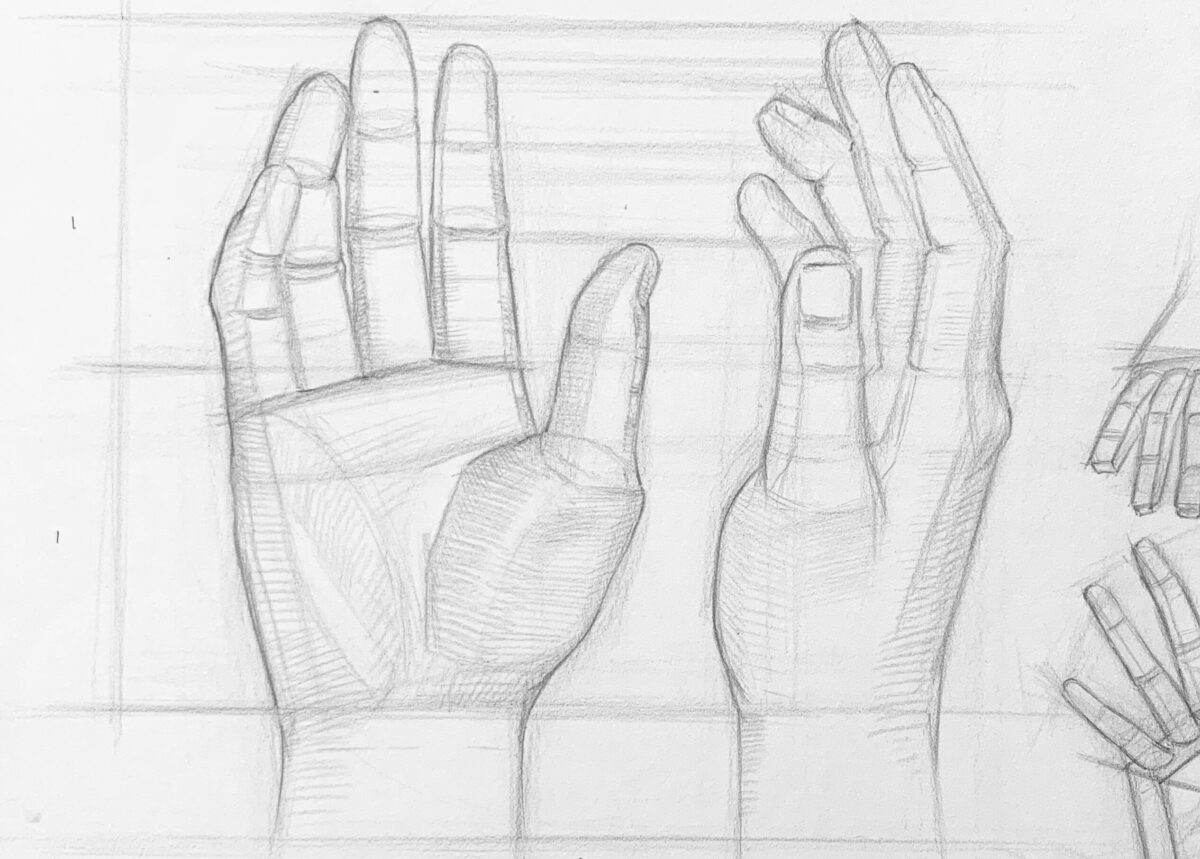
Our explanation will be based on an adult's hand as the basic model.![]()
●Palm Proportions:
- The distance from the wrist to the base of the middle finger is approximately equal to the length of the middle finger (refer to the large image on the left). The width of the palm is about three-quarters of its length.
- The length of each finger varies: the middle finger is the longest, the index and ring fingers are slightly shorter, with the ring finger usually being slightly longer than the index finger, although the reverse can also be true.

●Basic Shape of the Palm:
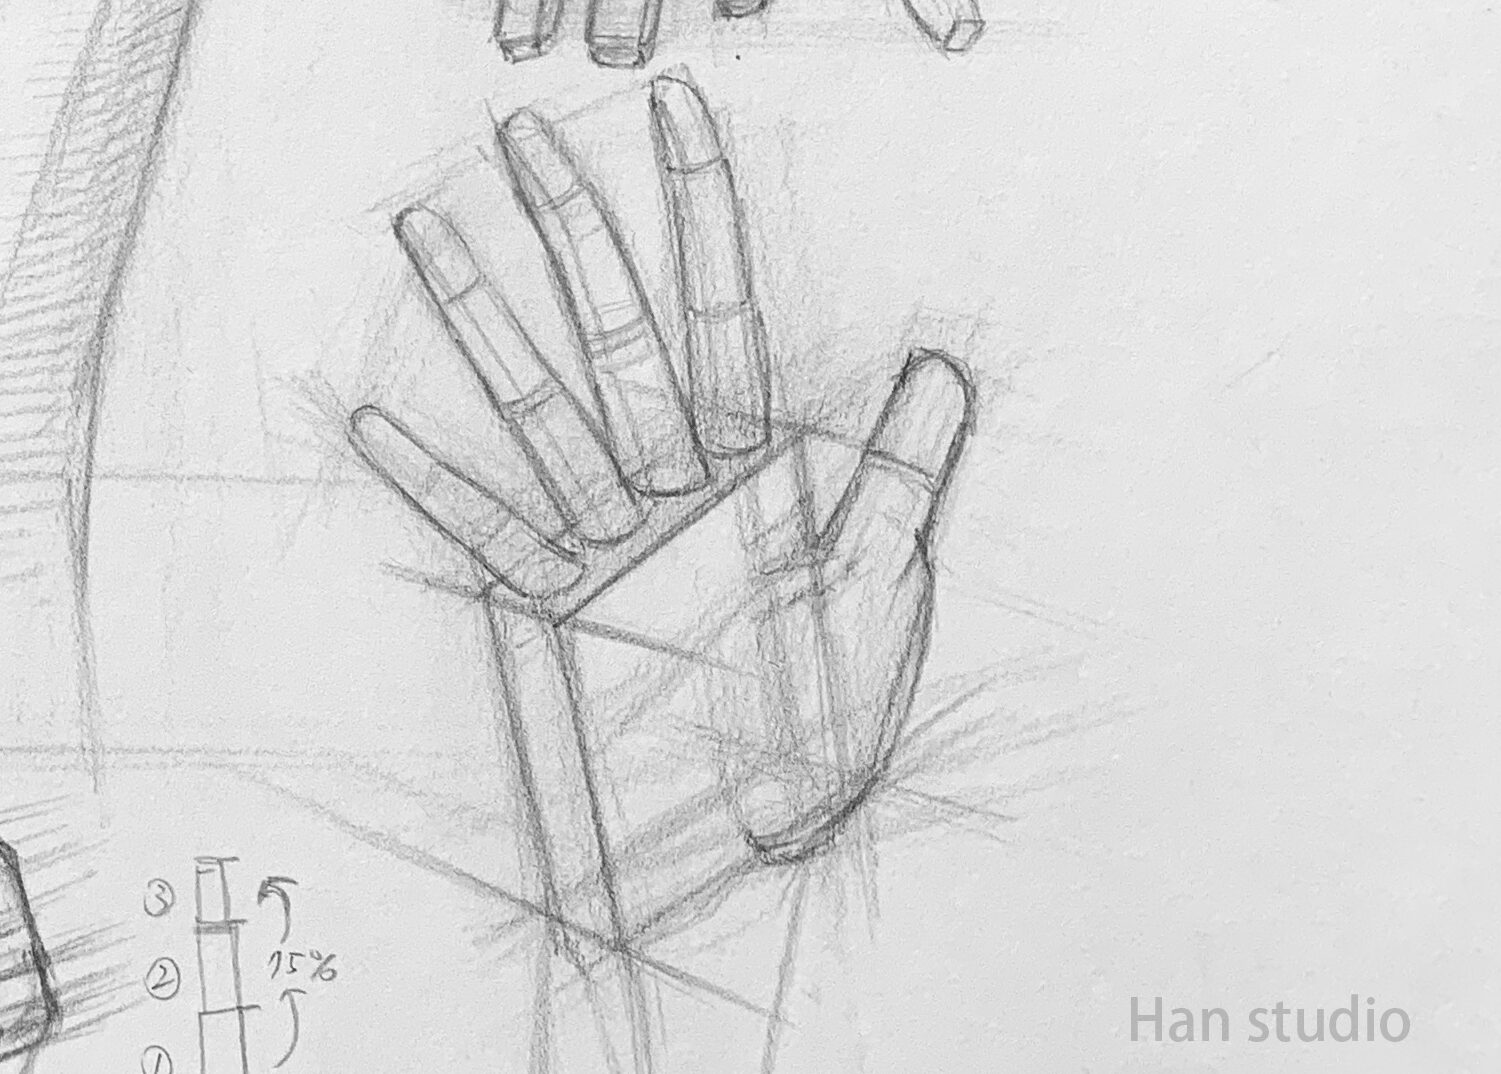
- The palm can be simplified into a trapezoid that is wider at the top and narrower at the bottom, with the fingers extending from the top.
●Finger Joints:
- Each finger has three joints, while the thumb is unique with only two joints. These joints determine the direction and angle of finger bending.
●Contours of the Palm:
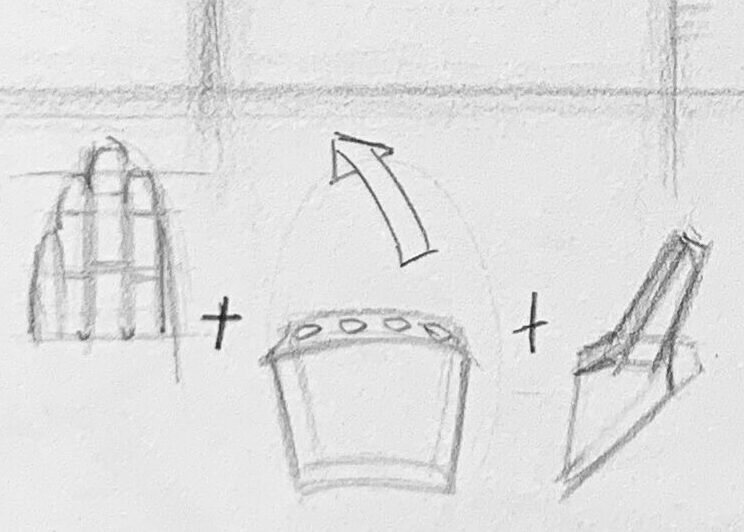
- Refer to the right side of the first image, which uses geometric shapes like building blocks to help understand the angles and curves of the fingers.
●How to Draw Hands:
1. Observation and Shape Drawing:
- First, observe the similar shapes and length-to-width ratios of the palm. Simplify the components by referencing the bottom of the image, breaking the hand down into three parts for better understanding. Sketch the basic positions and lengths of the fingers, paying attention to the spacing and relationship between the finger lengths.
2. Adding Shadows and Structural Lines:
- Add joints and structural lines to the palm and fingers. Observe the areas where shadows are created due to the bends in the shapes. Refer to the front and side views in the large images on the left.
3. Detail Drawing:
- Draw the details of the fingers and palm, noting that some lines may be blocked, creating overlapping lines.
Want to learn how to draw human body parts and understand the key points? Check out the following further reading:
Mastering Nose skech Structure and Perspective Techniques
Building Up from Simple Contours to Detailed Eye Portraits
Understanding the Three Key Elements of Head Structure
Mastering the basic proportions and structure of portrait drawing
I hope this structural introduction helps you understand how to draw the palm. If there are any topics or drawing techniques you would like to see, feel free to leave a comment or message me. Happy drawing!