If you want to draw a cute cat, it's recommended to start by understanding the knowledge below. This will help you grasp the structure beneath the surface when drawing shapes. Let’s now dive into some key points on how to draw cats.
1.Cat Head Structure:
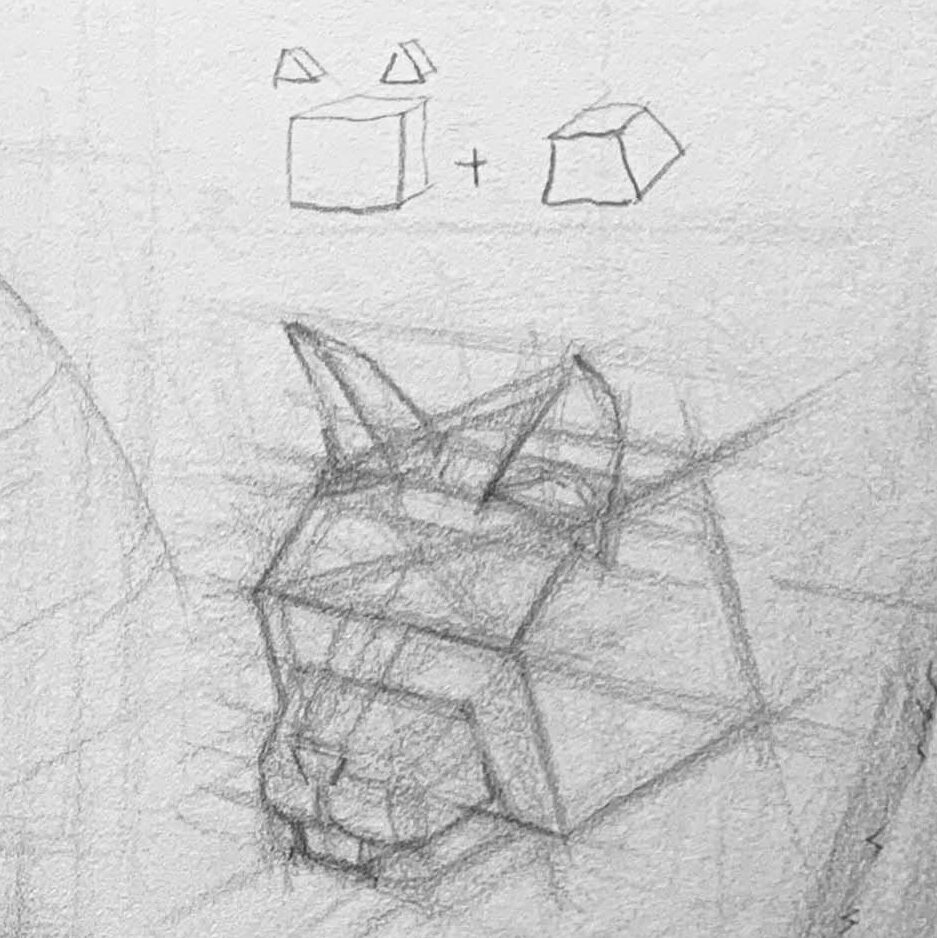
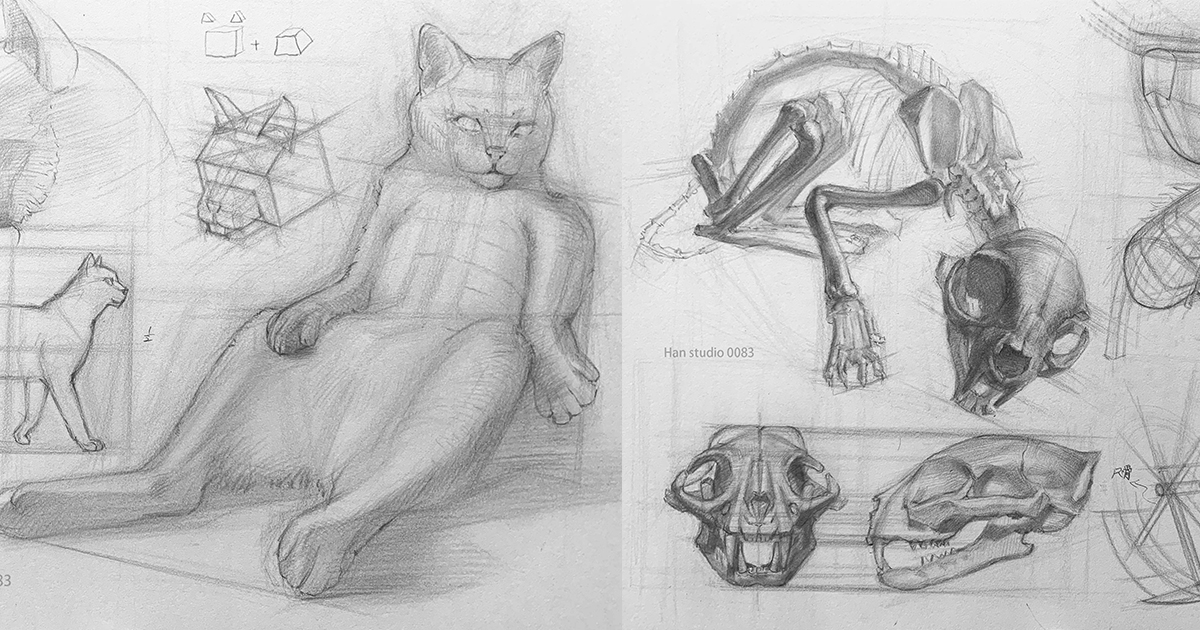
A cat’s head can be simplified using a combination of "cube + trapezoid" shapes or by assembling different-sized circles. Both simplification methods work, and by observing real cats, you’ll notice that their heads are actually composed of various geometric shapes.
Using a 3D cube helps us understand how to construct complex forms from simple geometric shapes and how light and shadow interact with the structure to create depth.
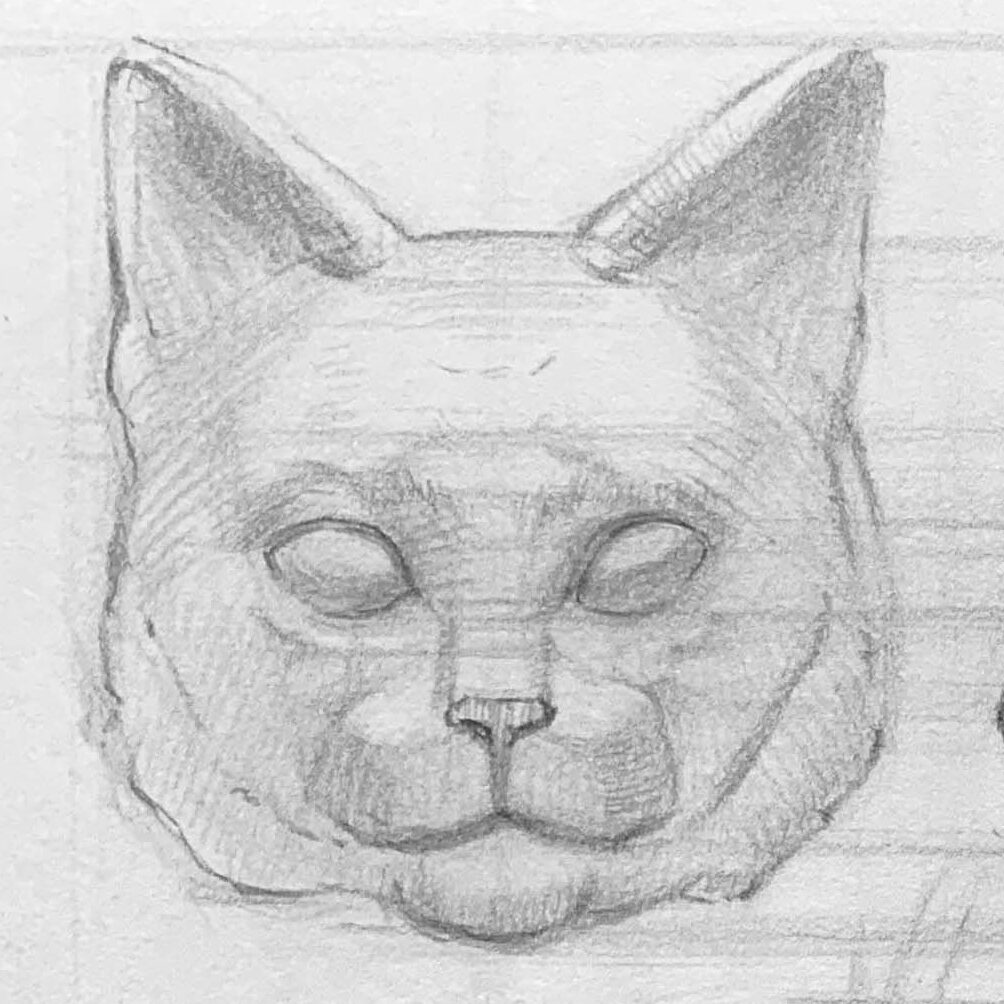
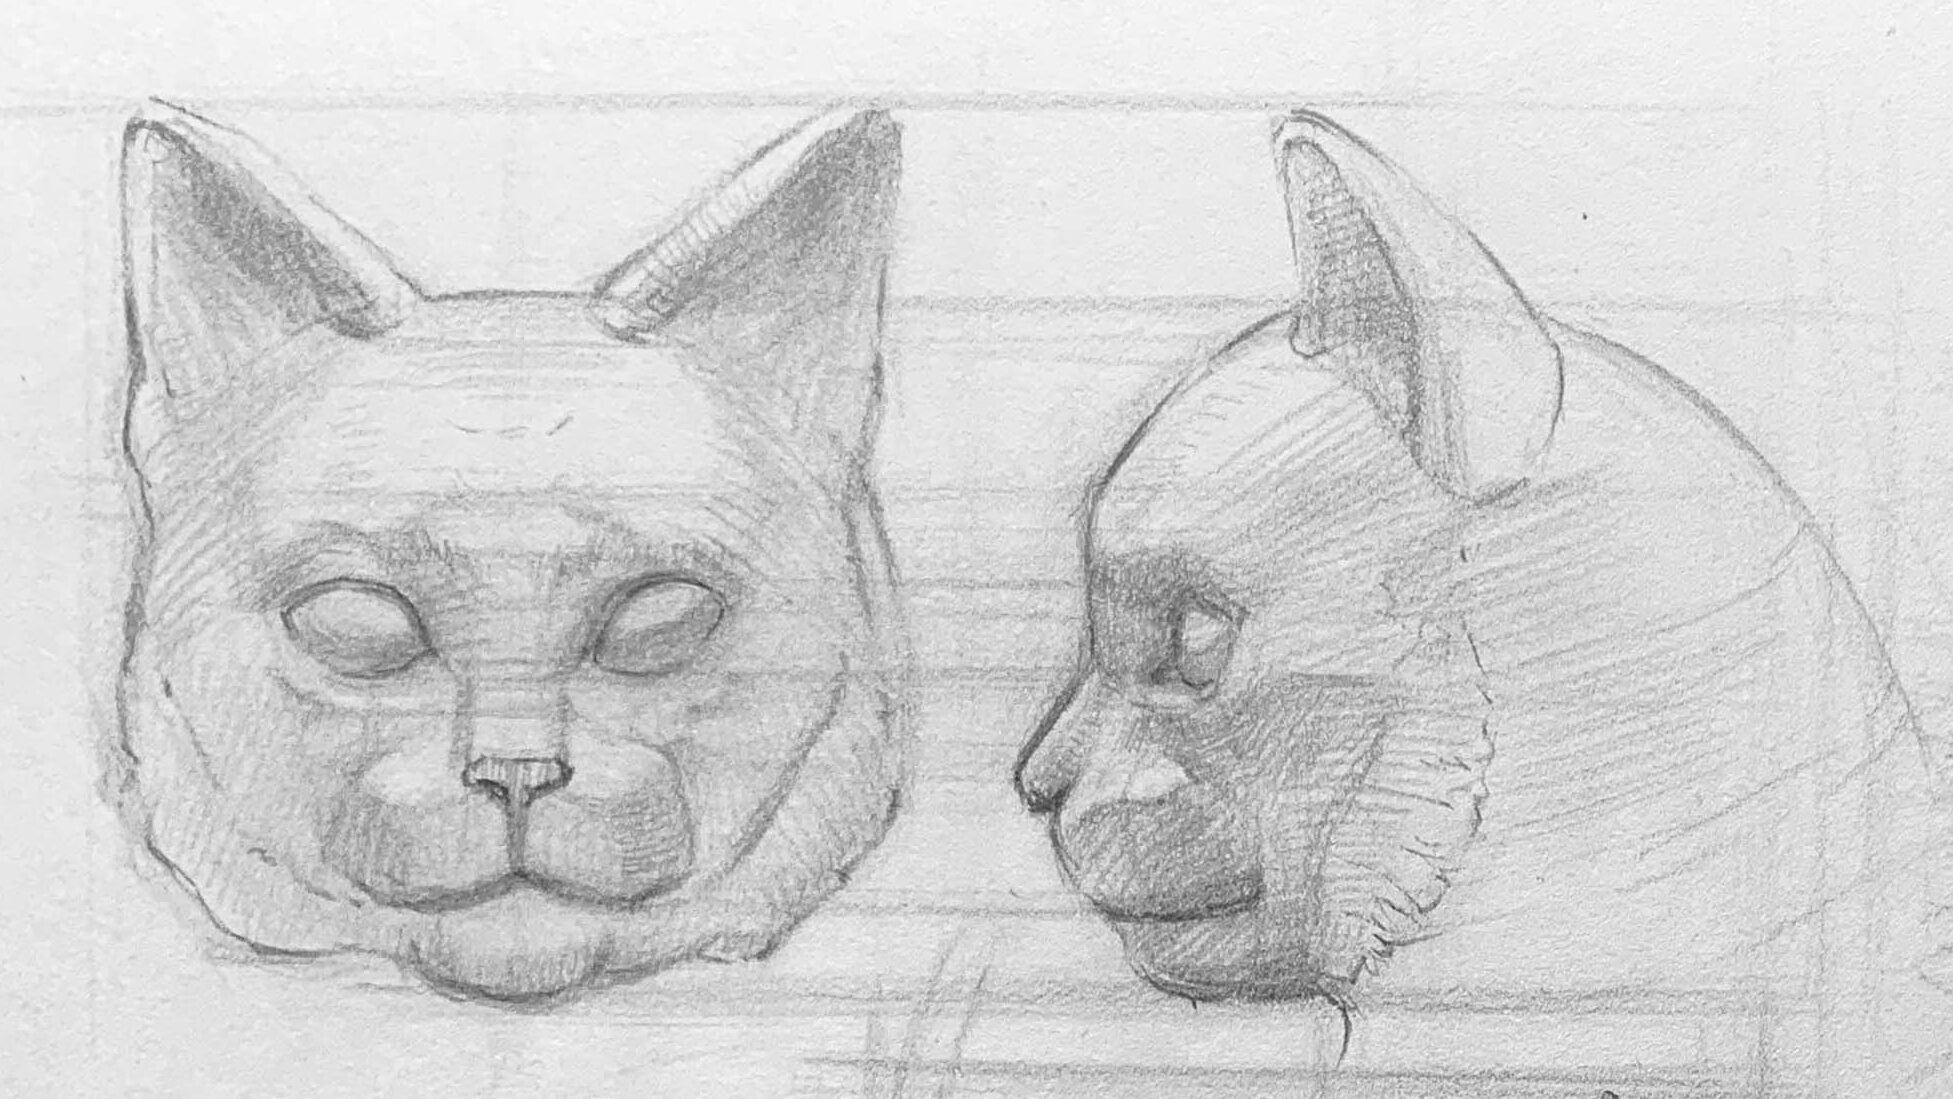
Front View of Cat's Face:
- The face is roughly circular, with a triangular shape formed by the connection between the ears and chin.
- The eyes are positioned slightly below the halfway mark of the head (including the ears).
- The ears are triangular, positioned slightly higher up, and tilt outward slightly.
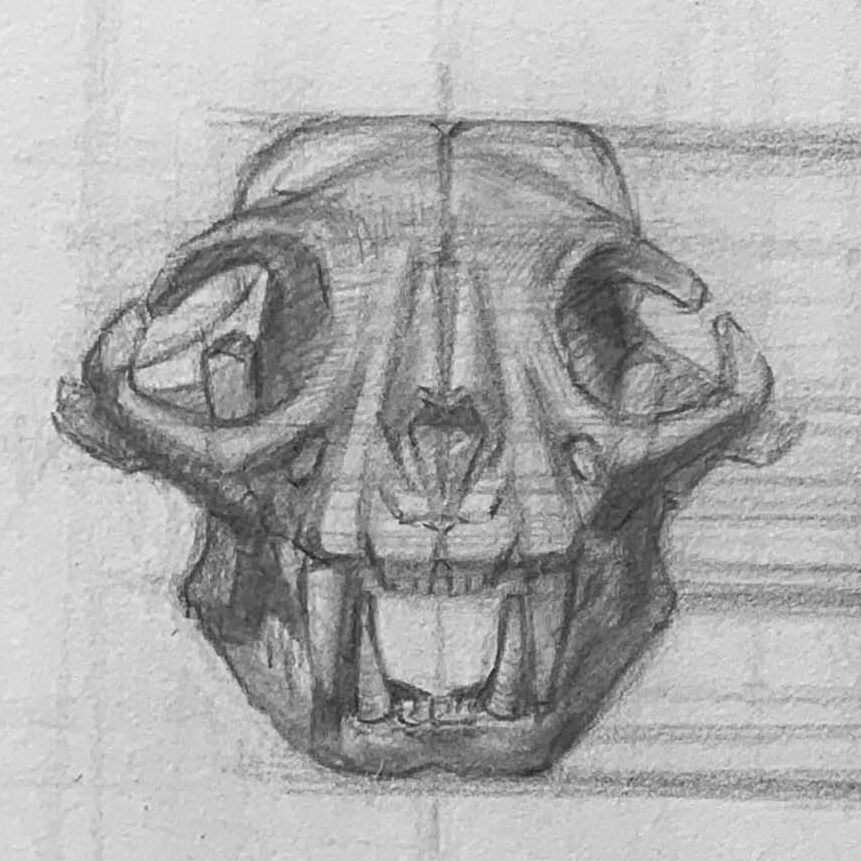
Skull Structure and Facial Features
- Felines have large, forward-facing eye sockets, which are advantageous for depth perception and hunting.
- The canines are sharp and prominent, and the overall mouth shape is an inverted trapezoid.
- A cat's skull is slightly flattened and cone-shaped, with a short snout and rounded forehead.
- The prominent canines and large eye sockets reflect the predatory nature of cats.
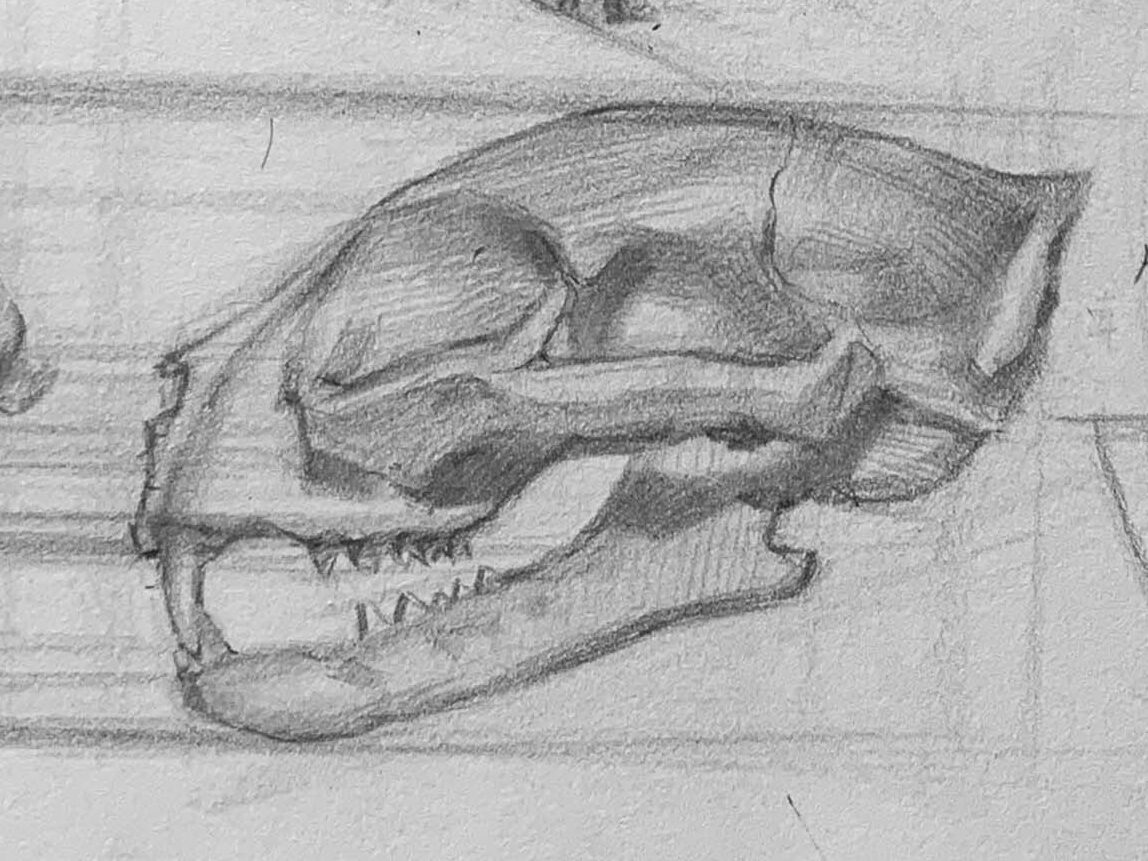
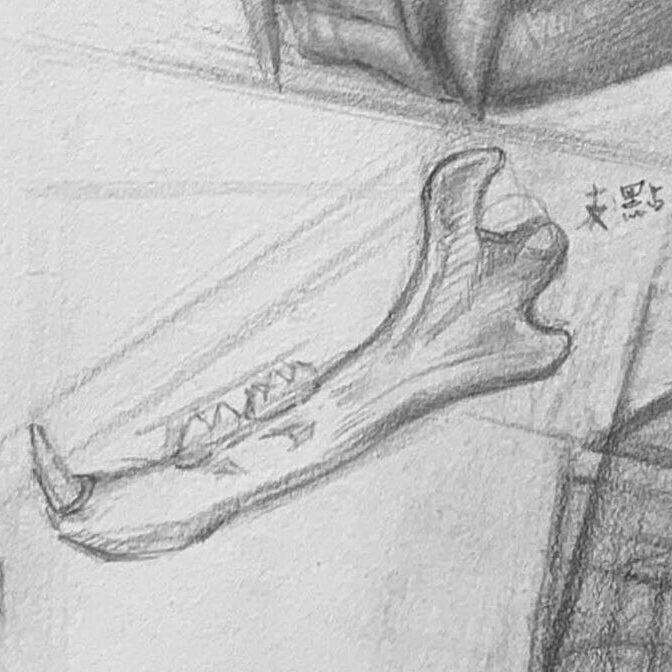
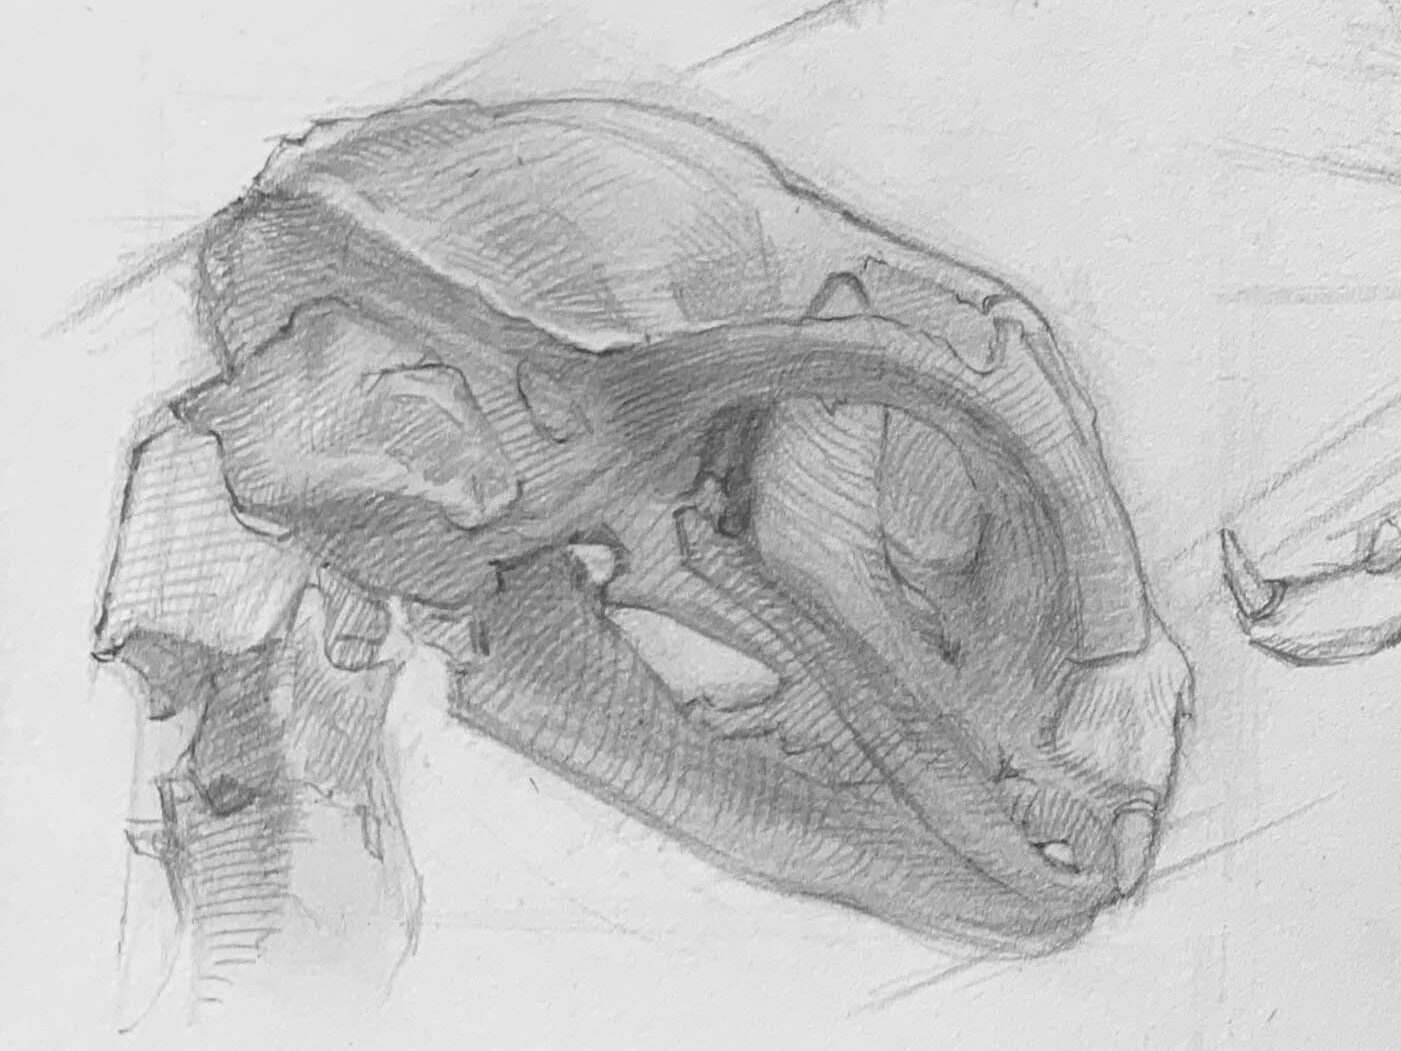
Side View of the Skull
- The cat’s skull appears clearly wedge-shaped from the side, with a shorter nasal area.
- The mandible is notably slender, aiding in biting and meat consumption.
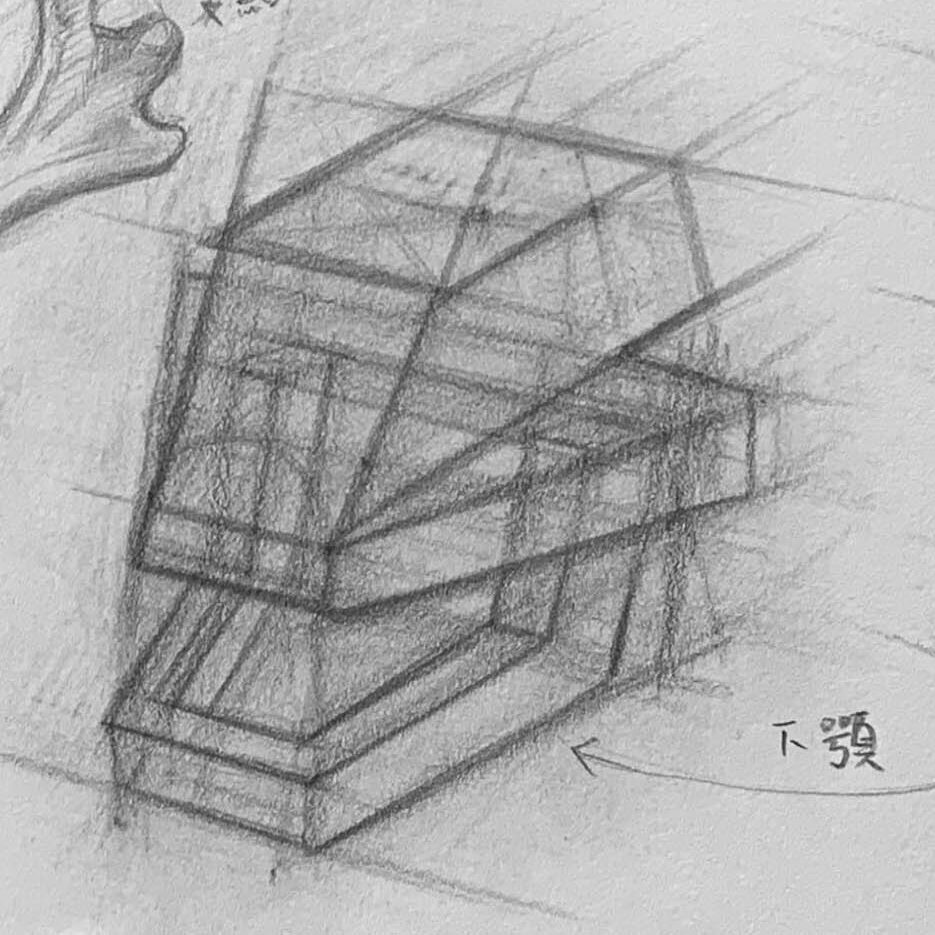
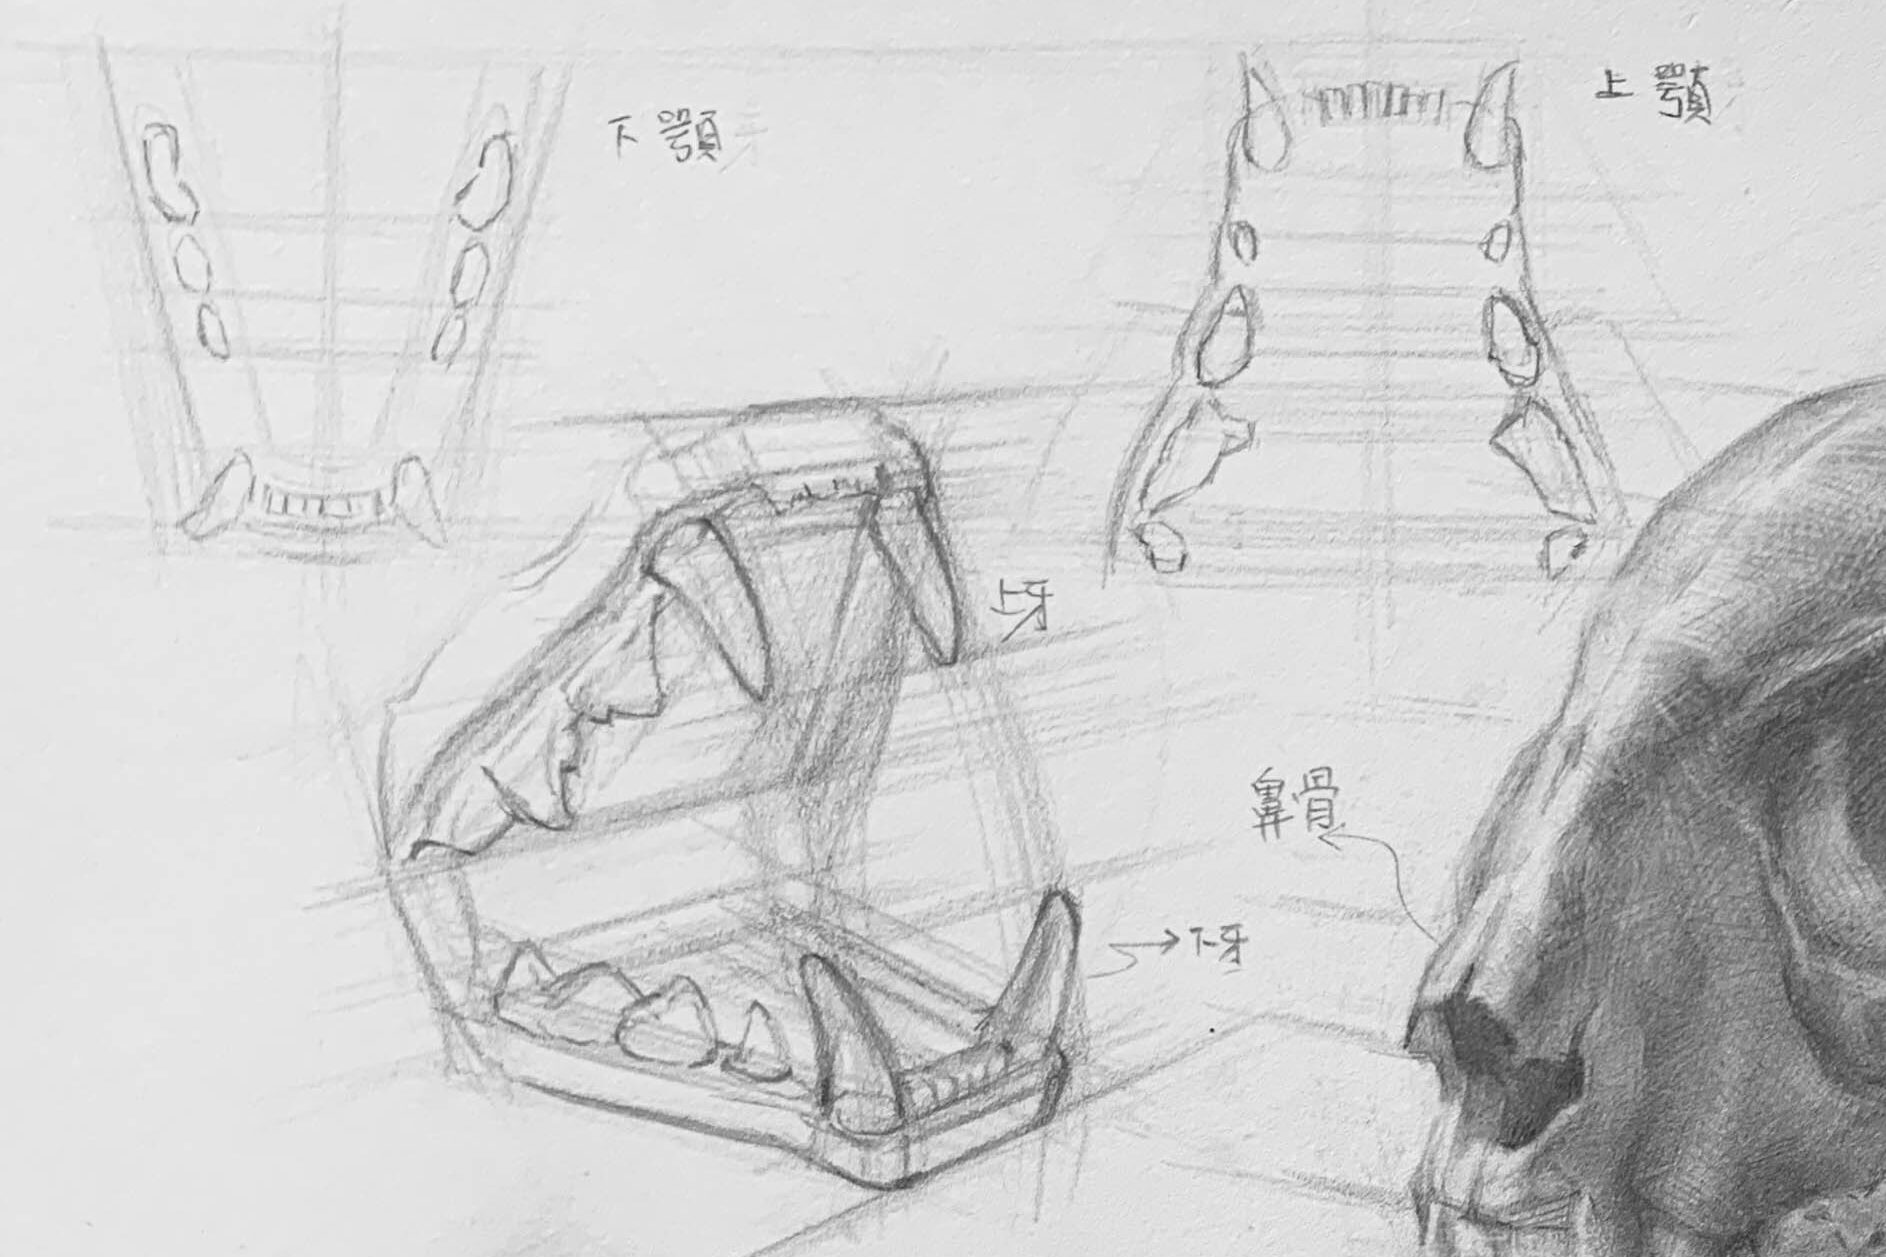
3D Block Structure Drawing Method:
- Simplifying the cat's skull into a rectangular block helps you quickly grasp the viewing angle and perspective.
- Divided into two structural levels (upper jaw, lower jaw), the smaller shapes are simplified, resembling Lego bricks.
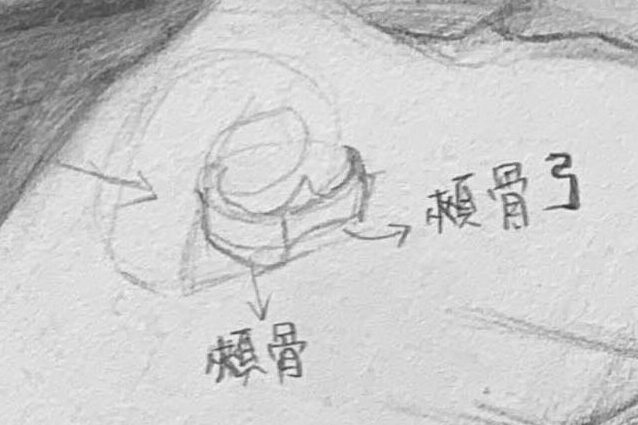
Nasal Bone, Zygomatic Bone, and Eye Socket Features
- Cats have deep, forward-facing eye sockets, which are essential for their sharp vision.
- The nasal and zygomatic bones are prominent and three-dimensional, supporting the overall facial contour.
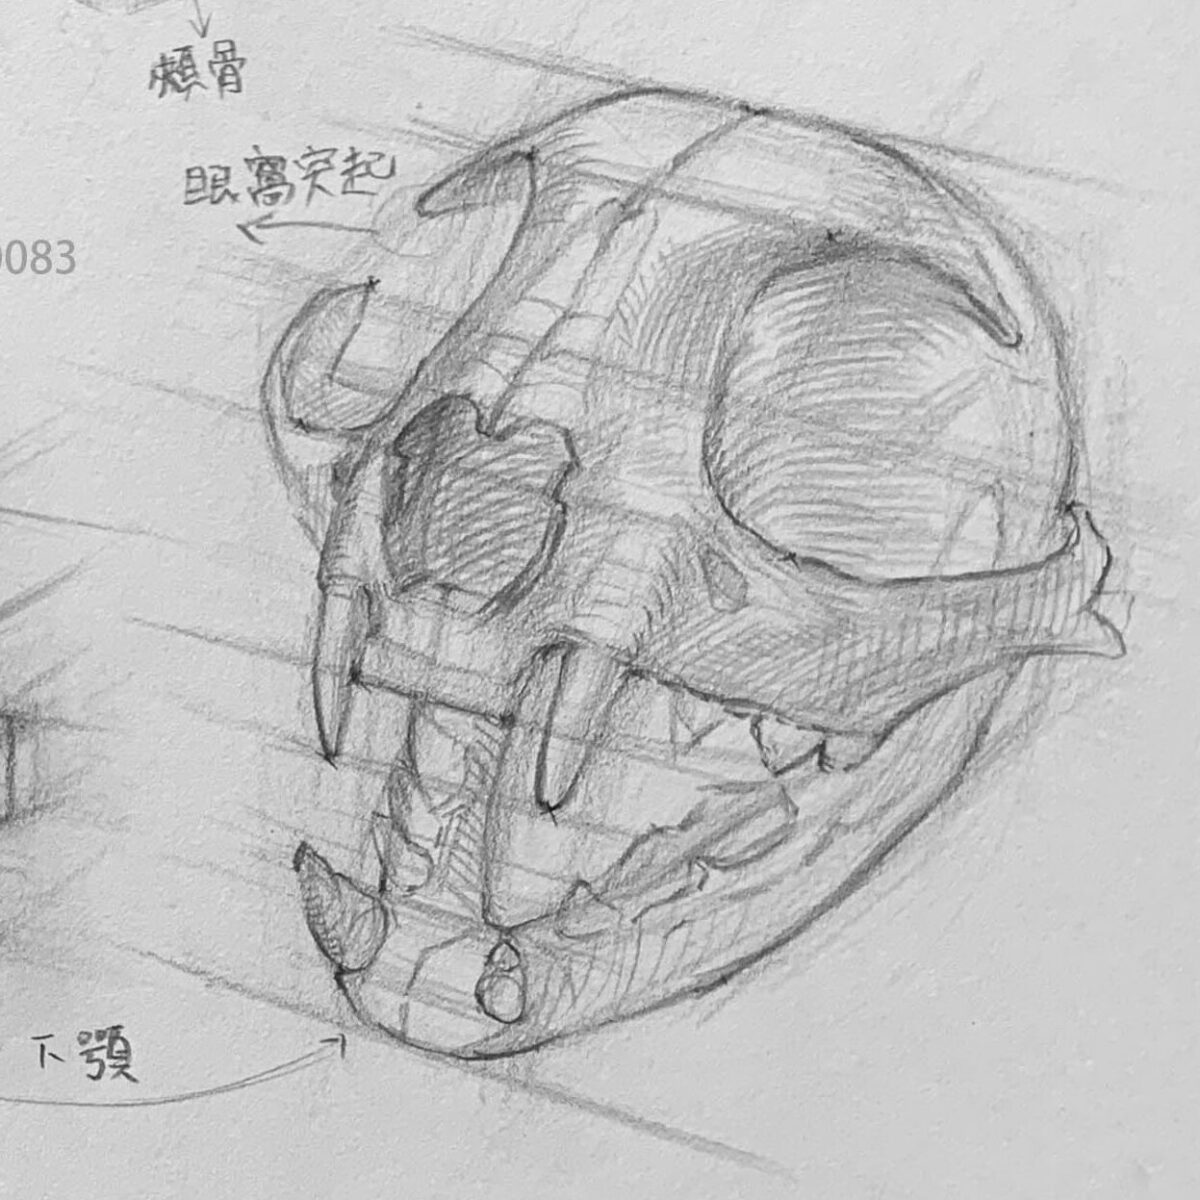
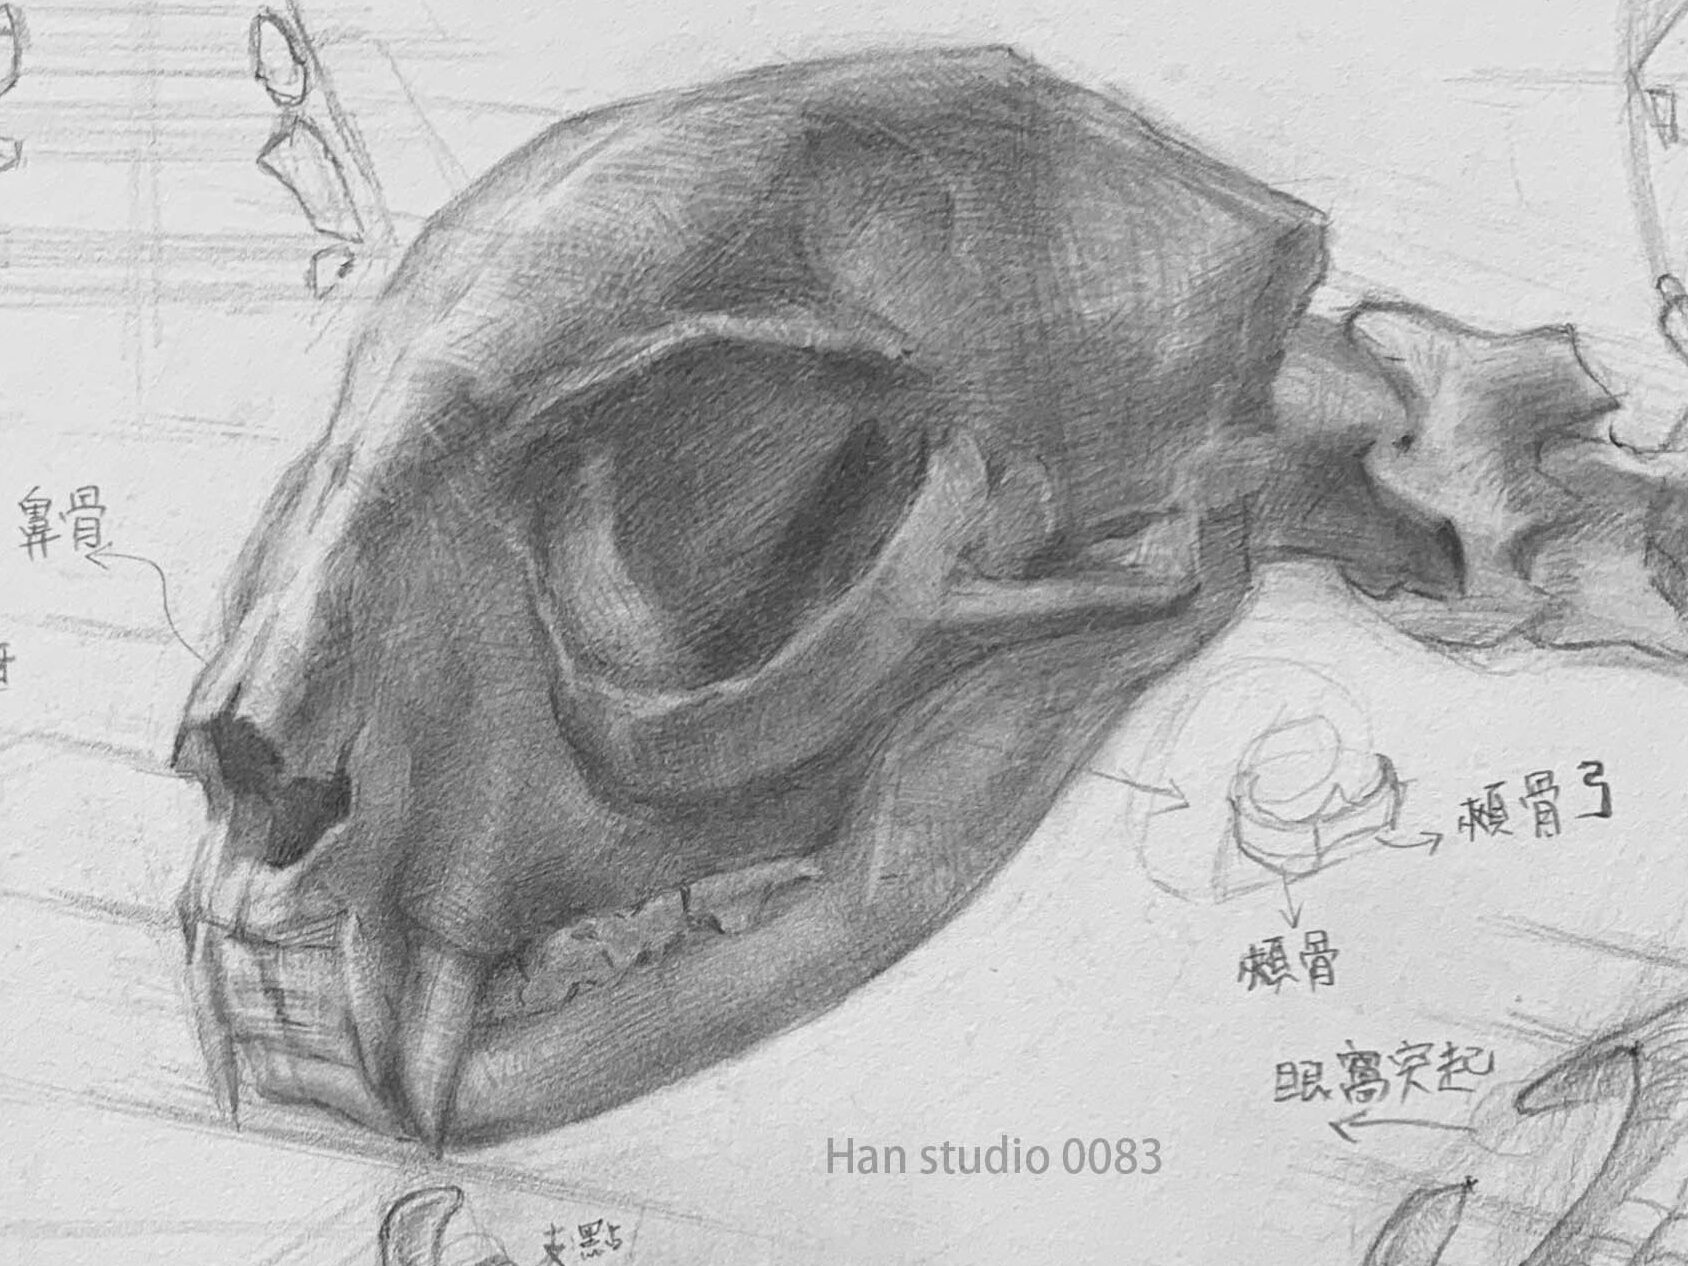
Reminder for Common Mistake When Drawing Cat Eyes:
When drawing the structure of a cat’s eye, it's easy to overlook that the eye socket is recessed into the skull. It’s recommended to treat the eye socket as a hollow cavity, marking the shadowed areas—this helps avoid the illusion that the cat’s eyes are stuck flat onto the face.
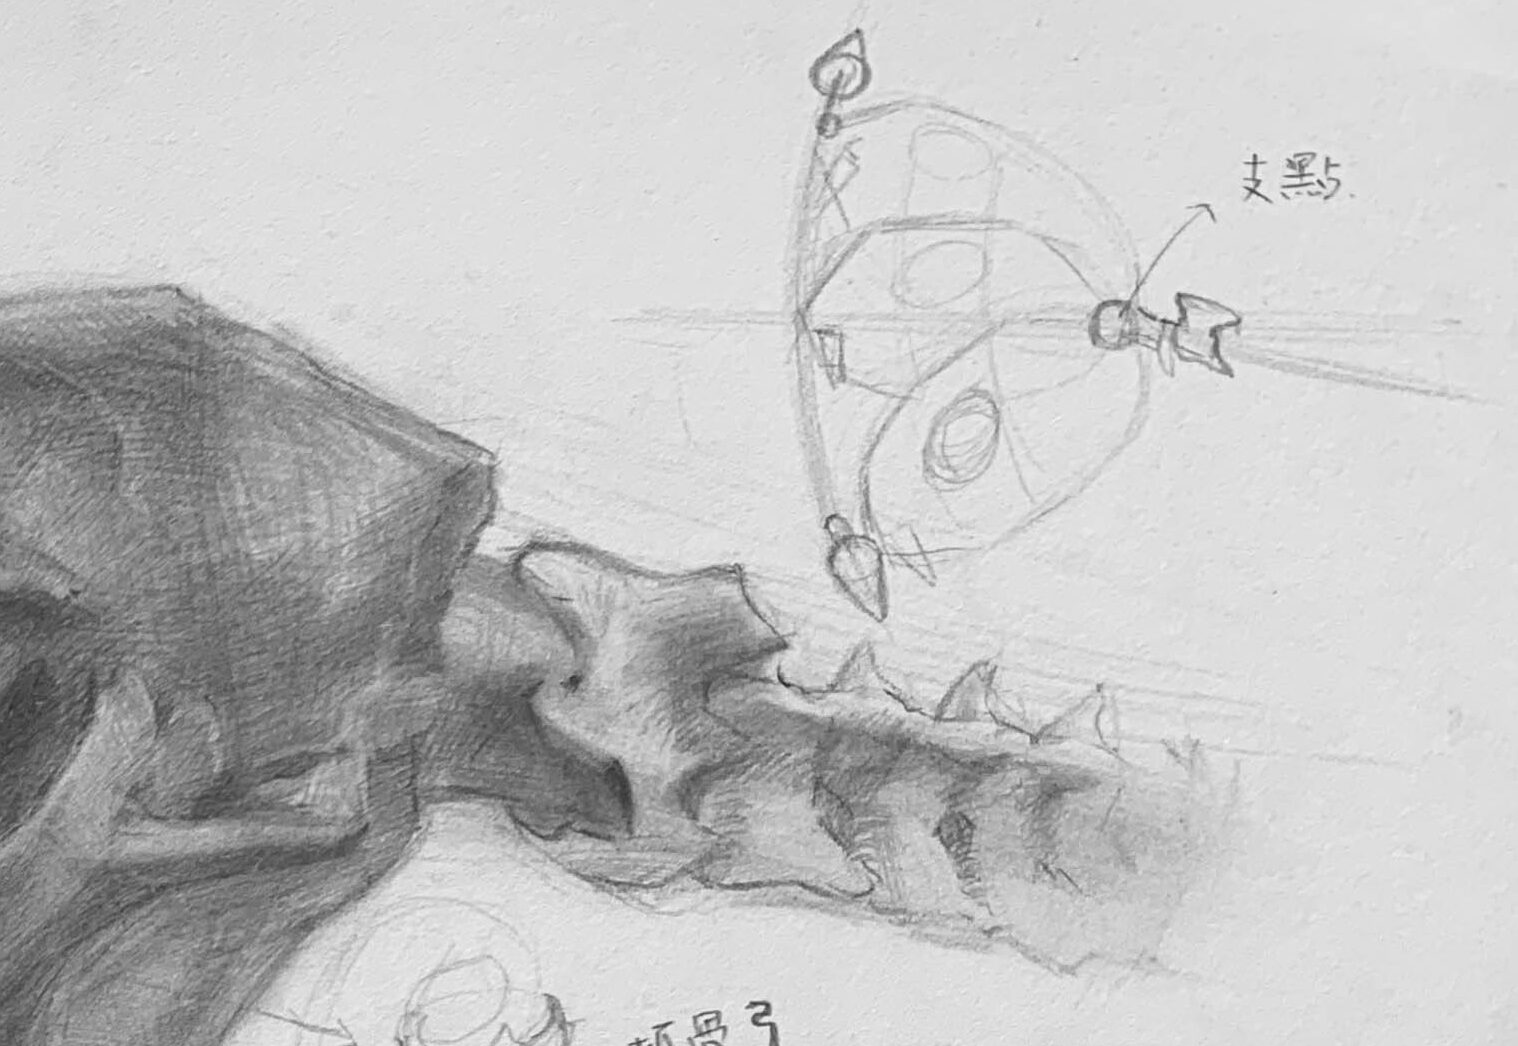
Back of the Skull and Spine Connection
Neck Vertebrae and Skull Joint
Understanding the joint between the skull and spine helps depict the natural connection between the head and neck in different cat poses.
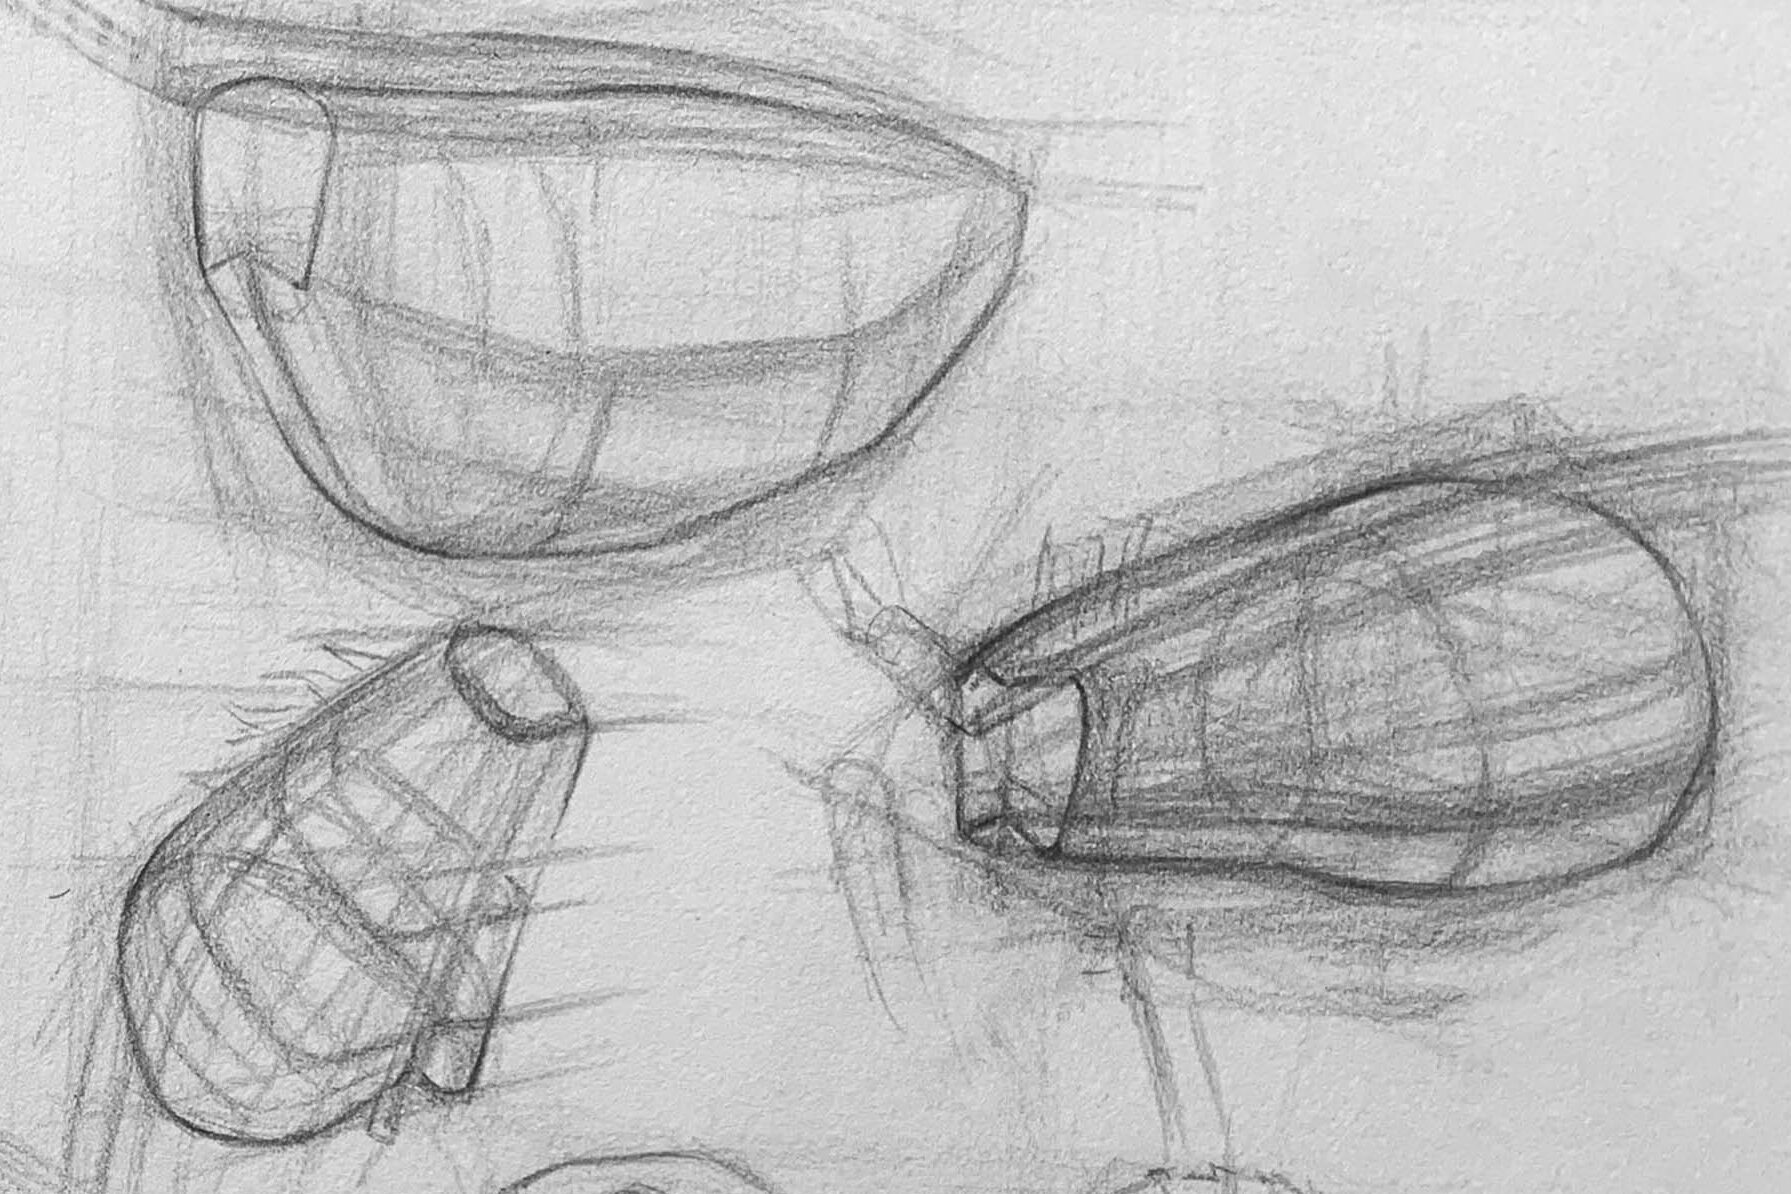
Cat Teeth and Jaw Structure:
- Cats have both canines and molars in the upper and lower jaws, clearly showing their sharp and powerful predatory features.
- The curvature and spacing of the teeth determine the three-dimensional form and shape of the mouth when it is closed.
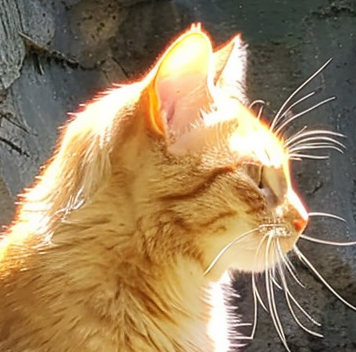
Side View of Cat's Face:
- The head contour is smooth, but it depends on the cat breed. The nose and mouth protrude, and in cats without an underbite, the area from the nose to the jaw has a slight slope.
- The base of the ears is located about one-third from the back of the head—compare this with the front view for reference.
2.Cat Body Proportions:
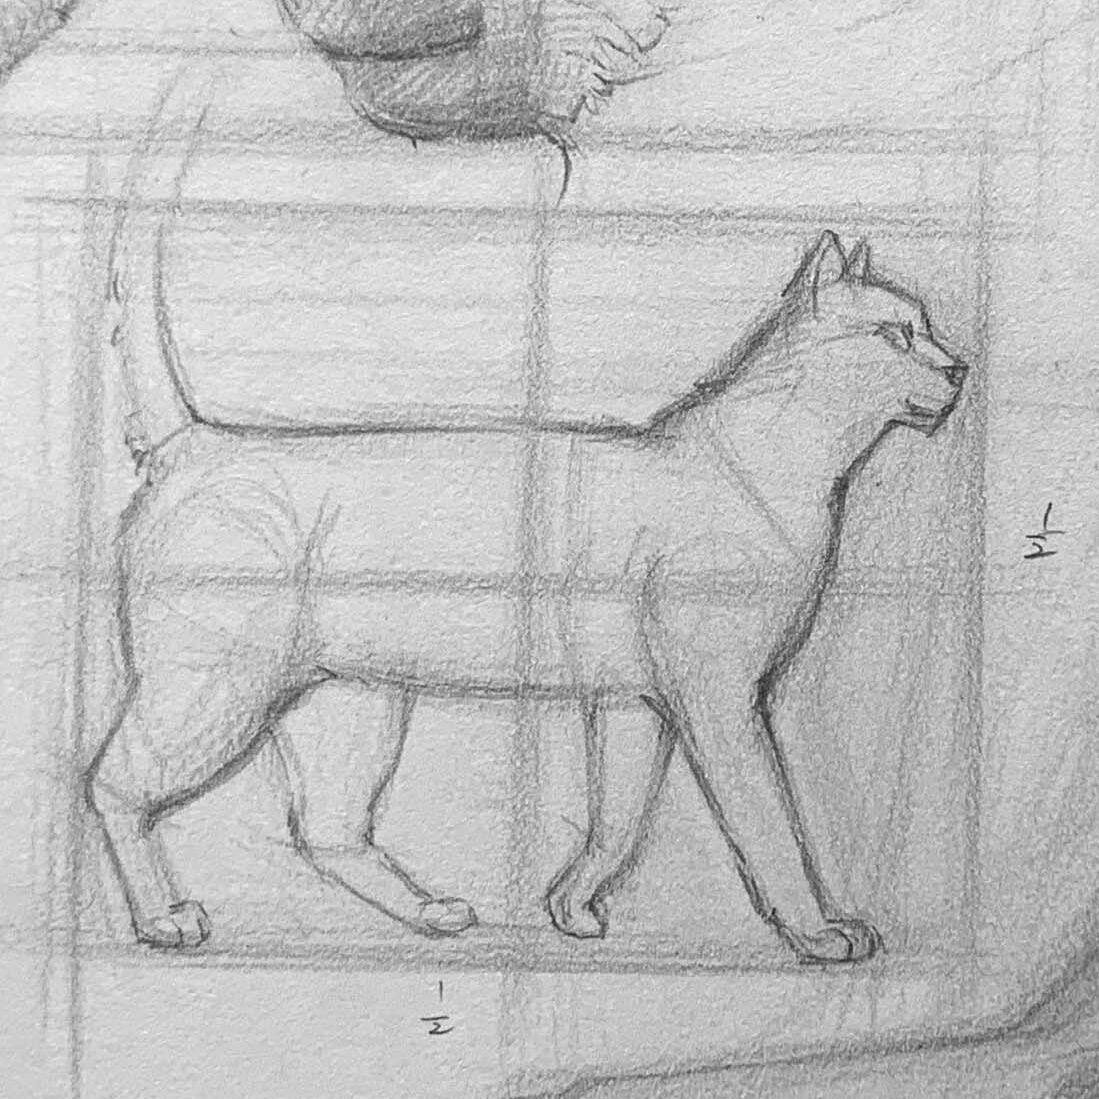
The body can be represented using a rectangle to grasp the overall proportions:
The body length is approximately 2-3 head lengths.
The leg length is about half the height of the body, but this varies by breed. For instance, British Shorthairs or Munchkin cats have shorter legs compared to mixed-breed domestic cats.
Cat Main Body Structure
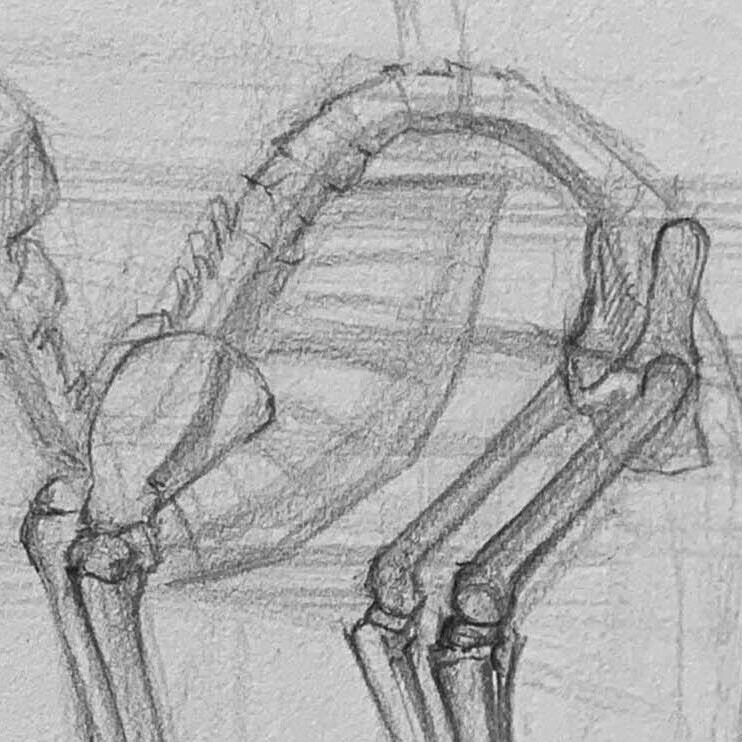
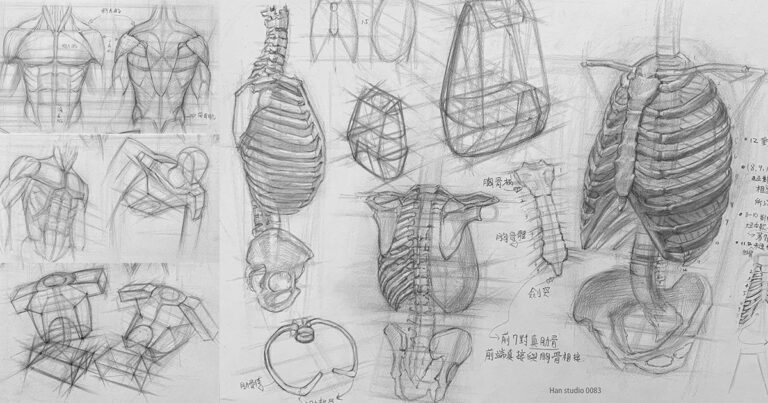
Rib Cage
- The rib cage is the core part of the cat’s body, roughly resembling an oval or teardrop shape.
- It’s narrower at the top and wider at the bottom. Pay attention to the surface planes and their transitions, as these affect how volume and shadow appear.
Abdominal Cavity and Pelvic Area
- Teardrop-shaped, tapering from the rib cage to the pelvis.
- Supports the cat’s flexibility and agility when jumping.
4.Limb Structure and Movement Principles
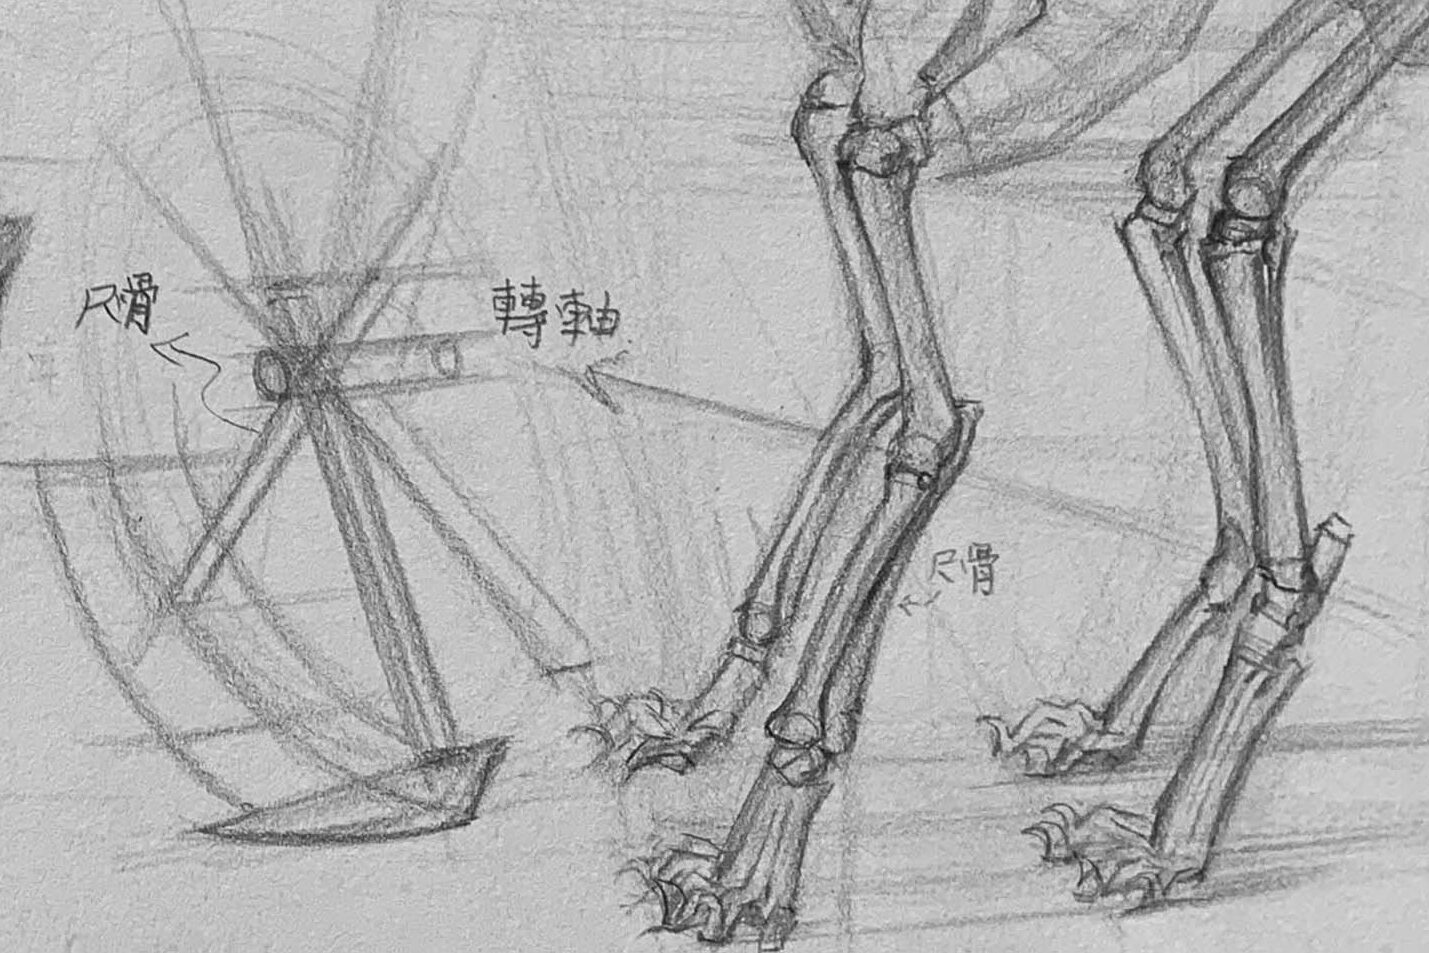
Front Limb Structure (Ulna, Radius)
The ulna rotates on a single axis, similar to the human arm, while the radius controls the rotation of the cat’s paw.
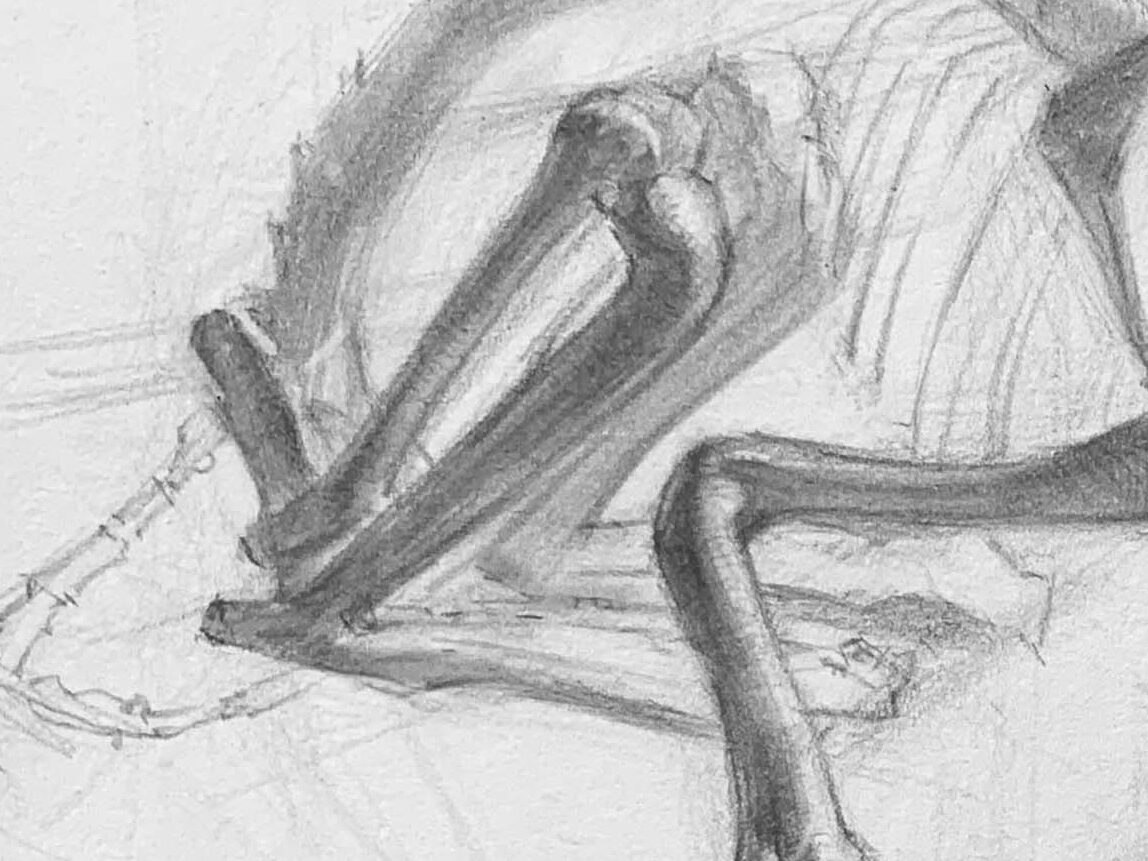
Hind Limb Structure
- The femur and tibia are long and strong, aiding the cat in large jumps and fast running.
- The hind limbs are more developed than the forelimbs, helping with upward leaps and rapid movement.
5.Cat's Dynamic Posture:
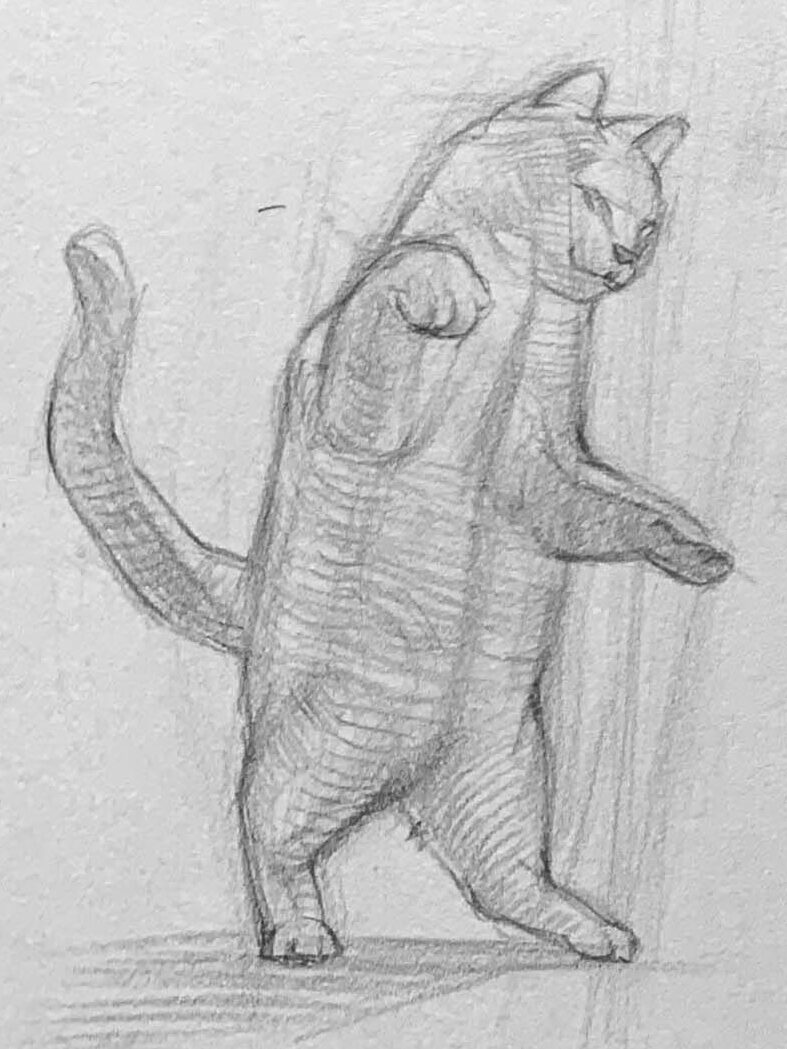
When a cat is walking or standing:
Pay attention to the relationship between the head, torso, and tail. The most crucial aspect is identifying the weight distribution of the movement. For example, in the standing cat illustration, the weight is on the left leg, causing the body to tilt slightly to the right.
In different postures (sitting, walking, standing), observe the bones, muscle structure, and joint angles carefully.
Cat Sitting Pose Example:
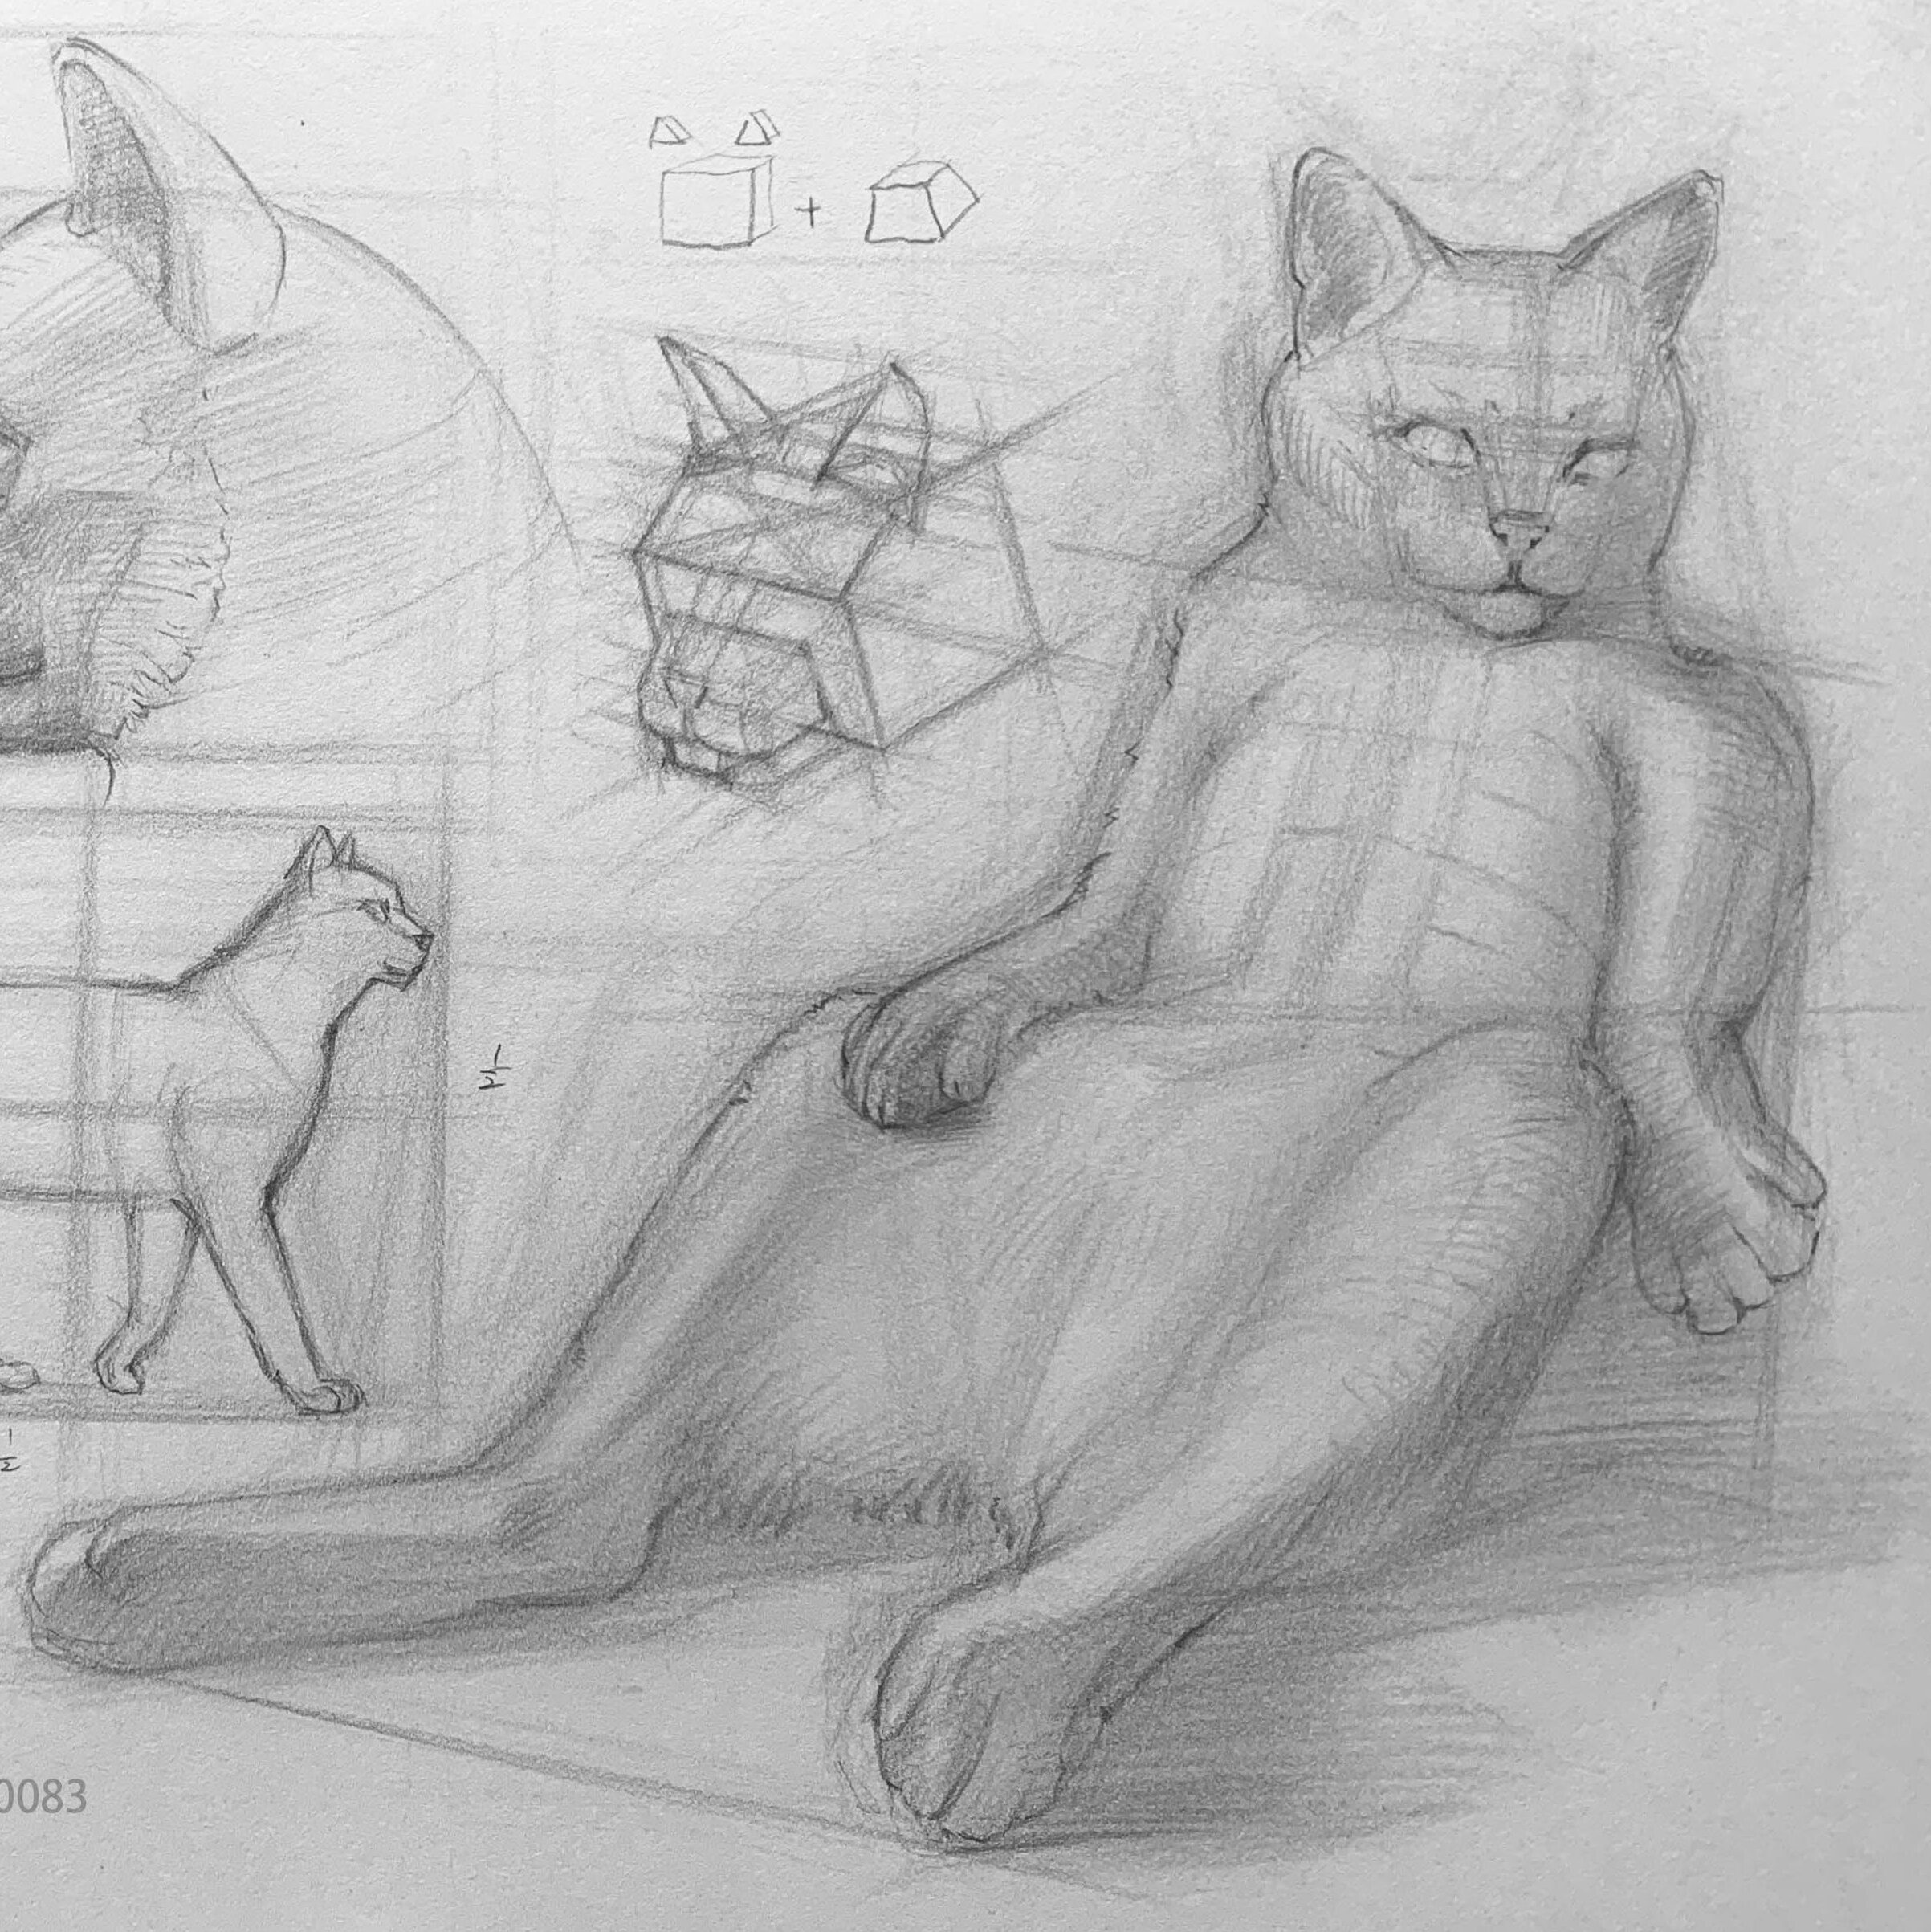
When sketching a sitting cat, focus on the slant angles of the shoulders, pelvis, legs, and chest line.The centerline of the chest should align with the overall body movement.Pay extra attention to the folds and bending angles of the cat’s leg joints.
If you want a more dynamic pose, ensure variations in these three lines. If they all share the same slope, the pose may look stiff.
6.How to Add Shadows and a Sense of Volume to a Cat?
After understanding the drawing method introduced above, you should already have a solid grasp of how to construct the cat's shape. Next, we’ll move on to using pencil shading to give your cat depth. Start by dividing the reference image into two value zones: light and dark. If you're unsure how to do this, check out this article on the two-value method.
Step 1:
When applying the two-value method, if the cat’s eyes and face are your focal points, be sure to give the eye area a stronger gray tone than other areas.
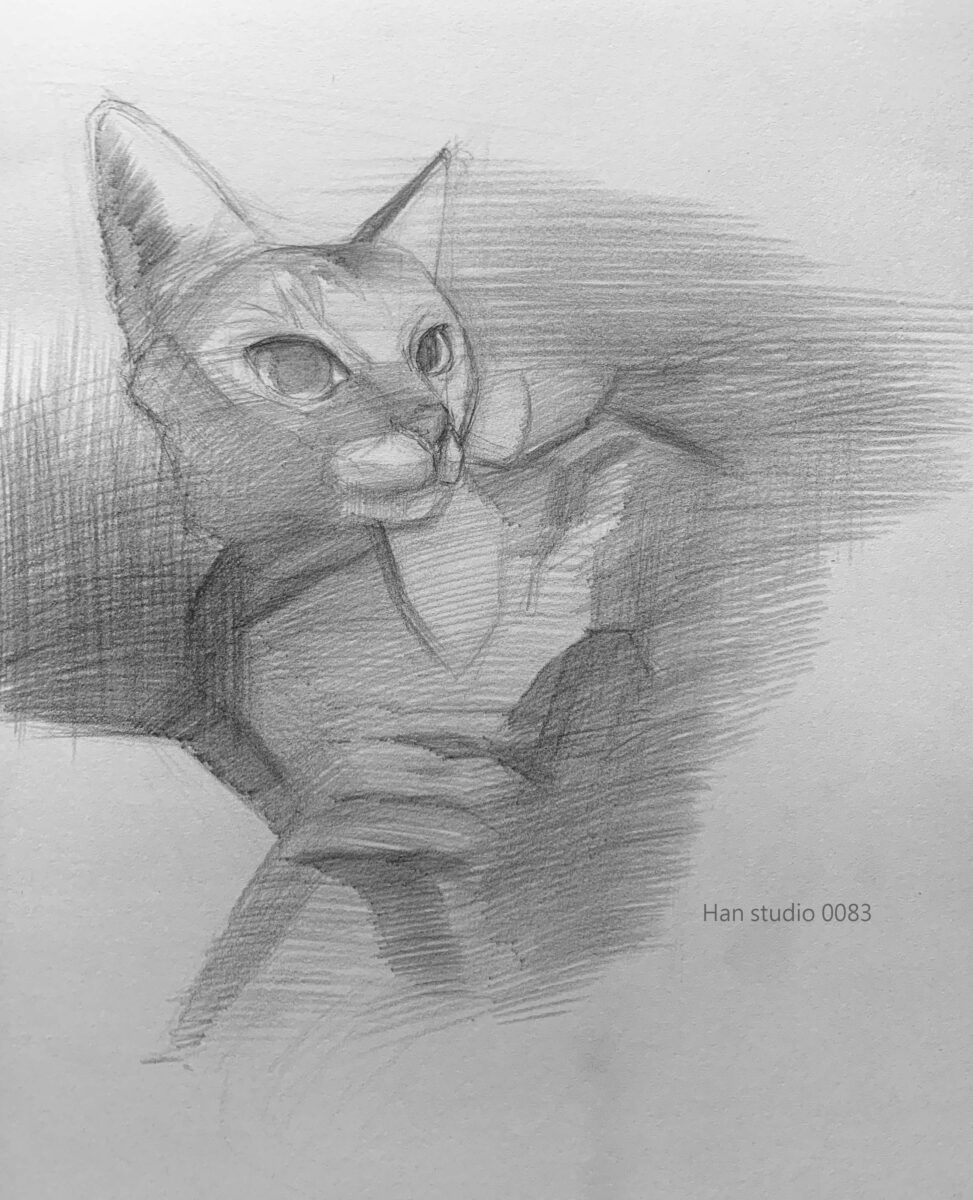
Step 2:
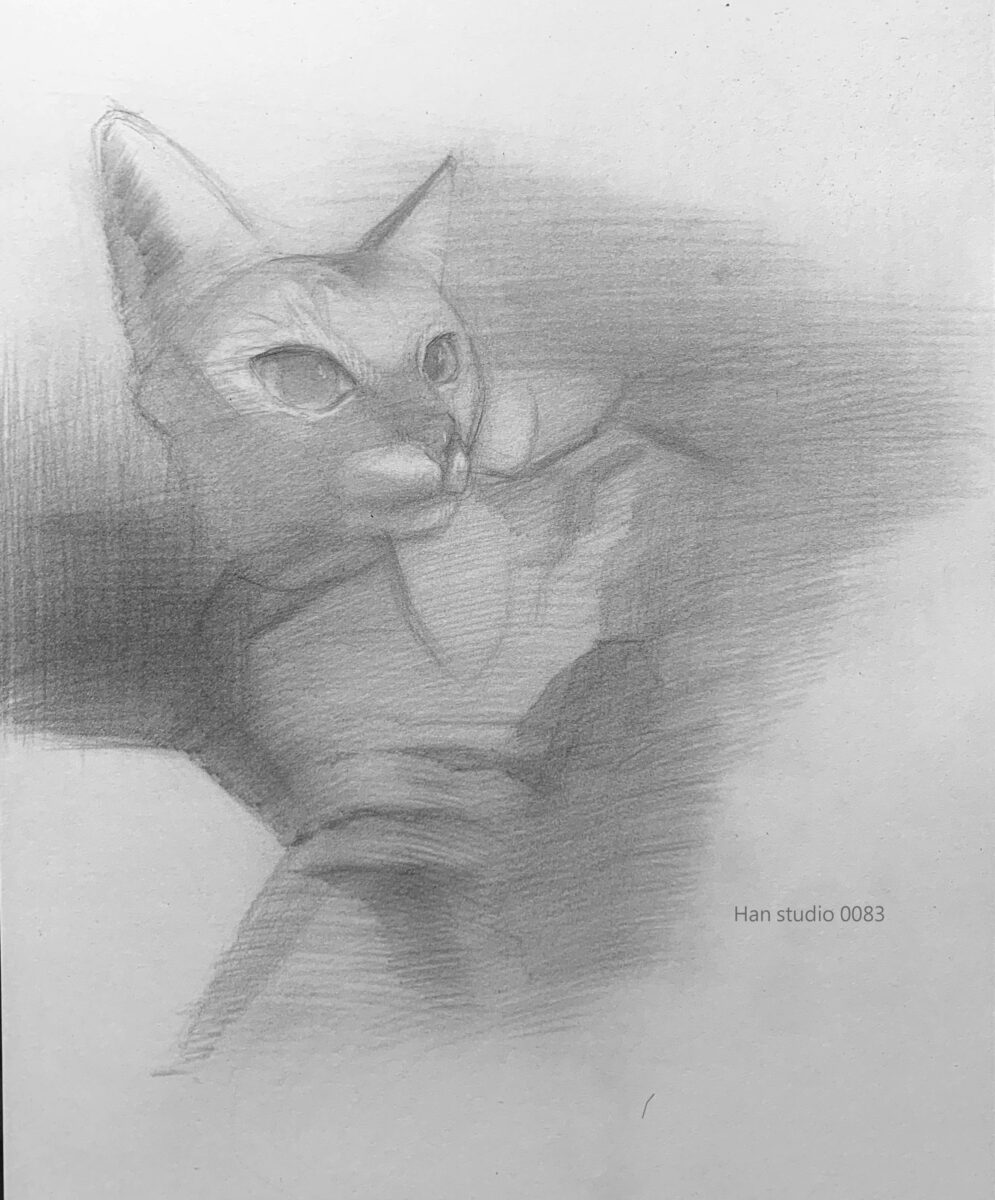
Use a blending tool to smudge your pencil strokes, pushing the graphite into the paper fibers. You'll notice the gaps between lines become filled, and the tone settles into the paper, creating a smoother and warmer texture.
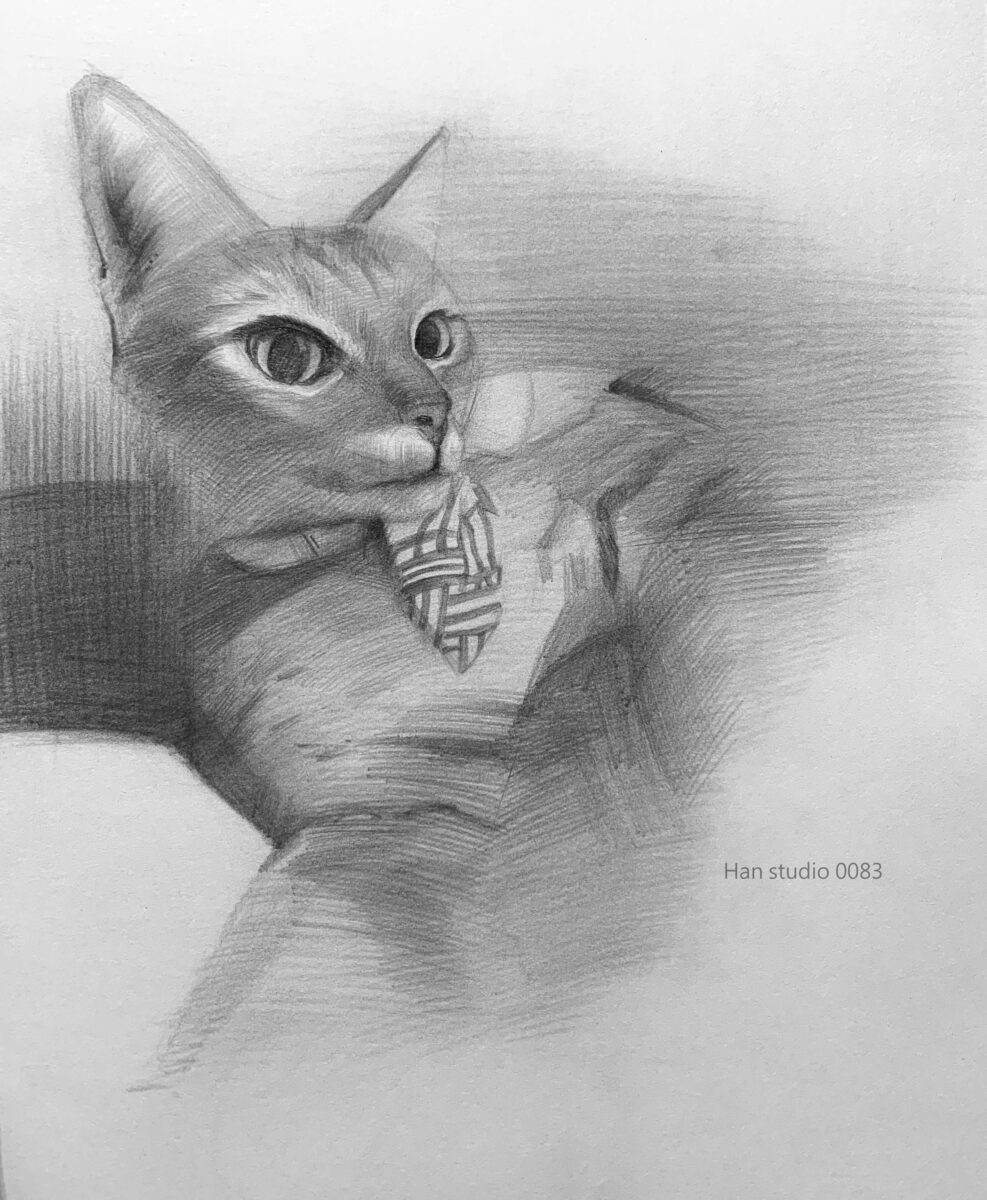
Step 3: Continue to enhance the light and dark contrasts of the face. At this stage, follow the direction of the fur to create a sense of volume, naturally developing a furry texture as you go.
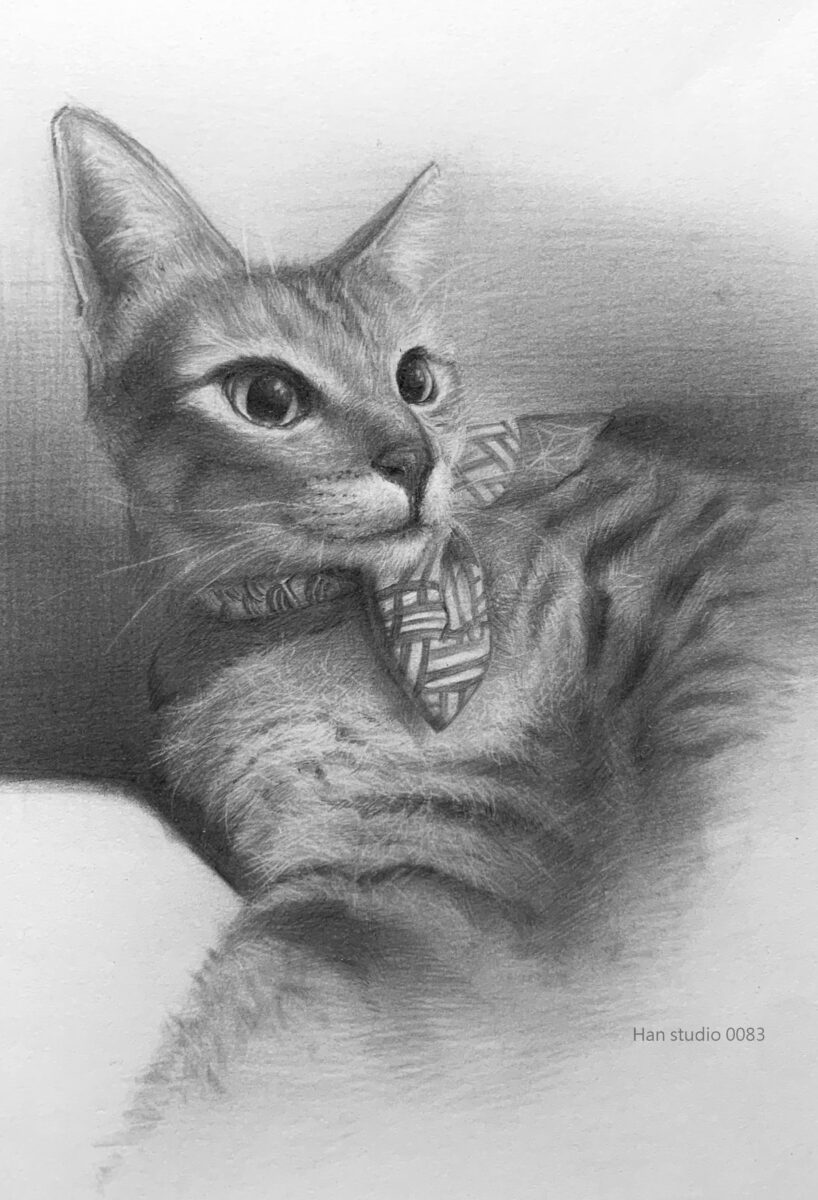
Step 4: In addition to using a pencil to create fluffy fur texture, you can also use both soft and hard erasers to add highlights. When erasing, be sure to follow the direction of the fur to maintain its natural flow.And with that, your adorable cat sketch is complete!
7. Common Questions & Answers
Q:Why should I start drawing a cat using geometric shapes?
Starting with geometric shapes allows for a clearer understanding of perspective, spatial depth (shape transitions, thickness changes), and proportions. It also prevents mistakes from focusing on details too early. However, if you are already very familiar with the structure, starting with details is fine.
Q:How can I understand the body proportions of a cat?
Using grids or reference shapes as a baseline helps.For example, measure proportions based on head width—count how many head widths make up the body length.
It’s recommended to start with simple poses (front-facing, side profile) to reduce the difficulty of shape analysis.

Q: How do you draw natural cat poses?
Start with simple geometric shapes, first setting the body's dynamic line, and observe the cat's skeletal and muscle movements, gradually adjusting the fluidity of the posture.
If you’re interested in learning about other members of the feline family, such as lion anatomy and drawing methods。, feel free to click on the article I wrote.
This concludes the breakdown of cat drawing techniques. Have you encountered any challenges with shaping or other aspects when sketching cats? Let me know!
If you're interested in learning to draw but don't know where to start, or if you'd like to understand the knowledge behind drawing,
feel free to join my LINE and contact me. In my classes, I organize drawing methods in a clear and structured way.
Click here to learn more about my drawing courses!
Further Reading
How to Draw Birds: Master Sketching Body Structure
Sketching Lions: Simplifying Head and Torso with Basic Shapes
How to Draw a Pet Dog: Mastering Perspective and Proportions
How to Draw a Koi Fish with a Pencil: Fish Sketching Tutorial
How to Draw Primates: Proportions, Anatomy, Dynamic Poses

Leave a Reply