- log in (to a computer)
- Register
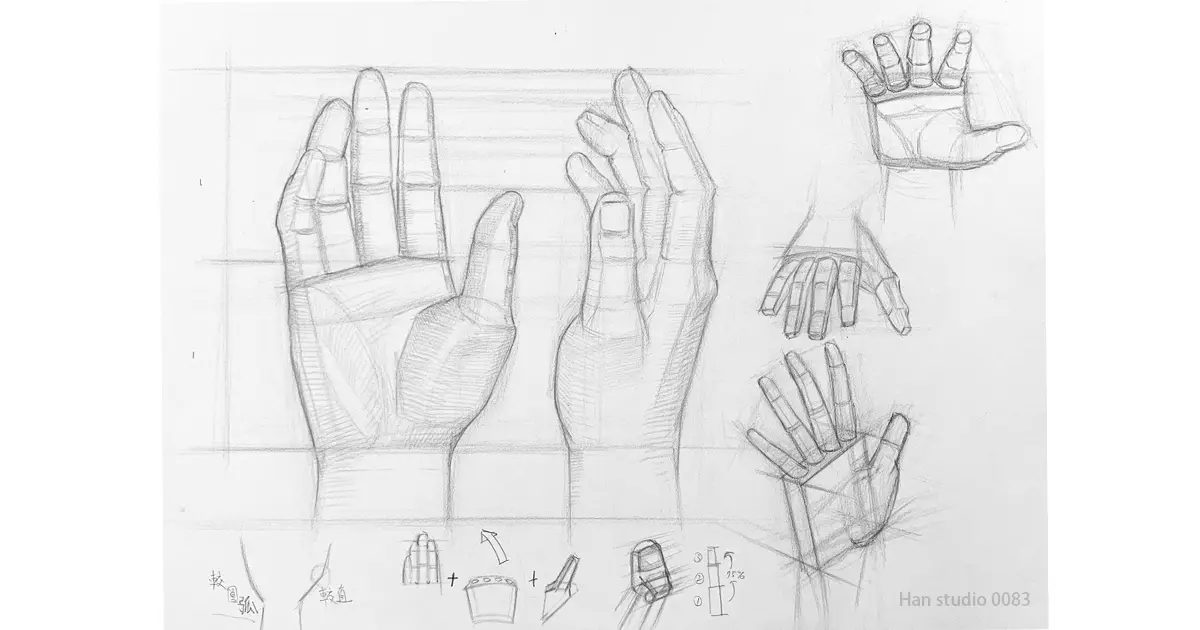
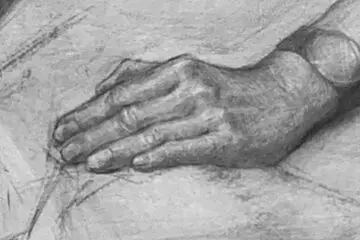
The reason hands are hard to draw, besides having many fingers, is that each finger has its own direction, length, and articulation.
When the palm rotates or the fingers bend, it also produces a large amount of occlusion and foreshortening.
Therefore, it is not recommended for artists to only trace the outer contour; instead, they should first understand where the palm is facing, where the joints are located, and how each section of the fingers connects.
We will use the palm of an adult's hand as a base model for the rest of the presentation.
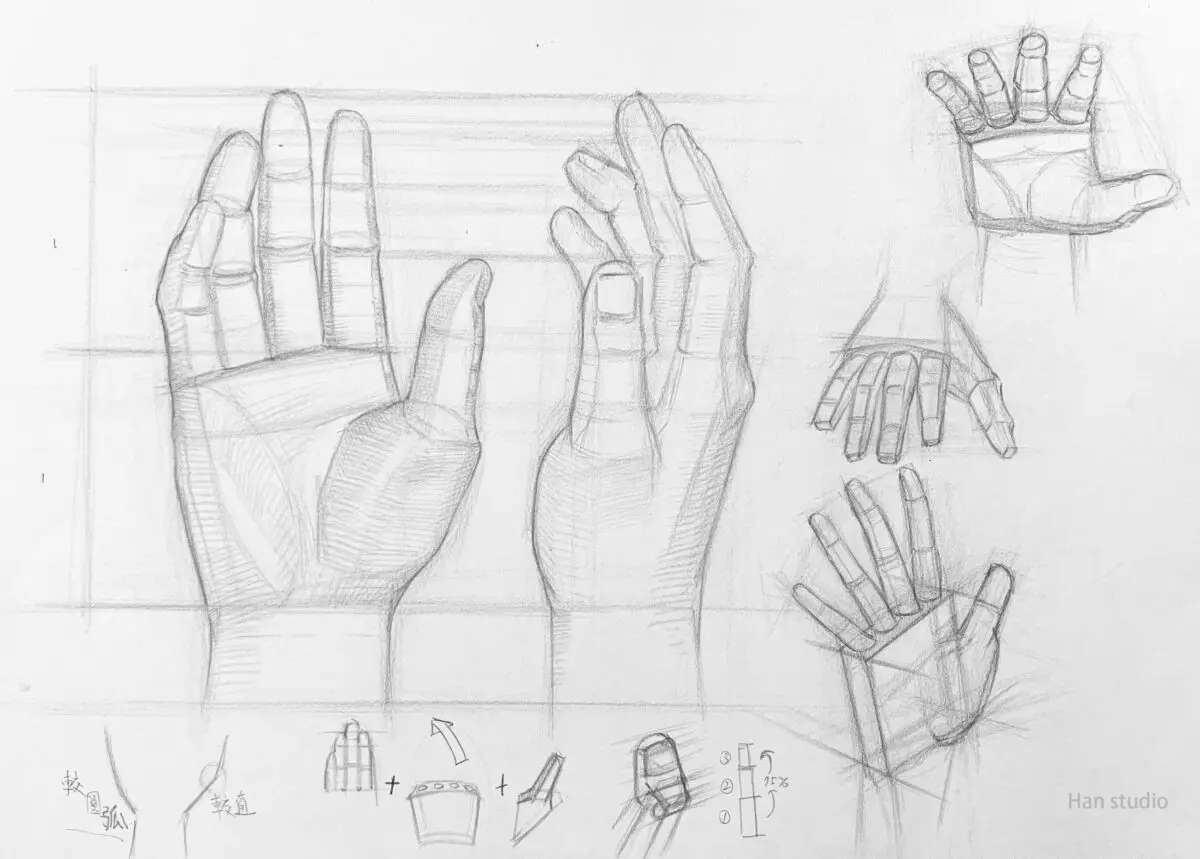
The distance from the wrist to the base of the middle finger is approximately equal to the length of the middle finger (refer to the large diagram on the left), and the width of the palm is approximately 3/4 of its length.
The length of the fingers varies, with the middle finger being the longest, the index finger and ring finger being shorter, and the ring finger usually being slightly longer than the index finger, but of course, the index finger is also longer.
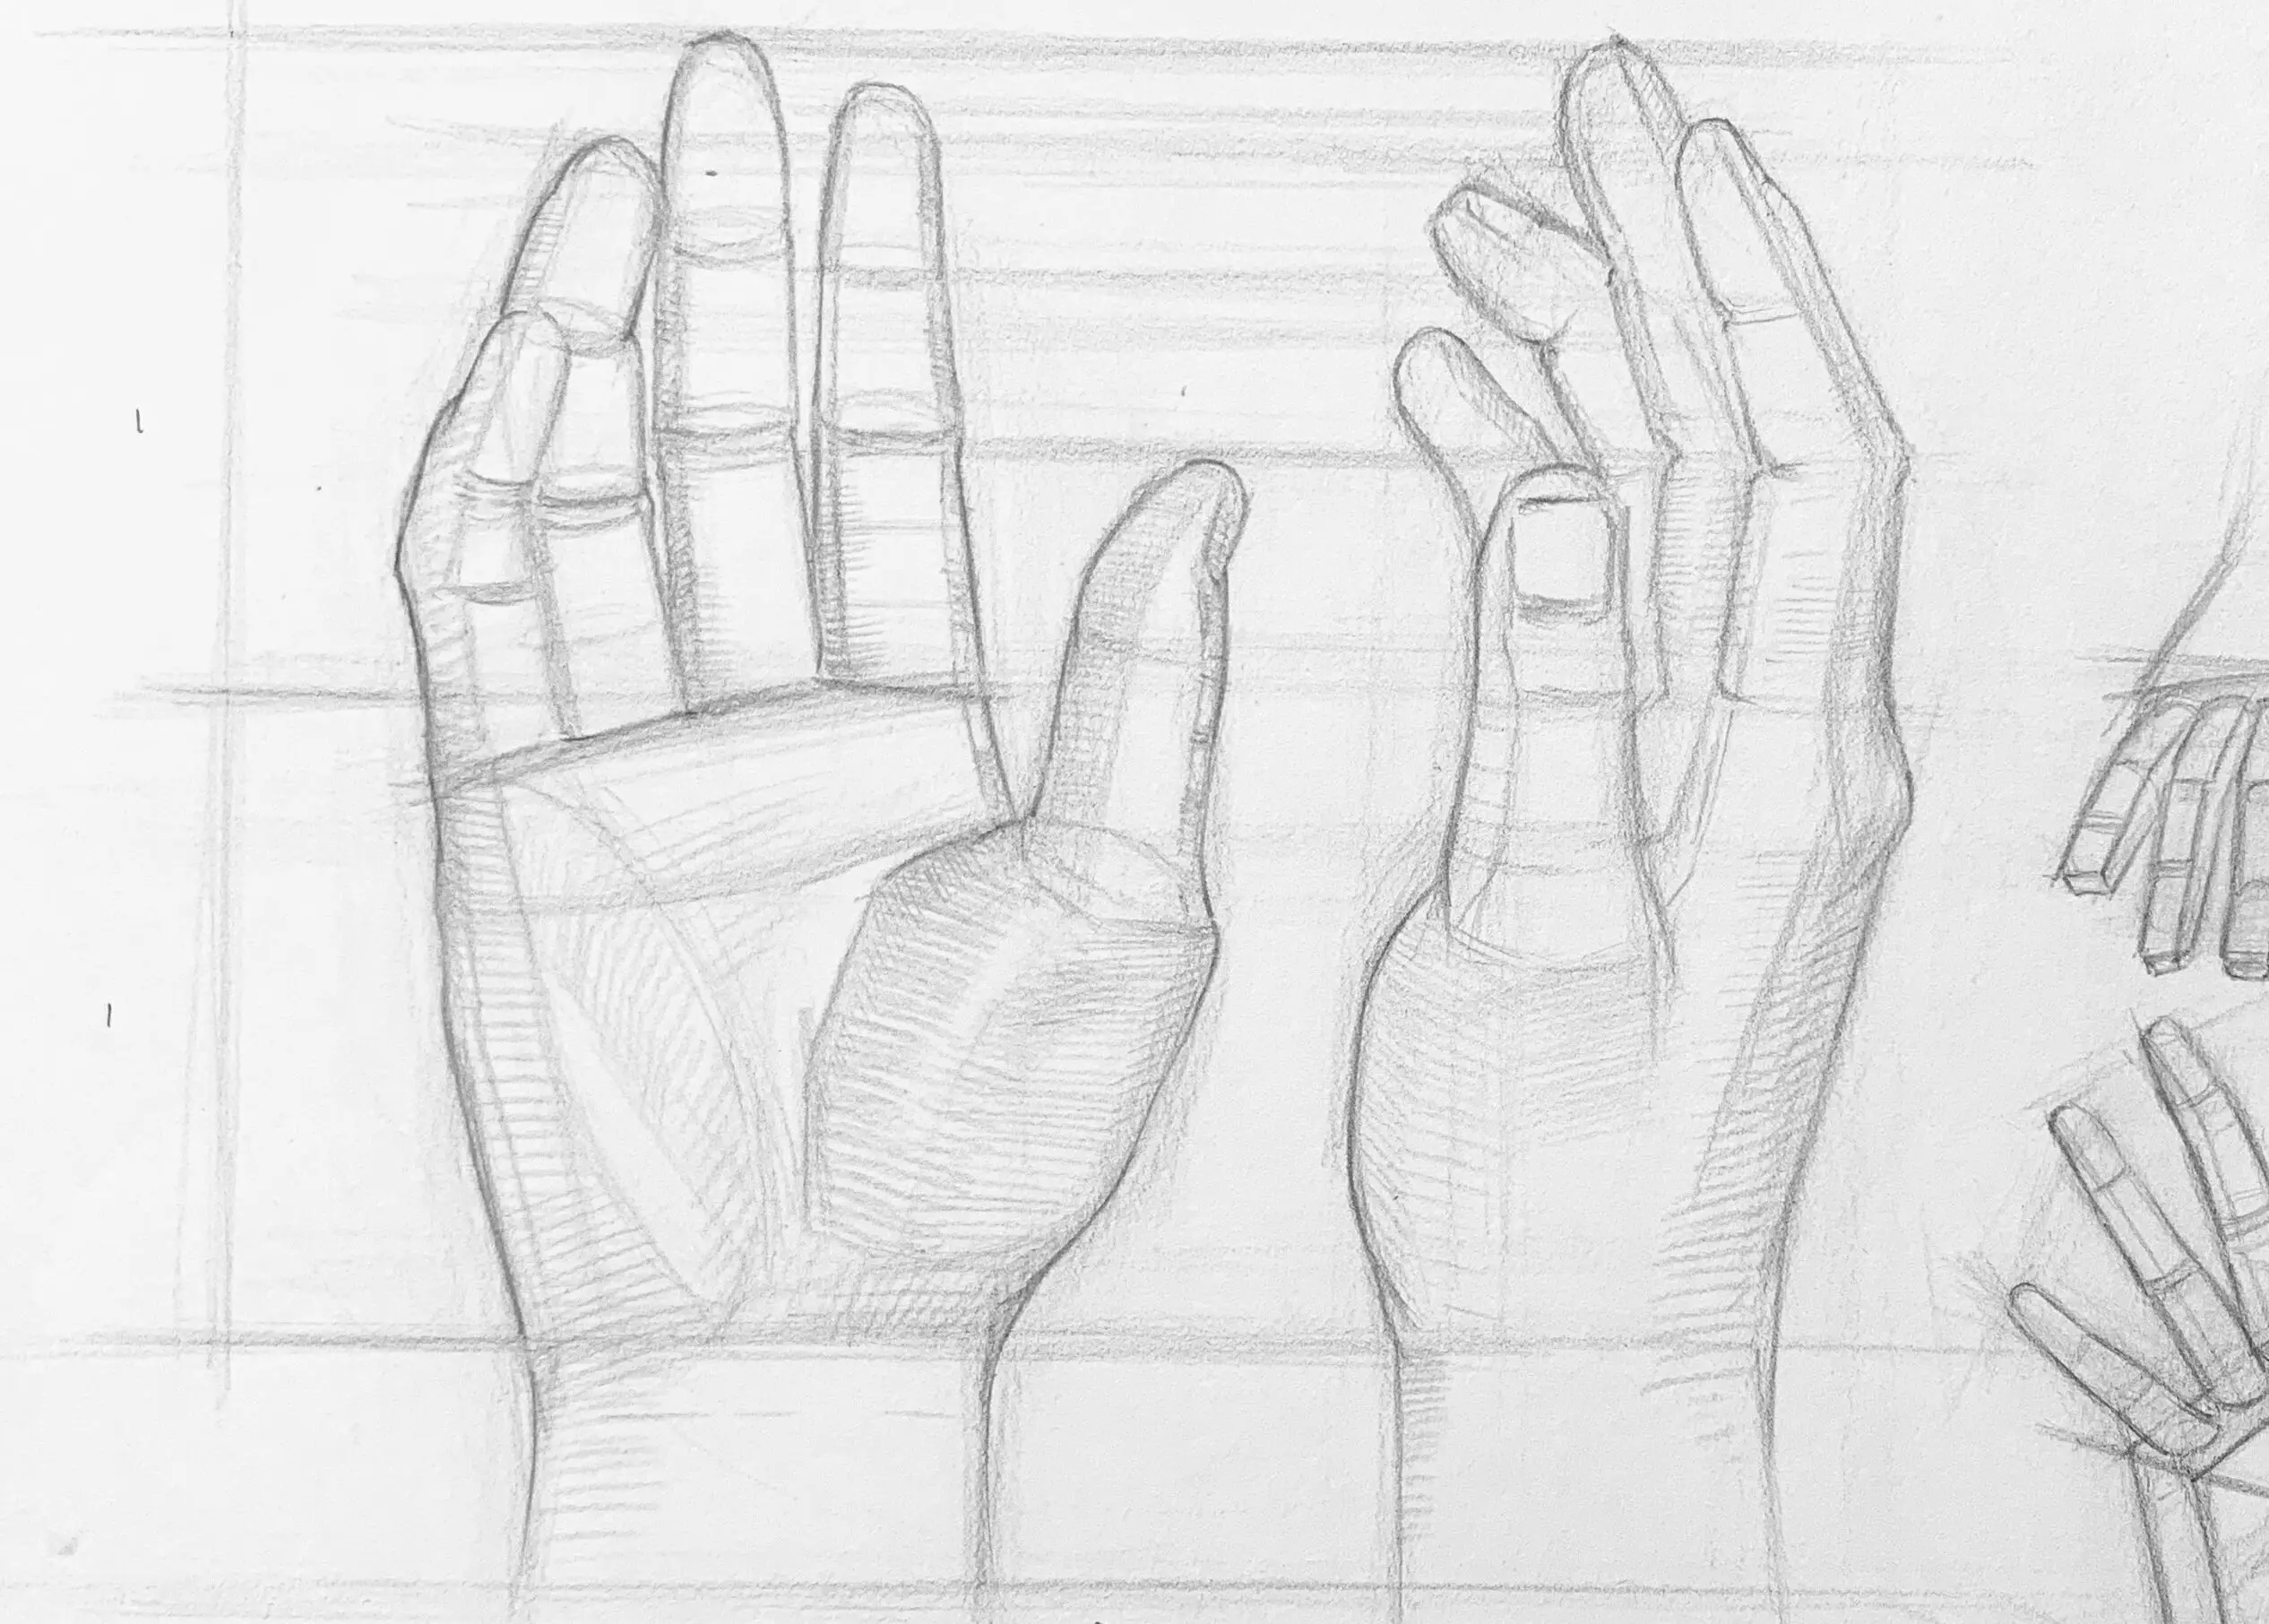
Corresponding to the open hand at the top left of the demonstration image.
You can first summarize the palm into a thick trapezoid or wedge:
Intuition easily makes hands look like thin cardboard, so it is emphasized here:
Even when viewing the palm from the front, you must draw the side and planes of the palm block to give the hand a sense of thickness.
The rectangular cutaway at the top left of the sample diagram can be used precisely to illustrate the orientation of the palm and the volume of each finger joint.
The palm of the hand can be simplified as a quadrilateral shape that is wider at the top and narrower at the bottom, with the fingers attached to an extension of the palm.
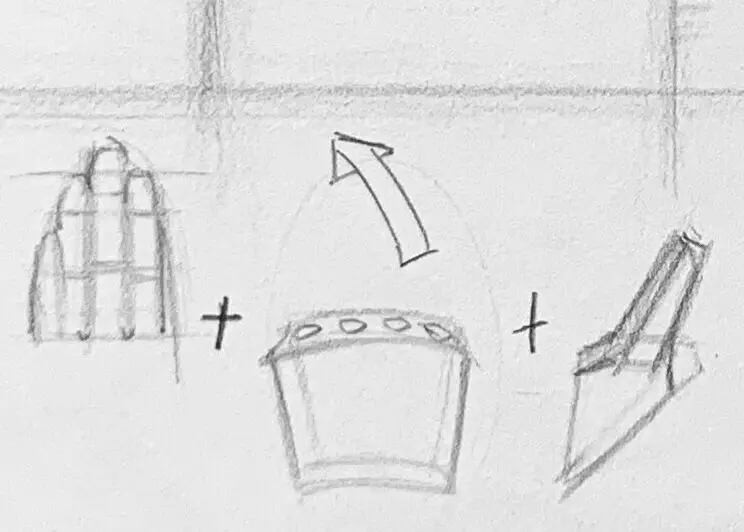
Corresponding to the diagram on the lower left with joints marked by dots.
The index finger to the little finger do not start from the same horizontal line. The four metacarpophalangeal joints form a slightly curved arrangement, and their height gradually decreases.
Remind readers to distinguish between two positions:
This is a very important point. Many people start measuring finger length directly from the web of the fingers, resulting in fingers that are drawn too short.
Can this be summarized into a single sentence:
First find the joints on the skeleton, then cover them with the skin shape, and do not mistake the gaps between the fingers for the starting point of the fingers.
Each finger has three joints, and the thumb is unique in that it has only two joints, which determine the direction and angle of the finger's bend.
Referring to the right side of the first picture, use geometric shapes that look like building blocks to make it easier to understand the turns of the finger surfaces.
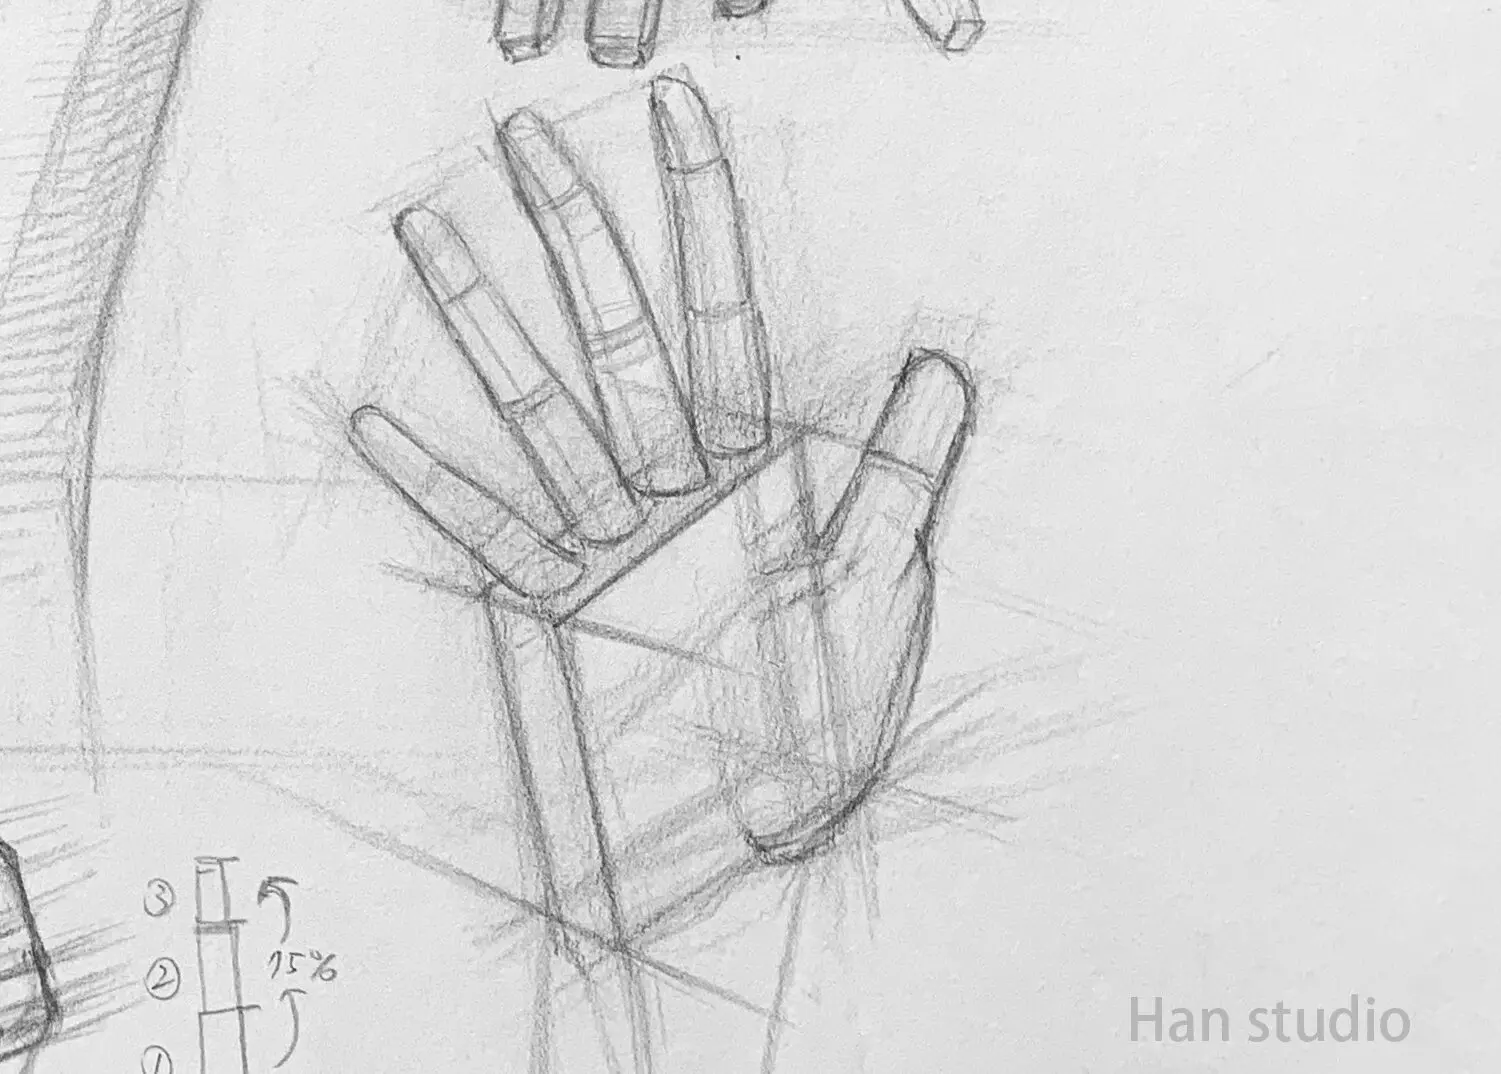
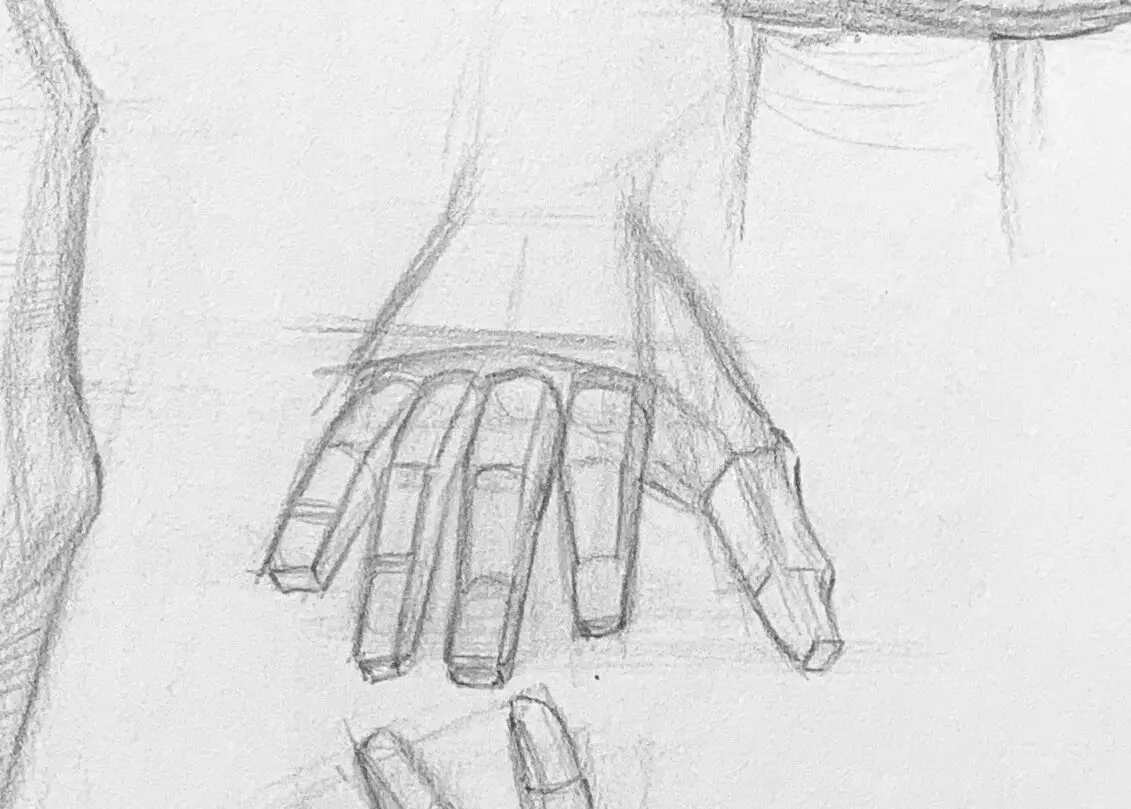
- First of all, observe the similar shape and length/width ratio of the palm of your hand. For simplified parts, you can refer to the bottom part of the picture, and break the hand sheet into three parts for easy understanding, draw the basic position and length of the fingers, and pay attention to the relationship between the distance between the fingers and their lengths.
- Add joints and structural lines to the palms and fingers. While drawing, observe the areas where shadows are created due to shape transitions, as seen in the large front and side views on the left.
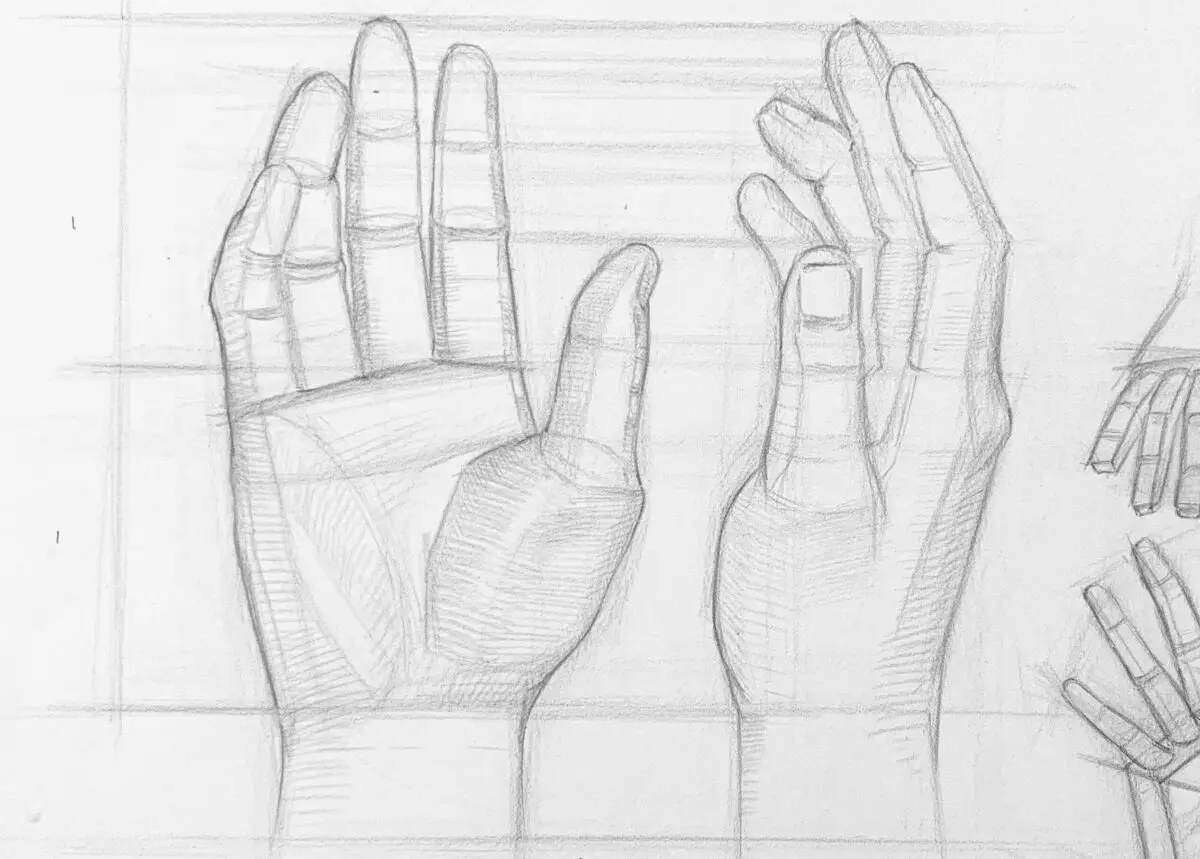
- Trace the details of the fingers and the palm of the hand, noting that some of the lines will produce lines of pre and post relationships because they are blocked.
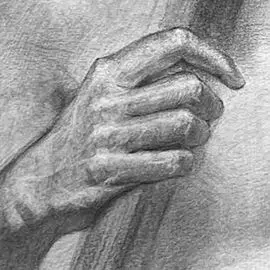
Introduction to Arm Painting: Detailed Analysis of Skeletal Simplification and Movement Mechanisms
How to Draw Ears:Simplified Ear Structure and Shading Tips
How to Use Two-Tone Shading: Simple Shadow Techniques
Facial Muscle Structure Analysis: Enhancing the Stereoscopic Sense of Figure Sketching
Mastering Nose Structure and Perspective: A Basic Analysis of Painting Still Life Compositions
How to Draw Eyes: Mastering Proportion and Detail Drawing Techniques
Portrait Sketching Tips: Three Keys to Understanding Head Structure
Mastering the basic proportions and structure of portrait drawing
How to draw lips in pencil: the key to shape and muscle undulation
I hope this step-by-step description can help you recognize and understand how to draw the palm of the hand, if there are any subjects you would like to see or drawing methods you would like to know, welcome to leave a message or private message me, I wish you a happy drawing!