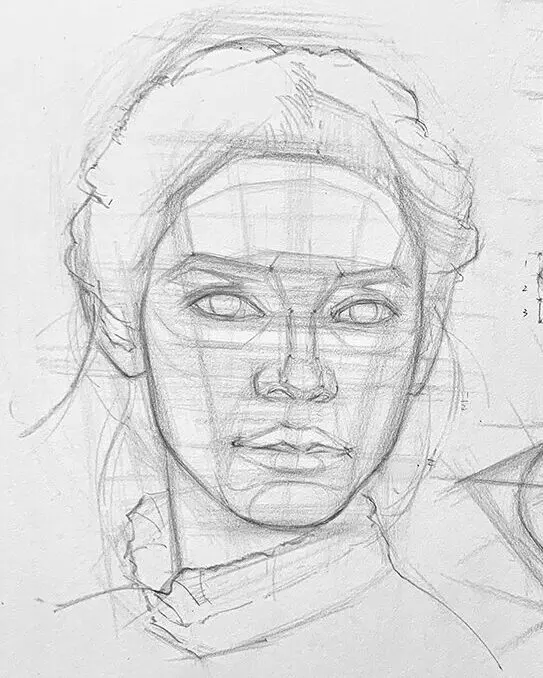
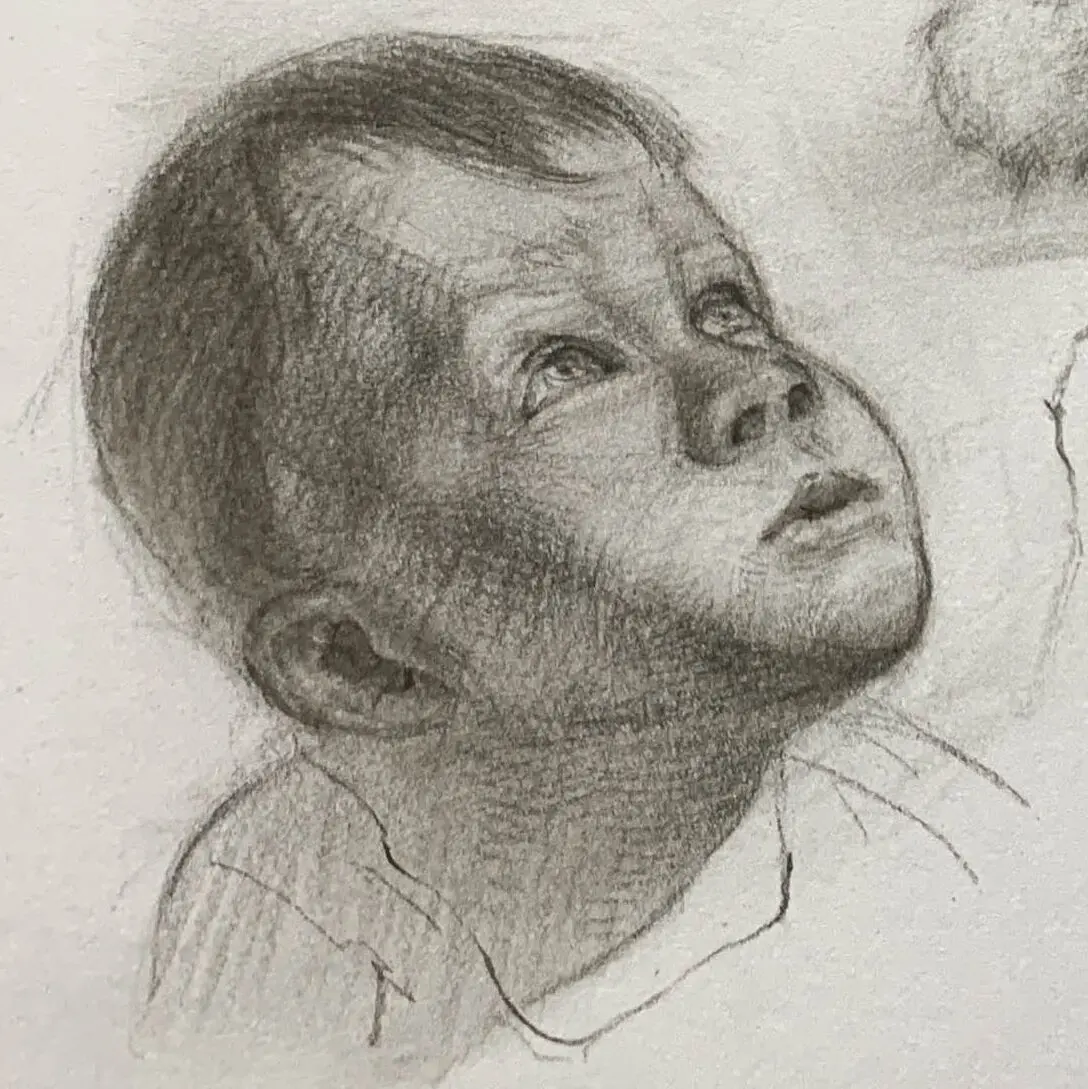
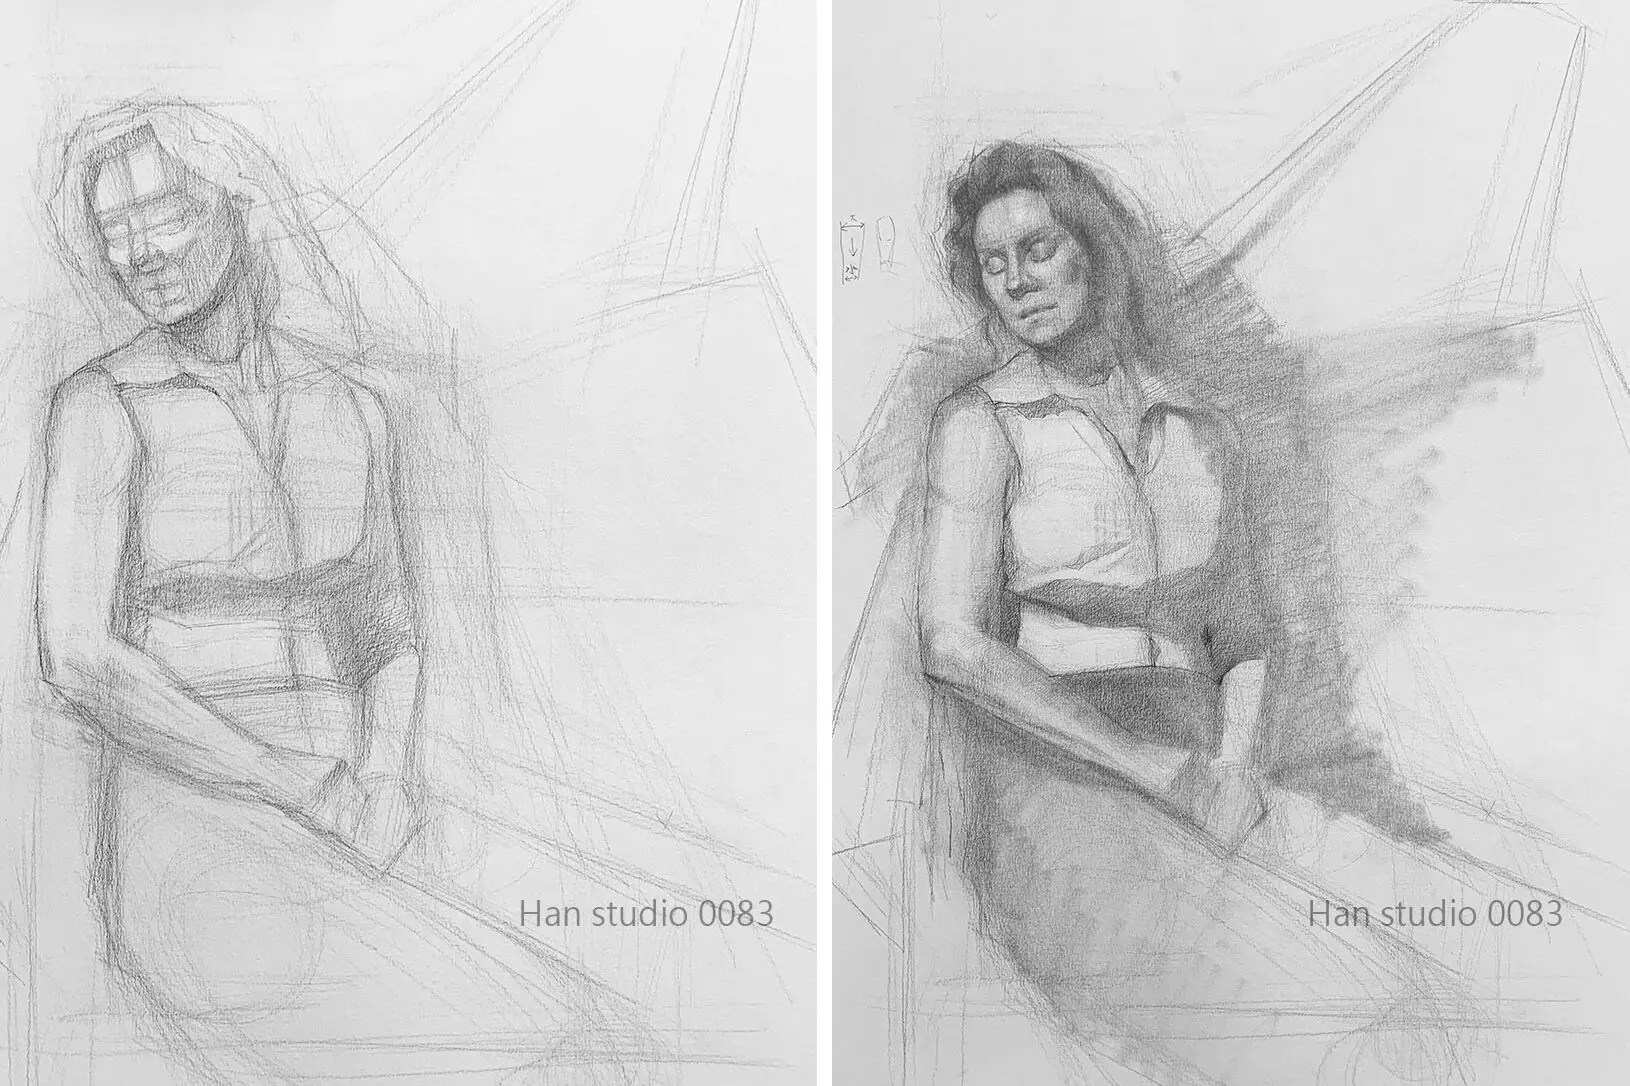
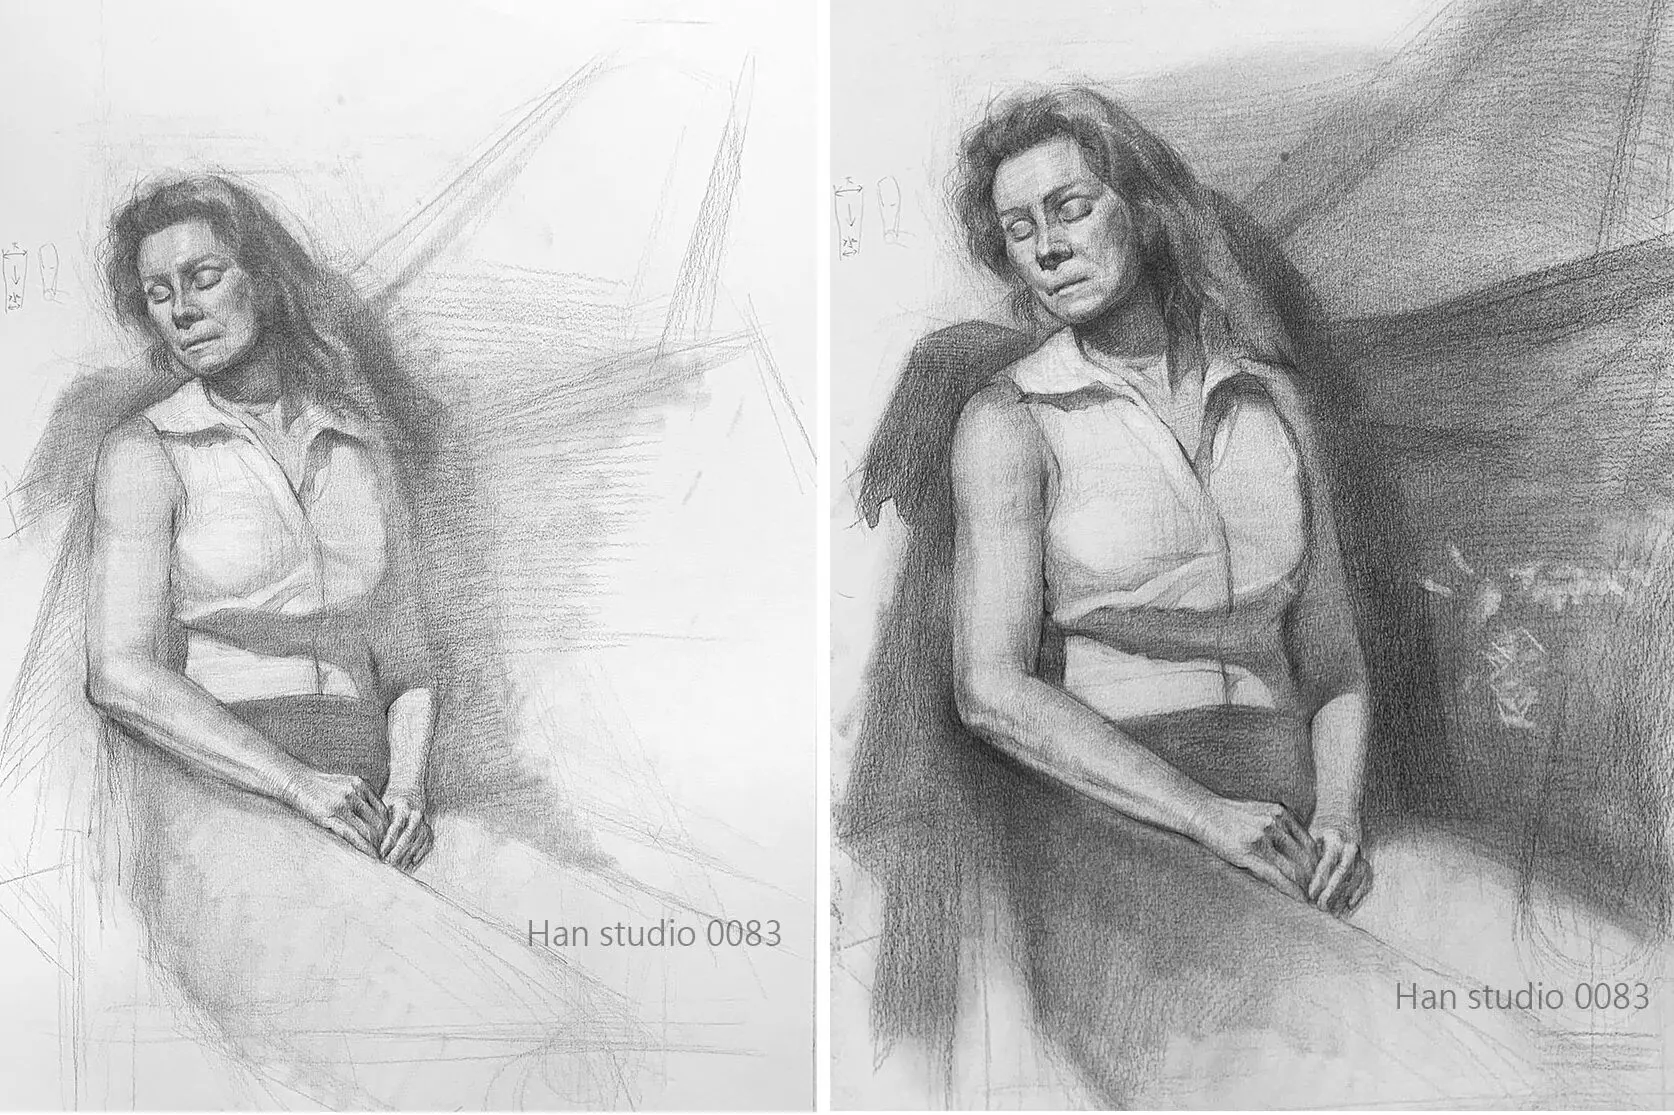
Are the facial features still odd when drawing according to the photo?
The eyes seem a bit high and the mouth is a bit crooked. I looked for a long time but couldn't figure out what was wrong, so I had to erase it and start over.
If you change the angle, it's even worse. Looking up, looking down, a 3/4 profile – my mind goes blank. I have no idea how to adjust the proportions.
This isn't a matter of you not being careful enough, nor is it a problem of talent.Because there isn't yet a system for "comparing, checking, and correcting."
This article will start with the three-part proportion of the head and guide you in building this system—from frontal views to changes in angle, from capturing the shape to adding shading, step by step.
1. Helps to catch the shape quickly and avoid "drifting" of the facial features
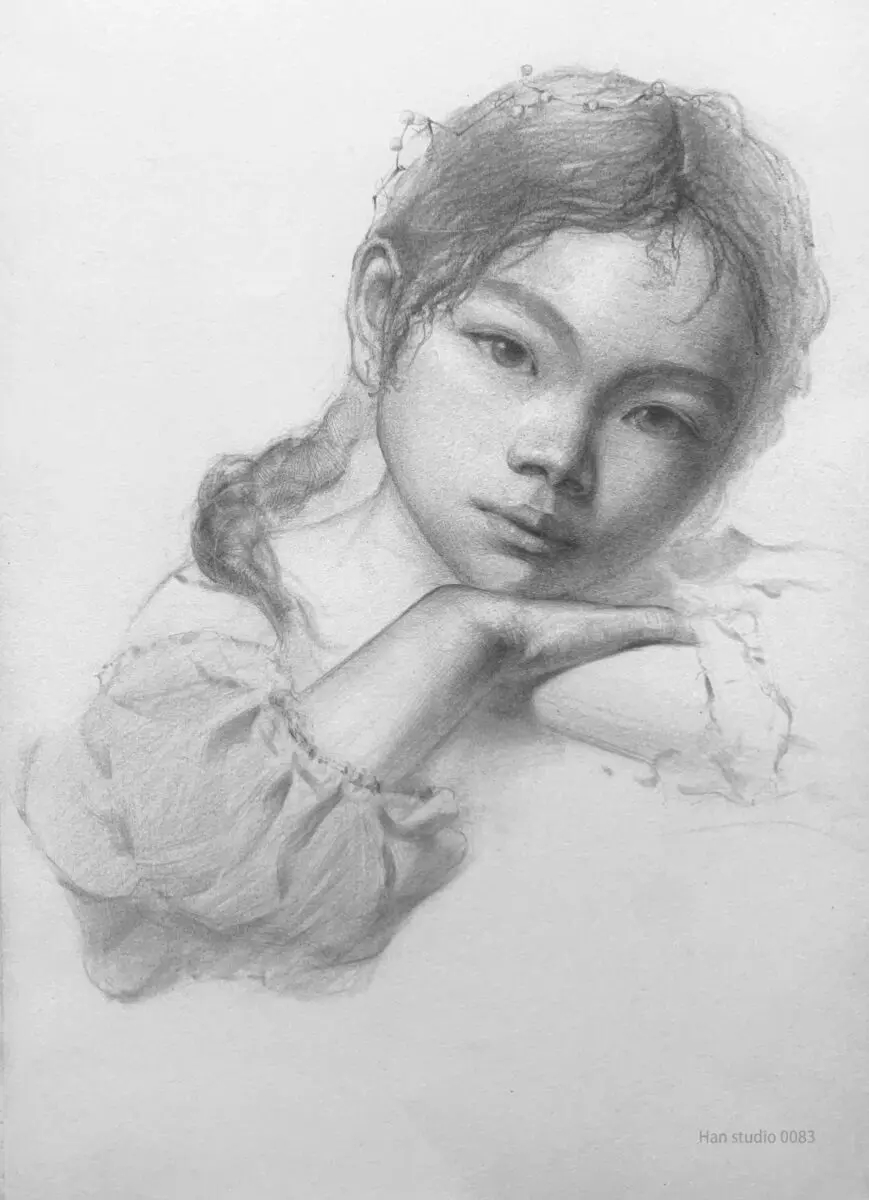
If the goal of a portrait is to "look like", it is recommended that you learn the Face Proportioning System.
With the scale system, you can check if the nose is drawn high, the mouth is crooked, and the eyes are drawn to the forehead.
Example: The proportionality system is like the lines of a map, giving you points of orientation that keep your features in a relatively accurate position even when you change angles.
2. Cope with different head angles and perspectives
When sketching or drawing, the angle of view changes and the spacing between the features compresses or stretches due to perspective.
After learning the proportionality system, you can figure out the approximate proportionality of the five senses at a 3/4 viewing angle, or when looking up or down.
3. Quick Checks and Fixes
When you feel strange in the middle of the drawing, we suggest you don't need to erase and redraw, just use the line check of the scale system.
This is important for sketching, exams or commercial drawing to quickly find areas that need correction.
4. Laying the groundwork for further styling and stylization.
The proportionality system is the common basis of "realism" and "metamorphosis".
Understand the correct proportions first, and then exaggerate the comic and illustration so that it will not be so distorted as to be unreadable.
5. So that you understand the structure better than if you had to memorize it.
Rather than memorizing proportions, the scale system helps you understand the logic of skull structure and the arrangement of the five senses.
We emphasize structural observation from "inside (skull) to outside (flesh)".
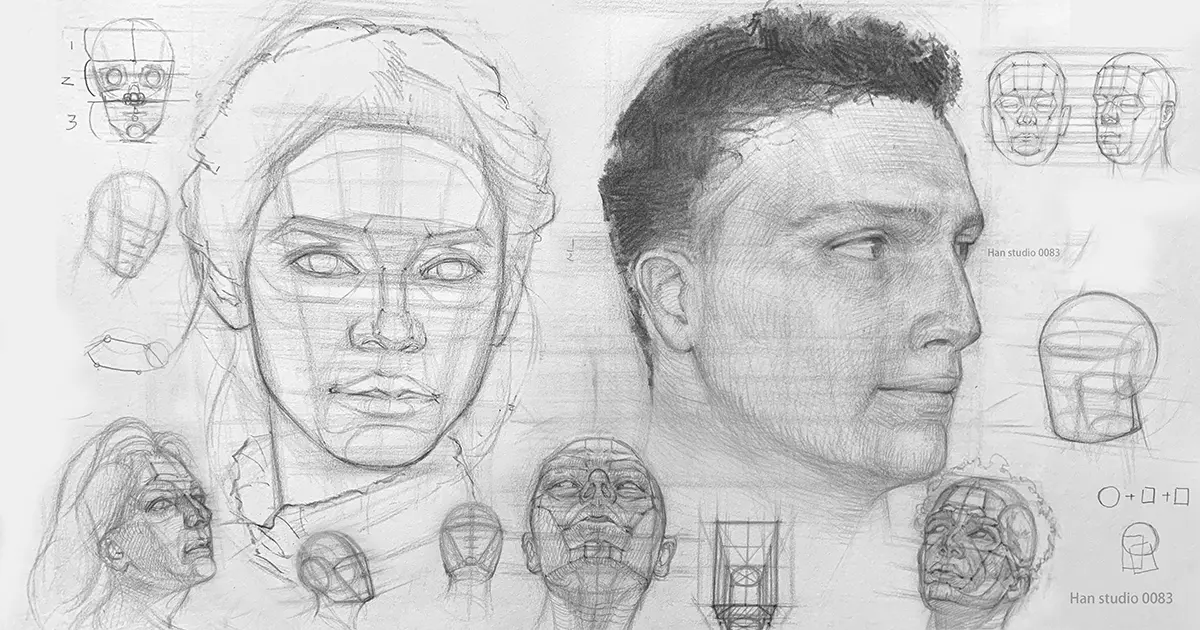
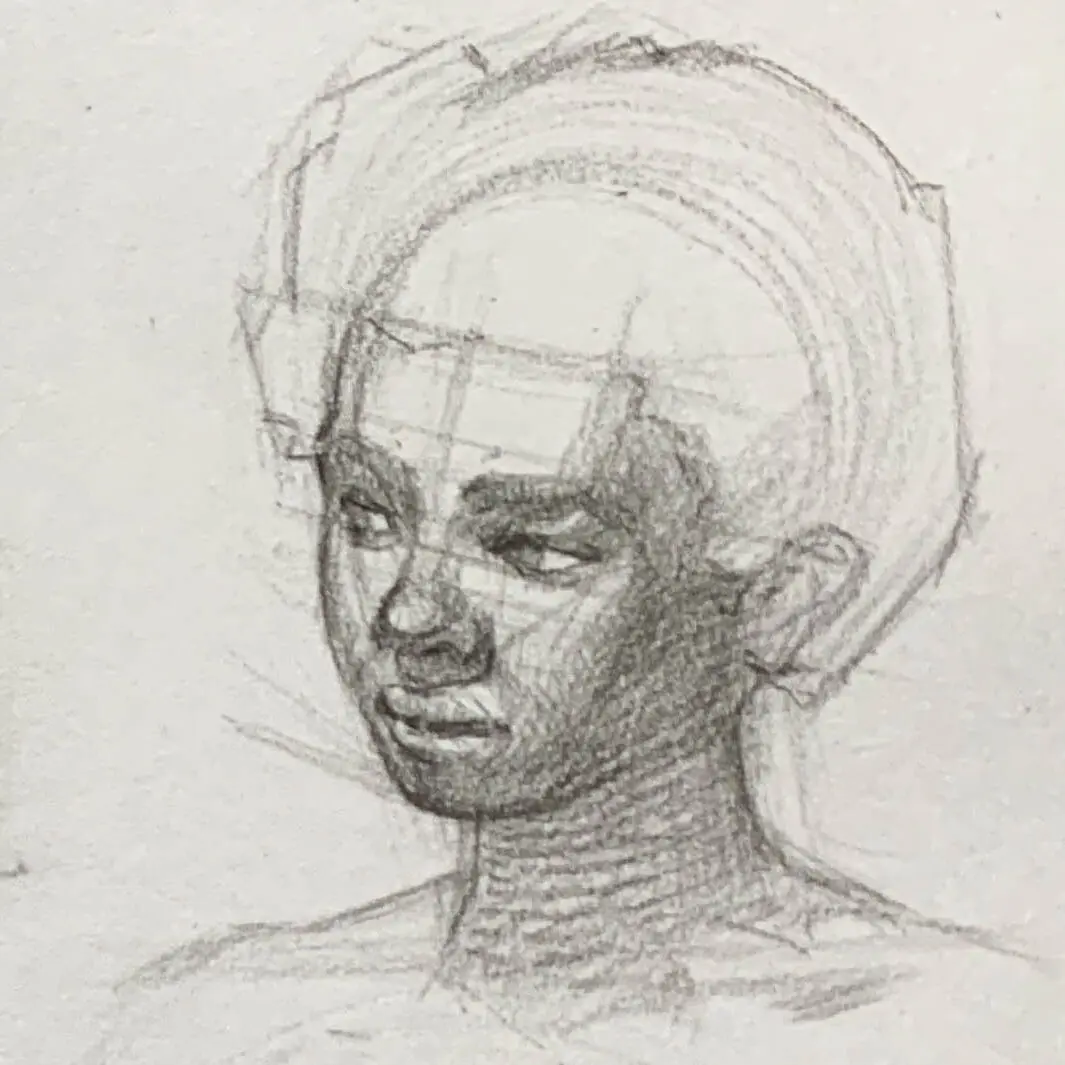
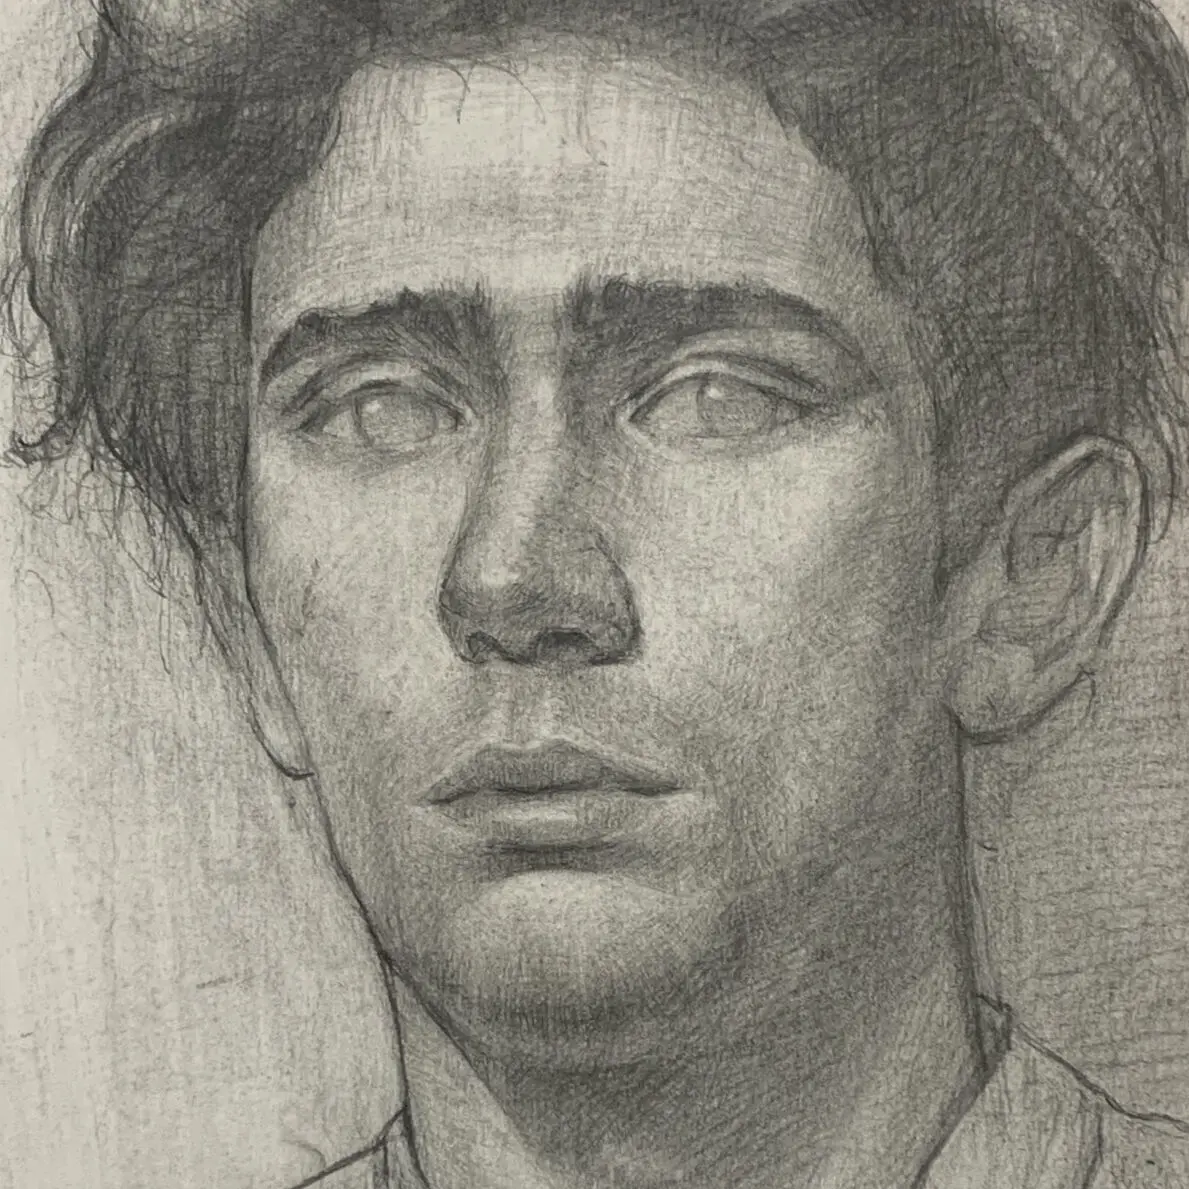
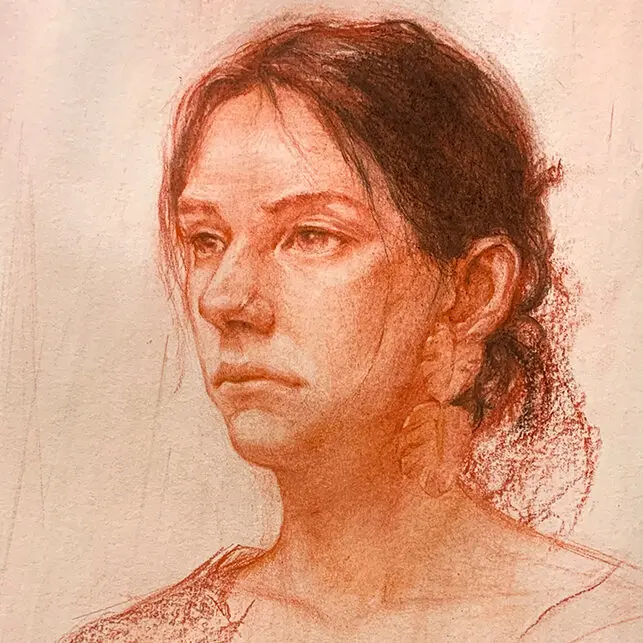
*The following is a frontal model to illustrate the facial structure, in reality, the proportion of each person will be more or less different.
Facial Layers
First, treat the whole face as a three-dimensional block and divide it into several main planes:
Frontal Plane → The arc from the hairline to the arch of the eyebrow.
mid-plane(eye and nose area) → forehead turns to nose and cheekbones.
plane of the lower segment(Mouth and Mandible) → Bottom of the nose to the chin, including the protrusion of the lips and the angle of the mandible.
Side Plane → Lateral zygomatic area to the ears and temples.
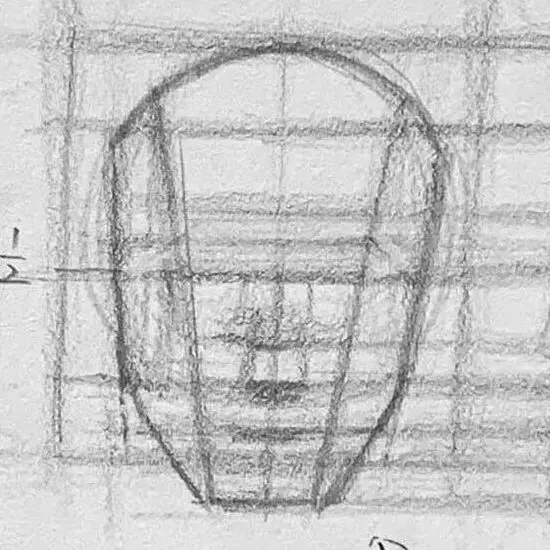
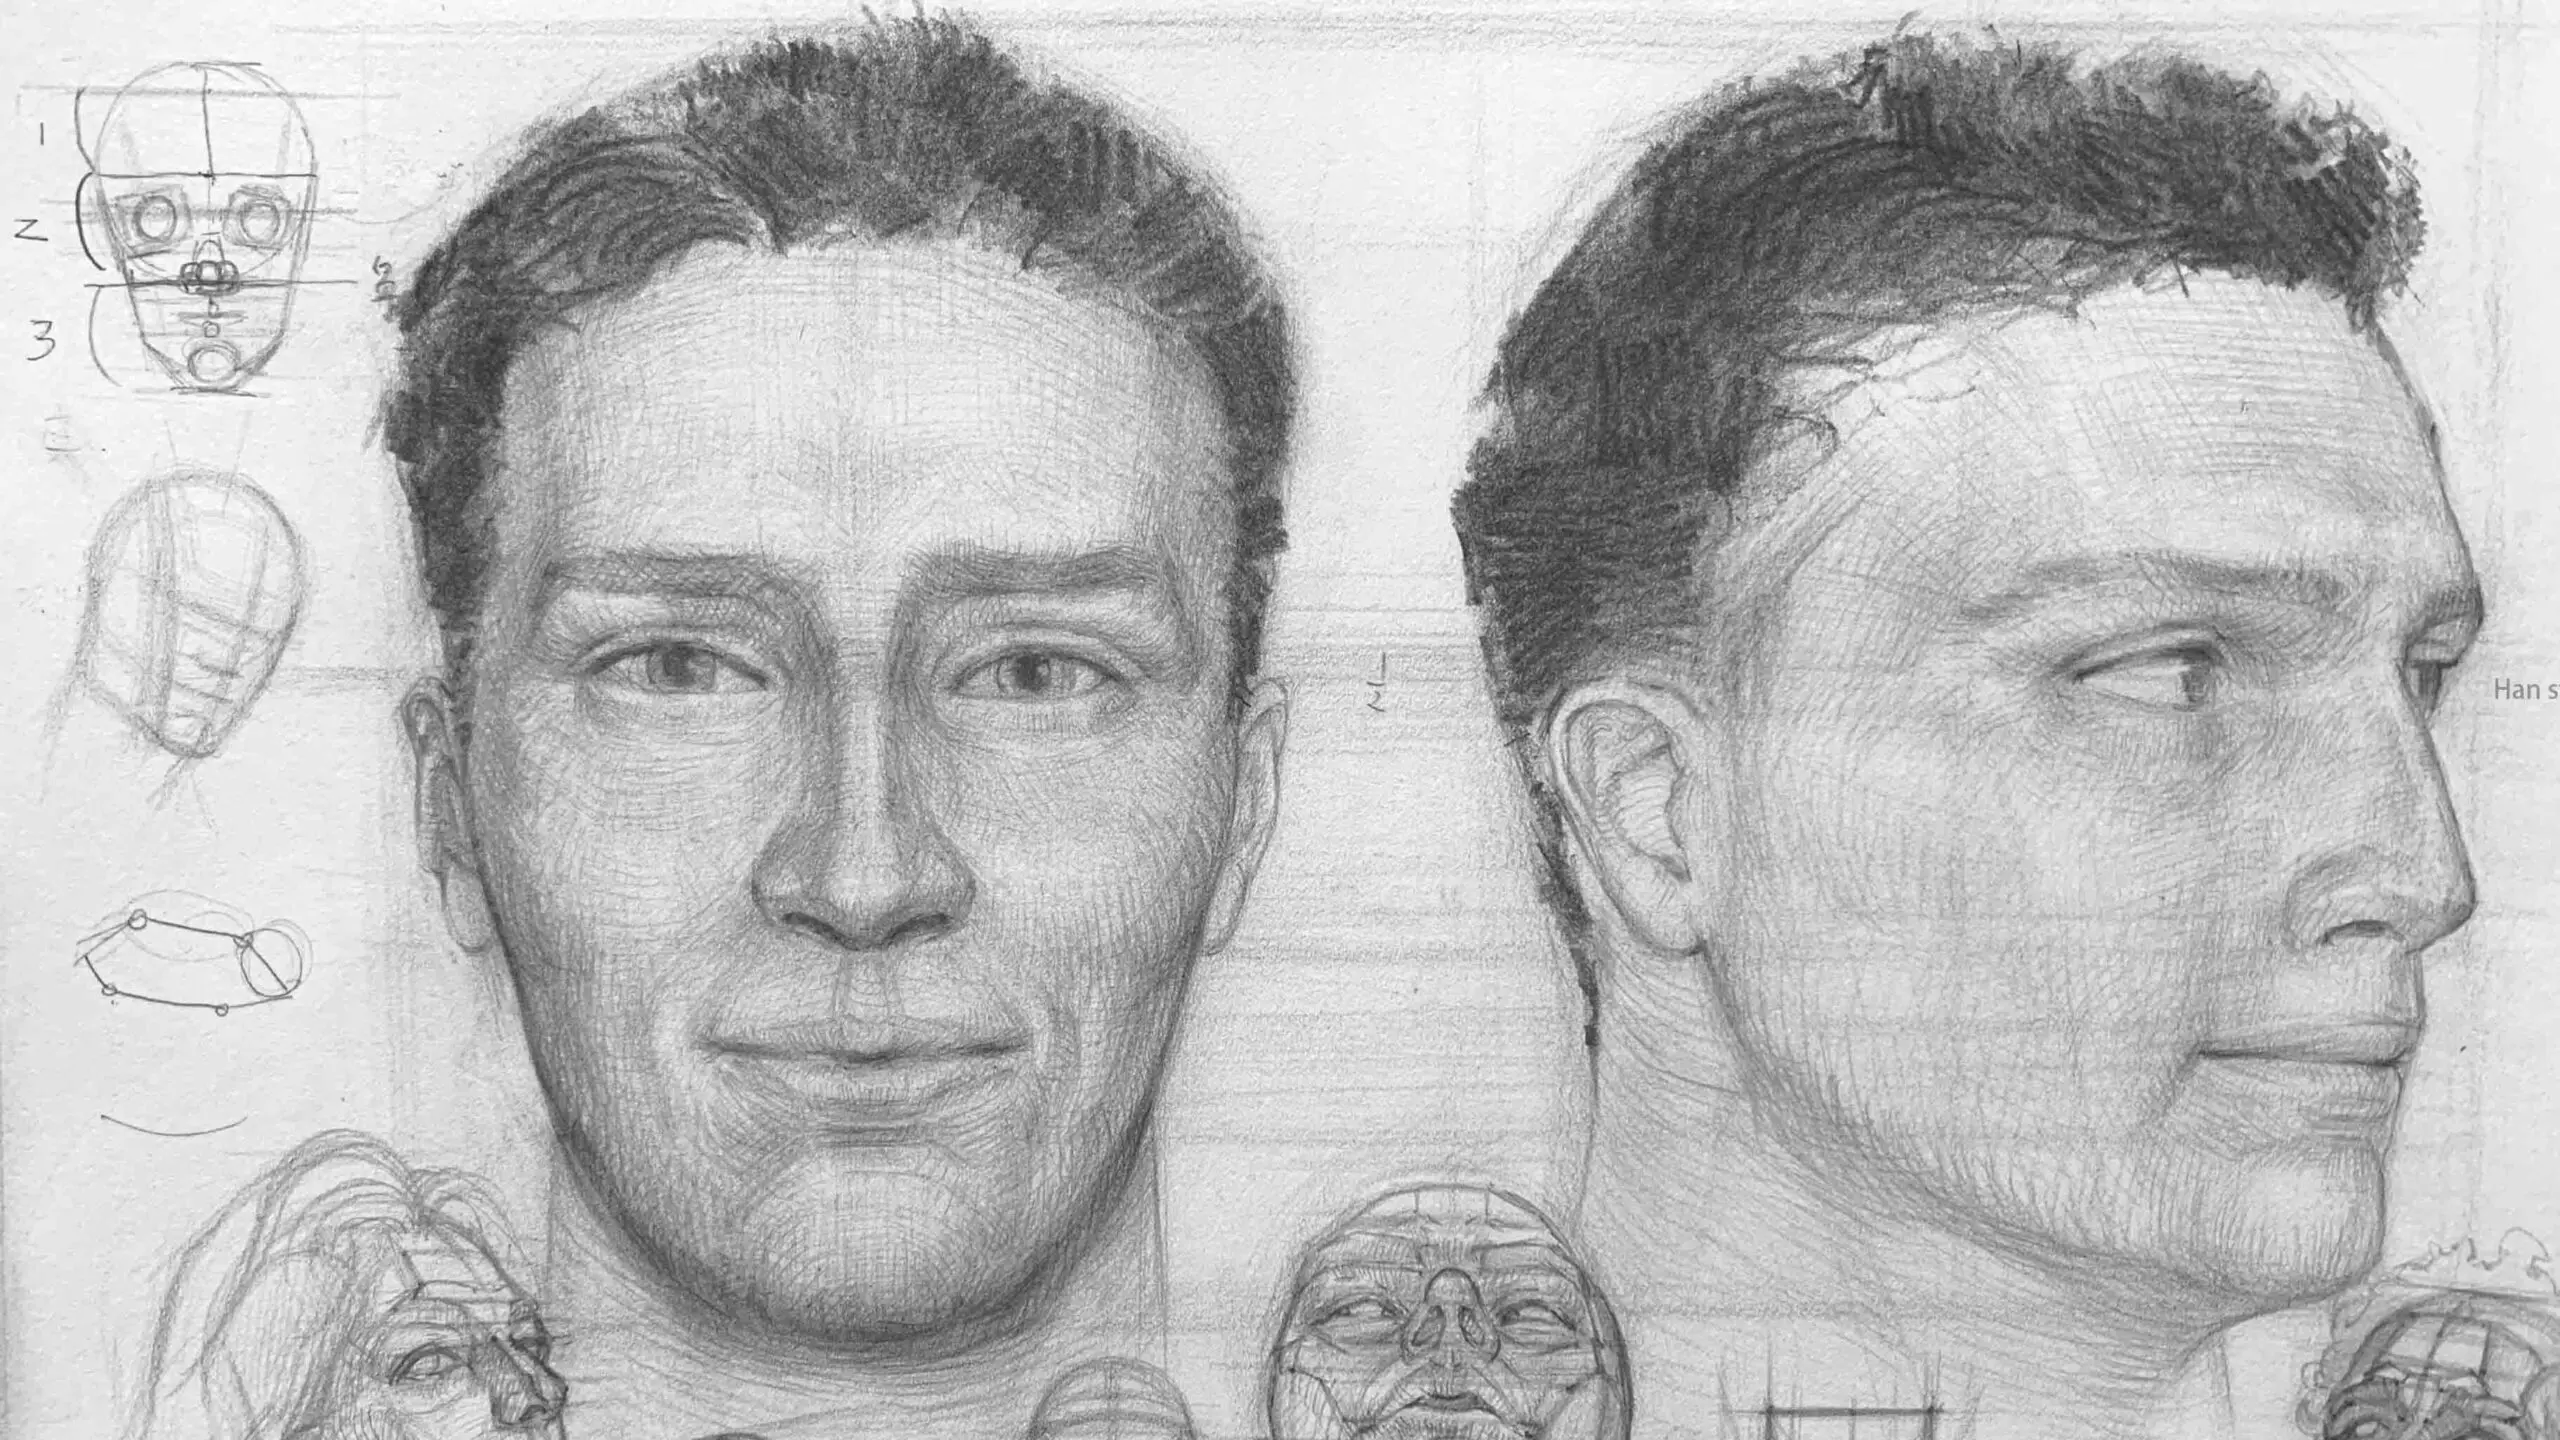
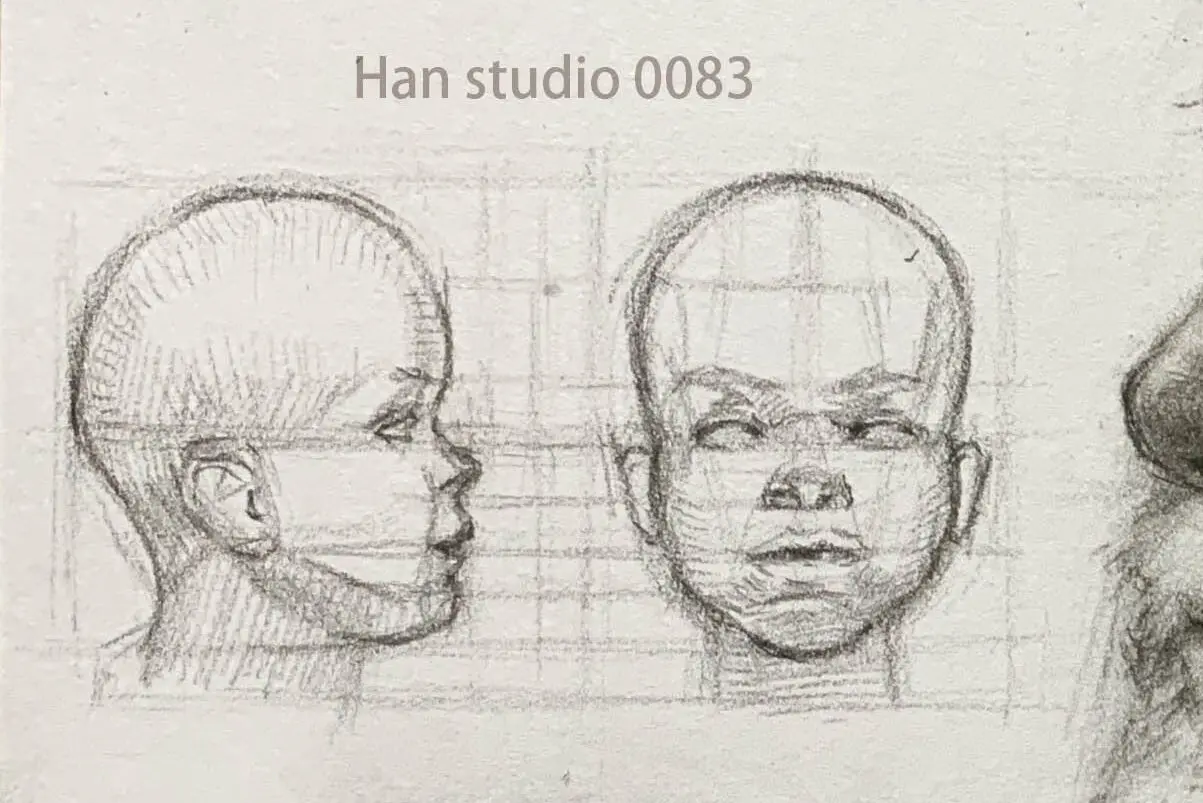
The proportions of the head can be divided into three parts:
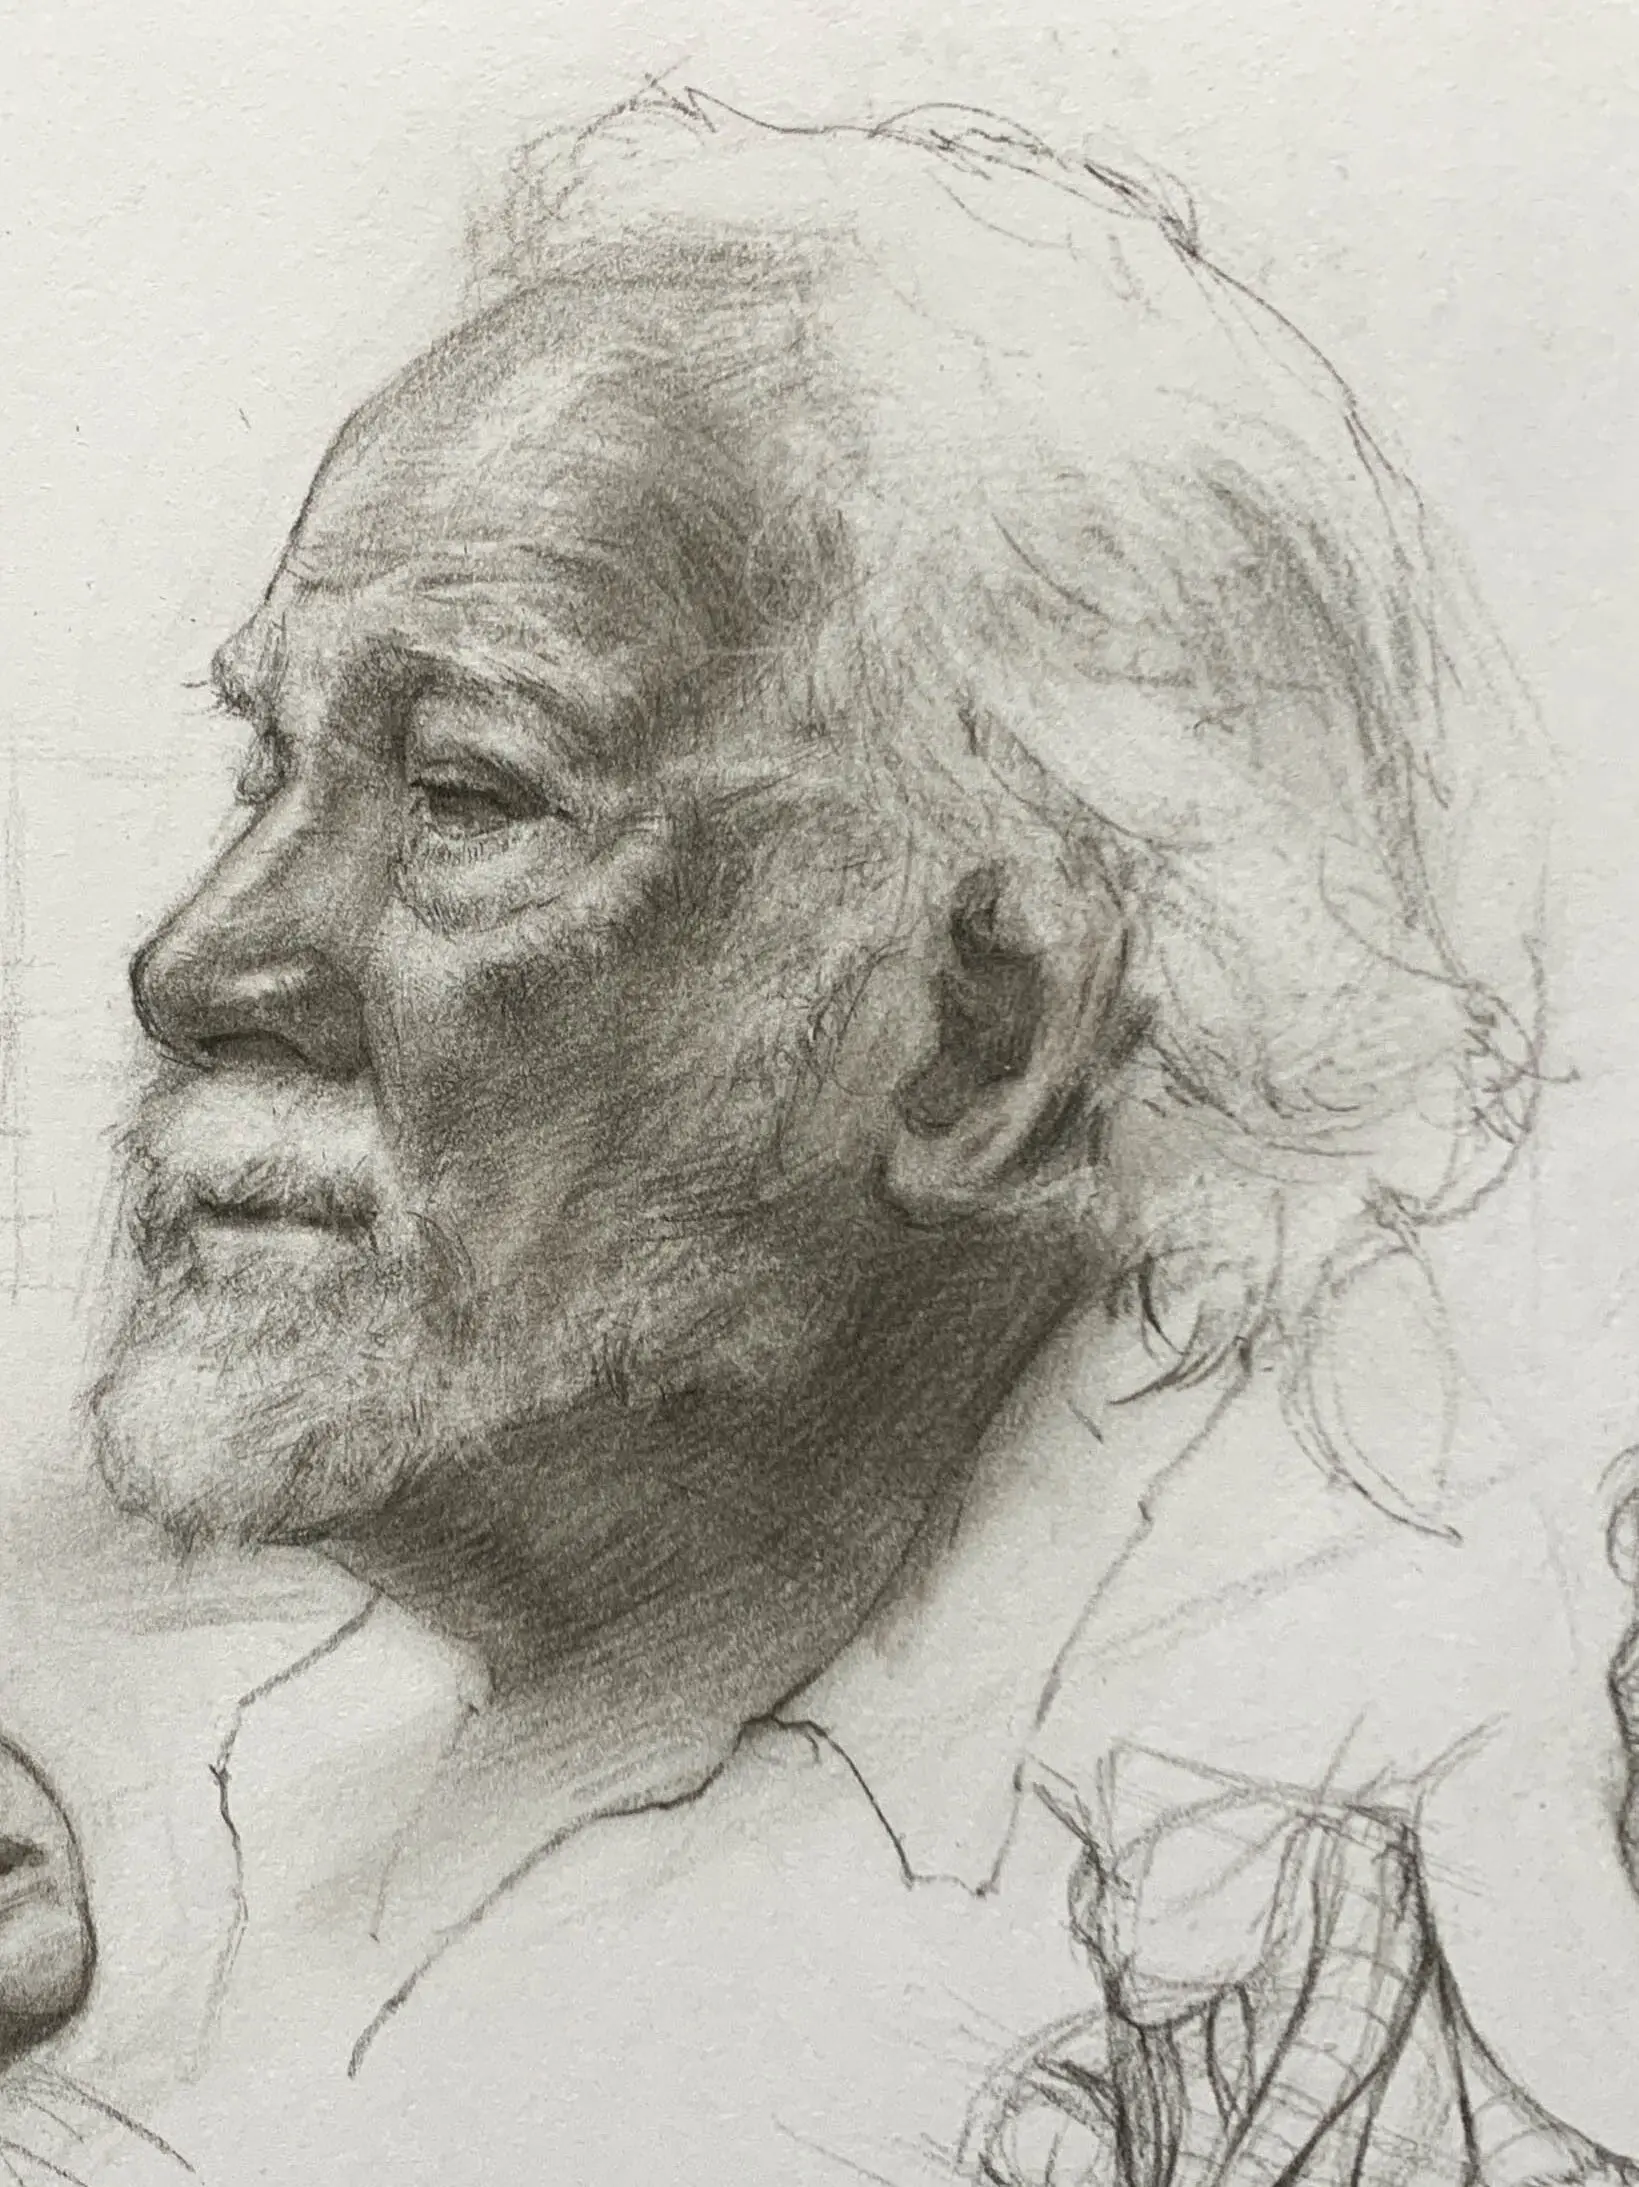
1. Hairline to the arch of the eyebrow
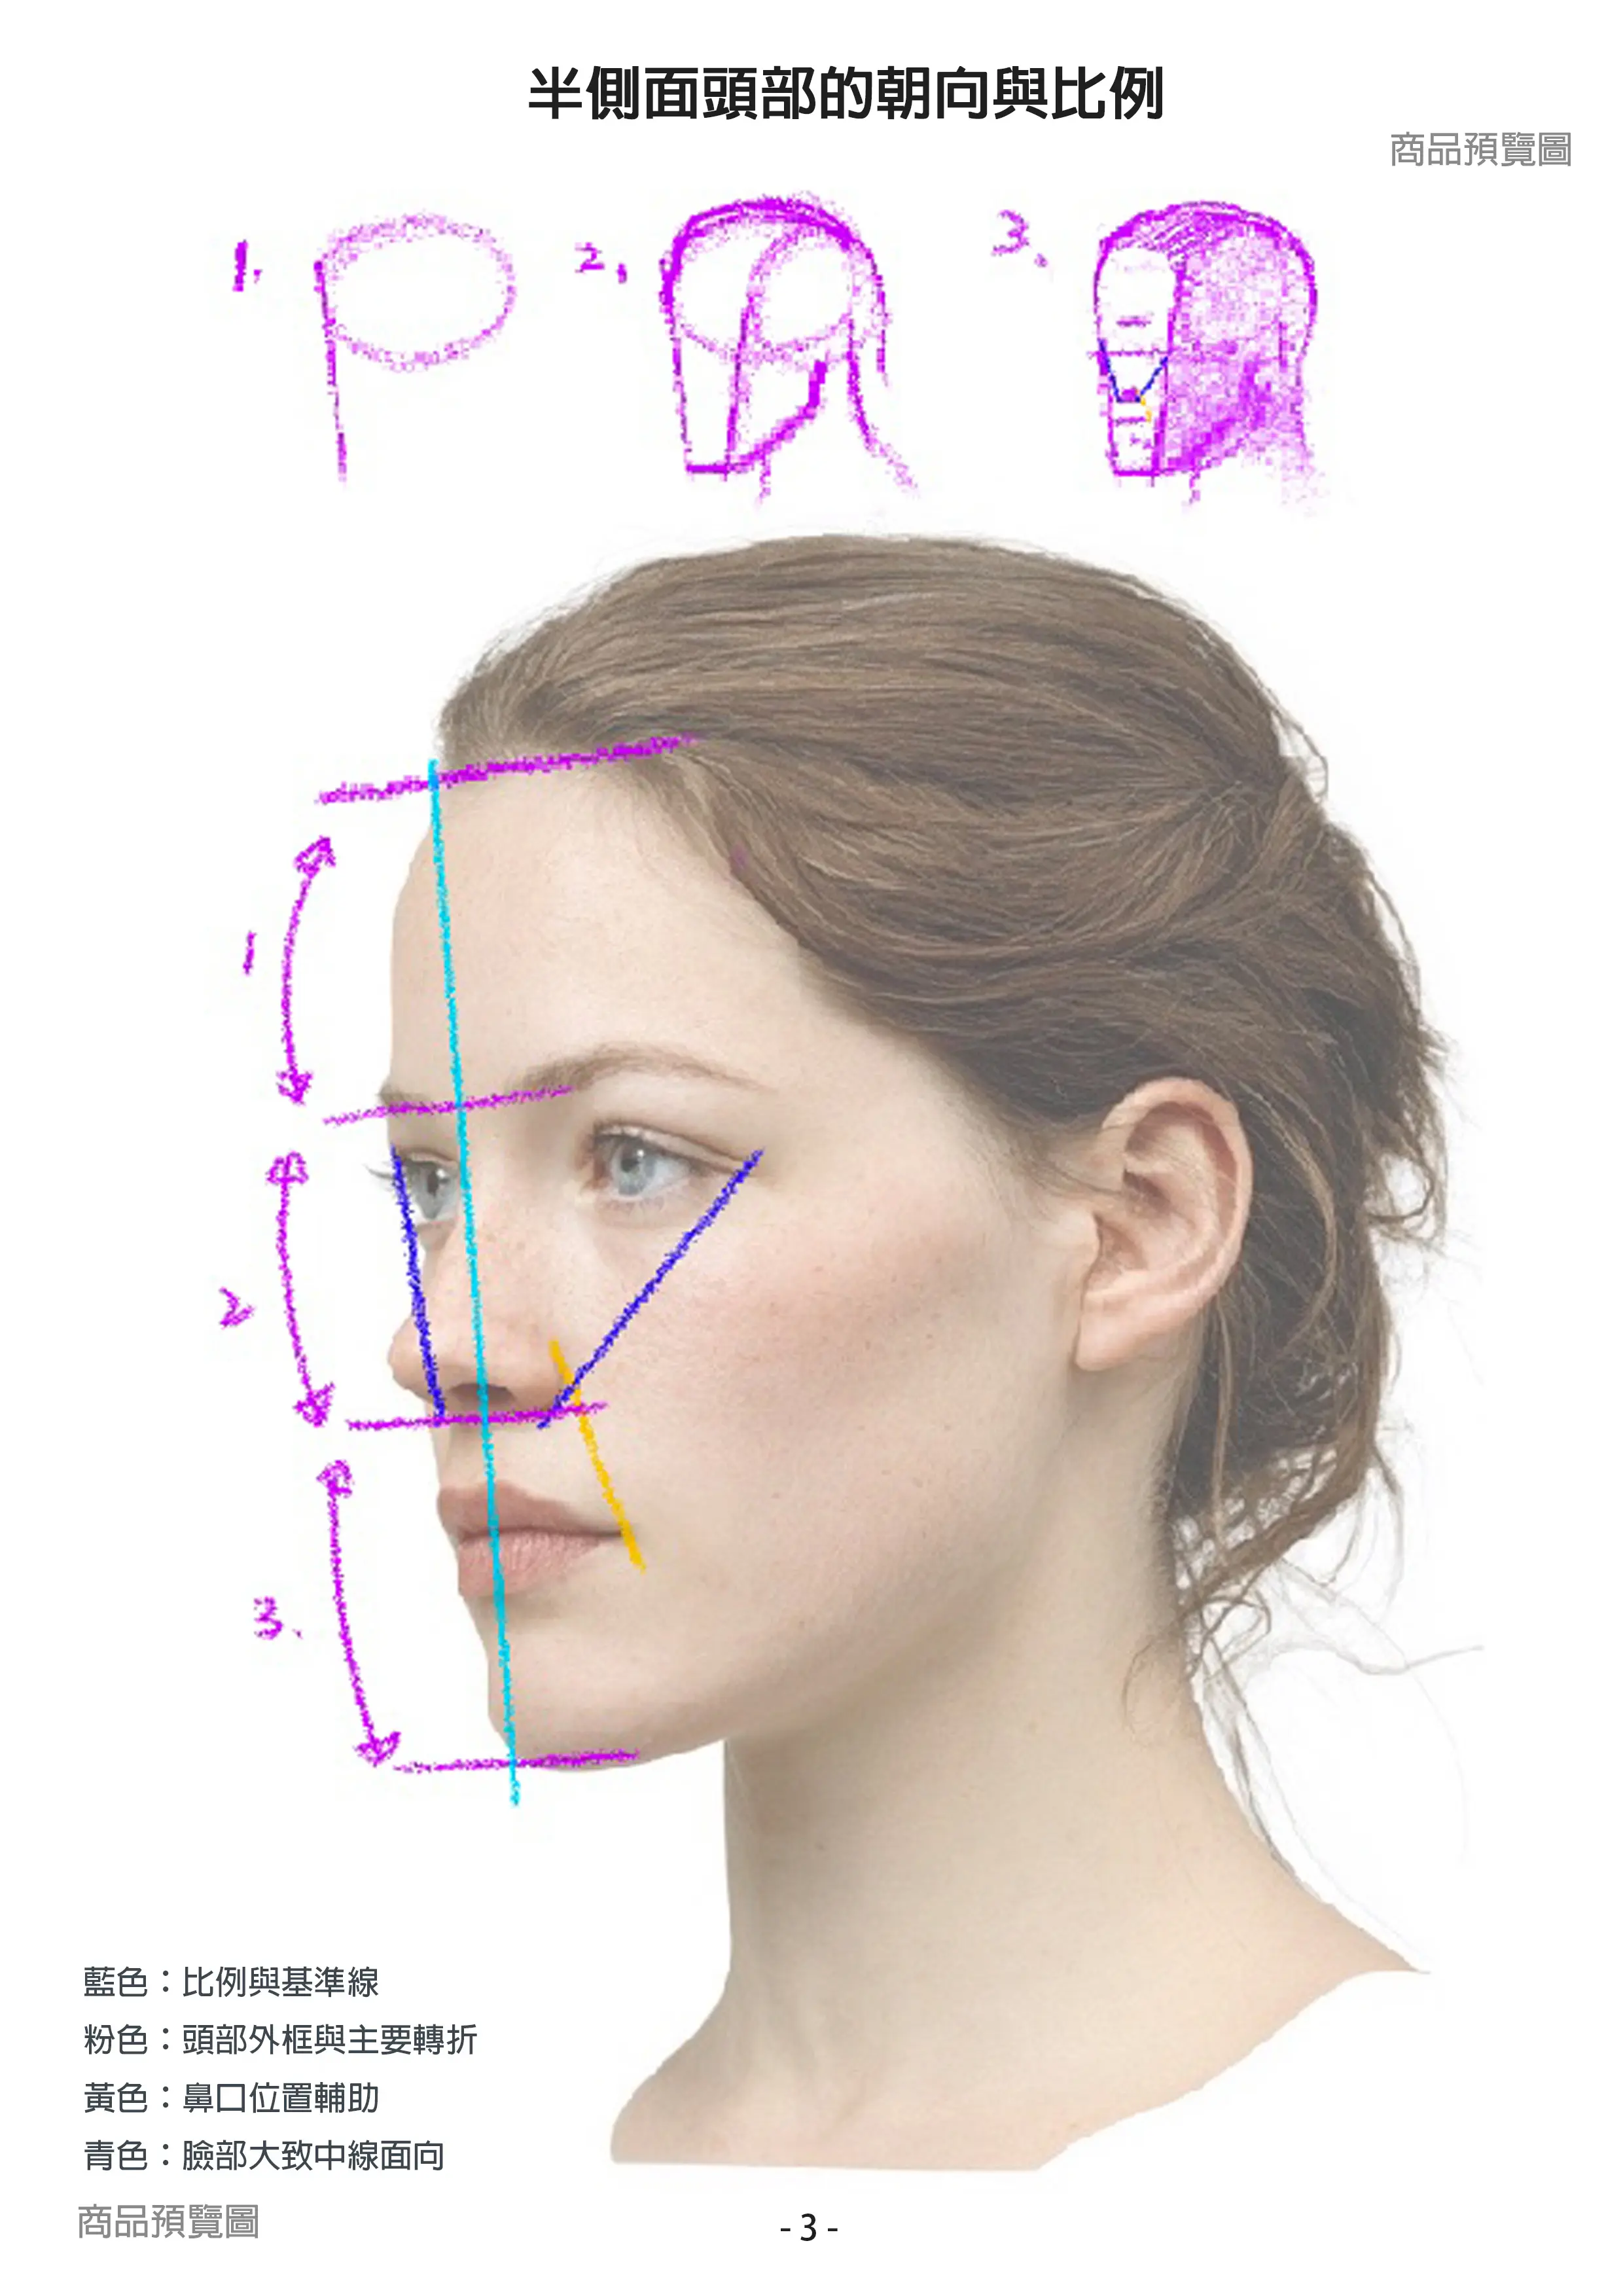
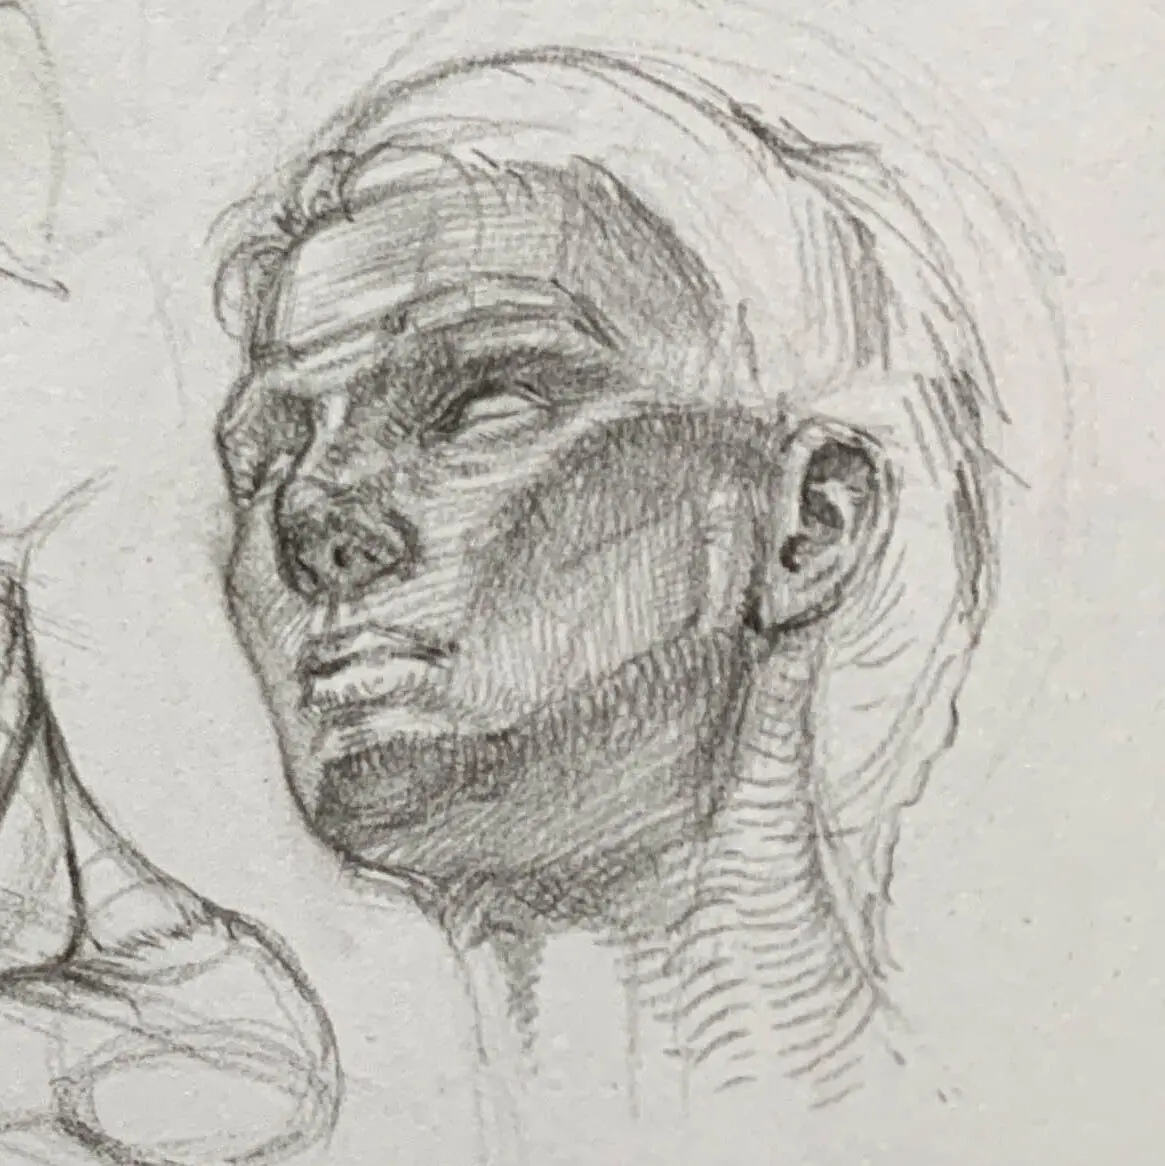
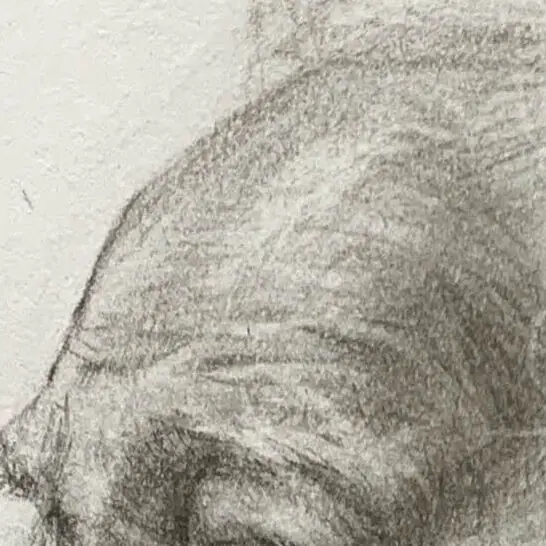
From a side angle, looking at this set of images: the hairline is not a straight line. It follows the intersection of the forehead's curve with the plane of the forehead, which is clearest when viewed from the side.
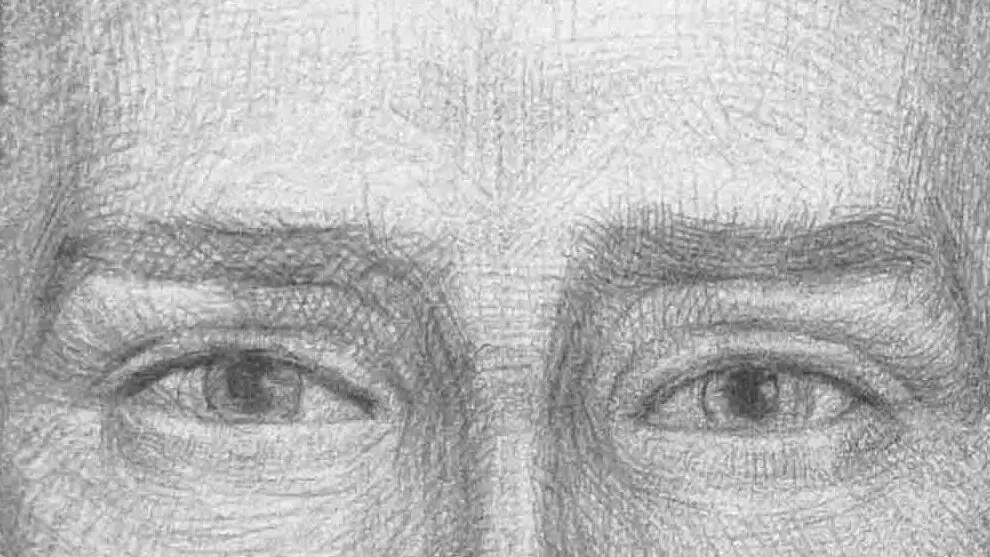
The centerline of the eye falls approximately at the height of the head 1/2 Halfway there.
Counting down from the top of the head, the first grid line is the hairline, and the second is the brow ridge. The section from the hairline to the brow ridge constitutes the first third of the face.
Look at this set of images. Note: the middle line of the grid corresponds to the eye level. The distance from the top of the head to the eyes, and from the eyes to the chin, are almost equal.
Counting down from the top, the third one isEyebrow Arch Connection
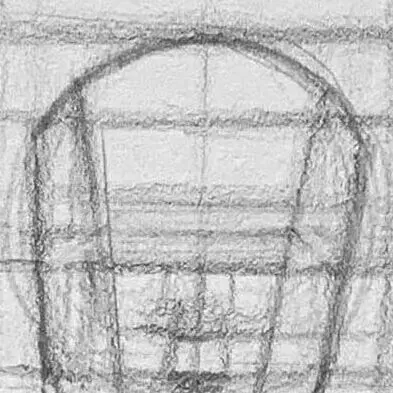
2. Arch of the eyebrow to the lower edge of the nose
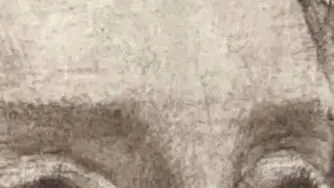
This section is the middle third of the face, and it's also the area with the densest concentration of facial features.
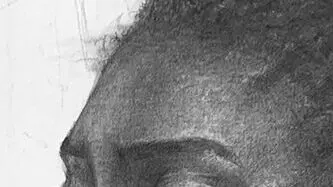
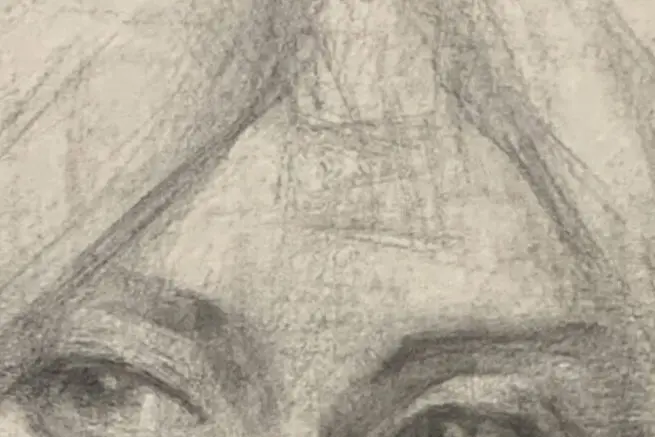
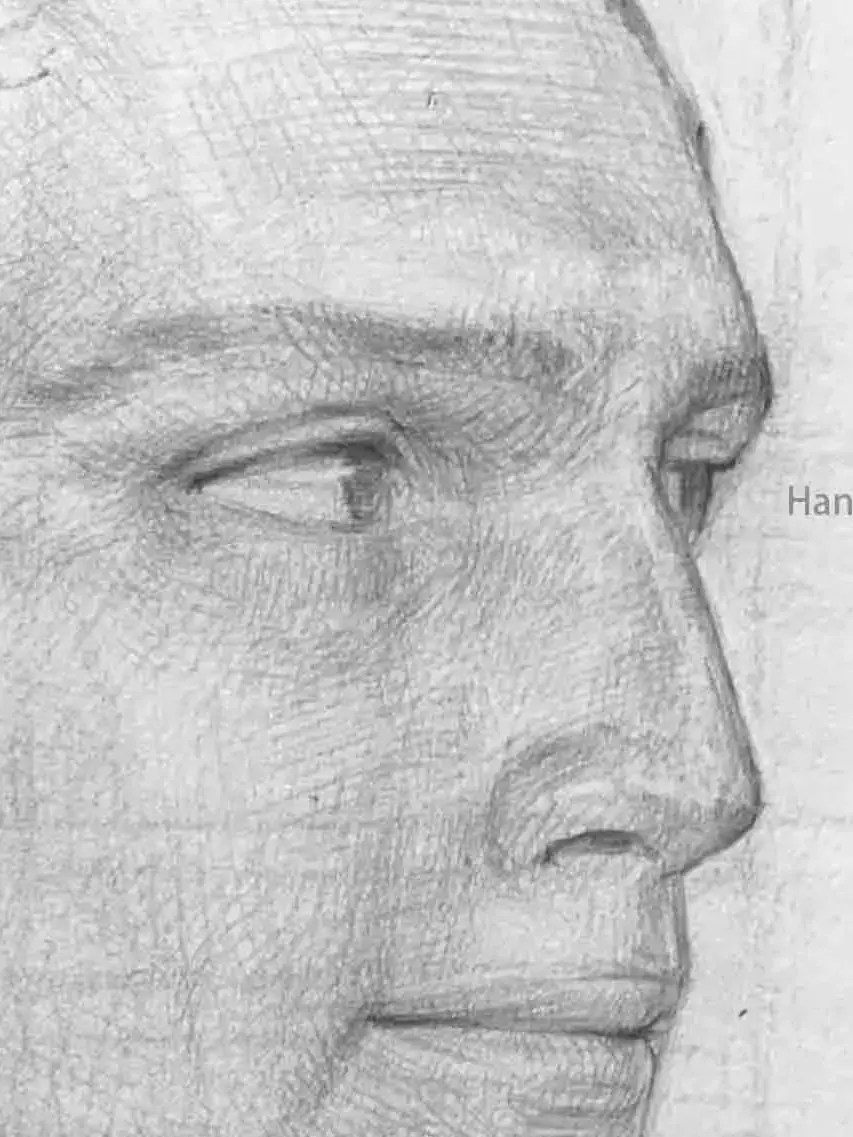
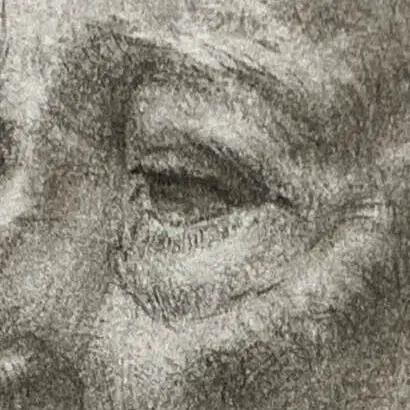
The brow ridge is part of the frontal bone. Viewed from the front, it's simply the bony contour above the eyes, but from the side, it's clearly visible how it protrudes significantly in front of the bridge of the nose. This front-to-back undulation is key to rendering the three-dimensionality of the face.
Eyebrow Arch Position. The bony elevation above the eye socket, thePart of the frontal bone。
On the side, you can clearly see how it crosses from the forehead into the eye sockets.
This set of diagrams compares the grid line positions from the front and side views: the brow ridge corresponds to the first line, the lower edge of the nose corresponds to the second line, and the area between these two lines is the range for this section.
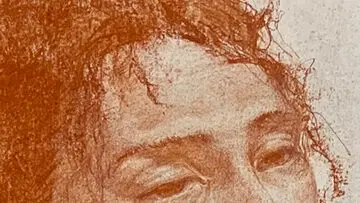
Look at this set of front and side profile comparison photos. Note: When viewed from the front, the brow ridge and the bridge of the nose are almost on the same plane, but in the side profile, the brow ridge is clearly protruding forward, and the bridge of the nose is receding. If a side profile of a face feels flat, it's usually because this front-to-back difference has been missed.
3. Subnasal fringe to chin
The last third, from the underside of the nose to the chin, should be similar in length to the first two segments.
This common problem is that the drawing is too short proportionally, making the whole face look like an old person or a child's proportions.
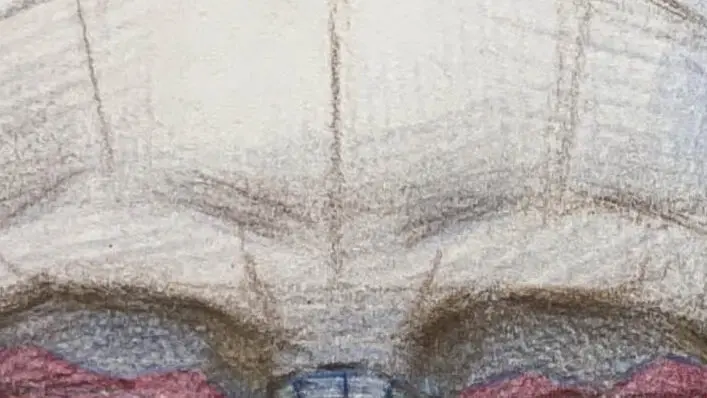
In the front view on the left, note that the thicker marked line indicates the position of the lower edge of the nose.
Compared to the right side view, the position of the lower edge of the nose in relation to the overall face shape can be confirmed.
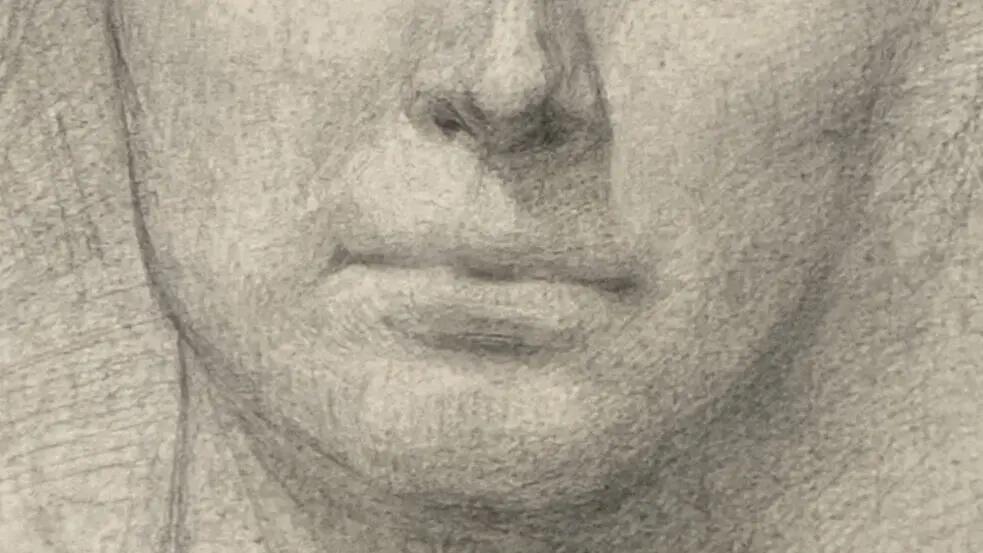
The large image below is an actual sketching demonstration: Observe the space from the nose to the chin. The lips are not in the middle of this section, but rather about 1/3 of the way up. The chin takes up a larger proportion of this space.
● Distribution of the five senses:
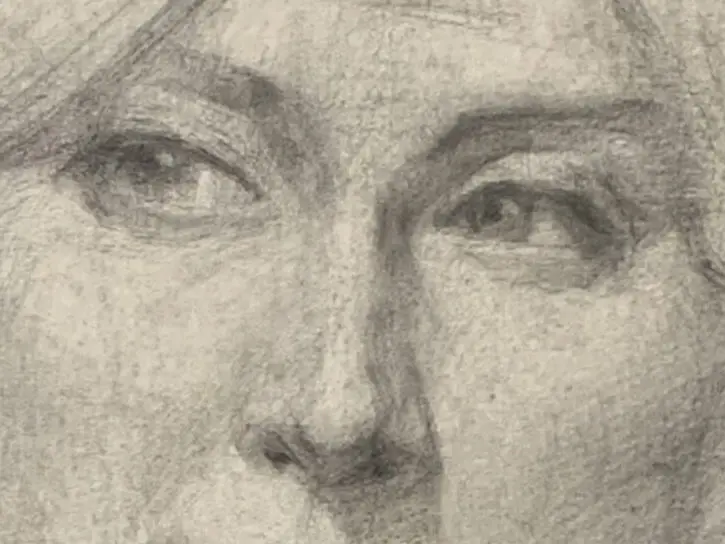
eyes: Located at the horizontal midline of the overall head height (1/2).
Nose width: Usually about the same as aroundinner corner of the eyeDistance.
corner of the mouth: Approximately align the pupil with the vertical line of the pupil.
For a deeper understanding of the three-dimensional origin of the five senses, it is recommended to read the structure of each part (eyes, nose, mouth, ears) in separate chapters.
Reading here, you should have a basic concept of head structure.
But there is still a gap between "understanding" and "drawing it."
Many people are in a situation where they know about trisecting an angle but don't know where to draw the lines when they actually start. They know they should use geometric simplification, but they get things wrong when they change perspectives. This period of trial and error usually takes a very long time if you rely on yourself.
Human Figure Drawing Structure Textbook: Multi-angle Head Analysis It was designed to make up for this gap.
The content doesn't just explain theory; it provides practical exercises: First, understand proportions and orientation with color analysis diagrams, then follow the gray drafts to practice surface turns from various angles. Front, semi-profile, and upward angles are included, with practice tips highlighted on each page.
If you finish reading this today and are still unsure about "the order of writing," this practice draft is for you.
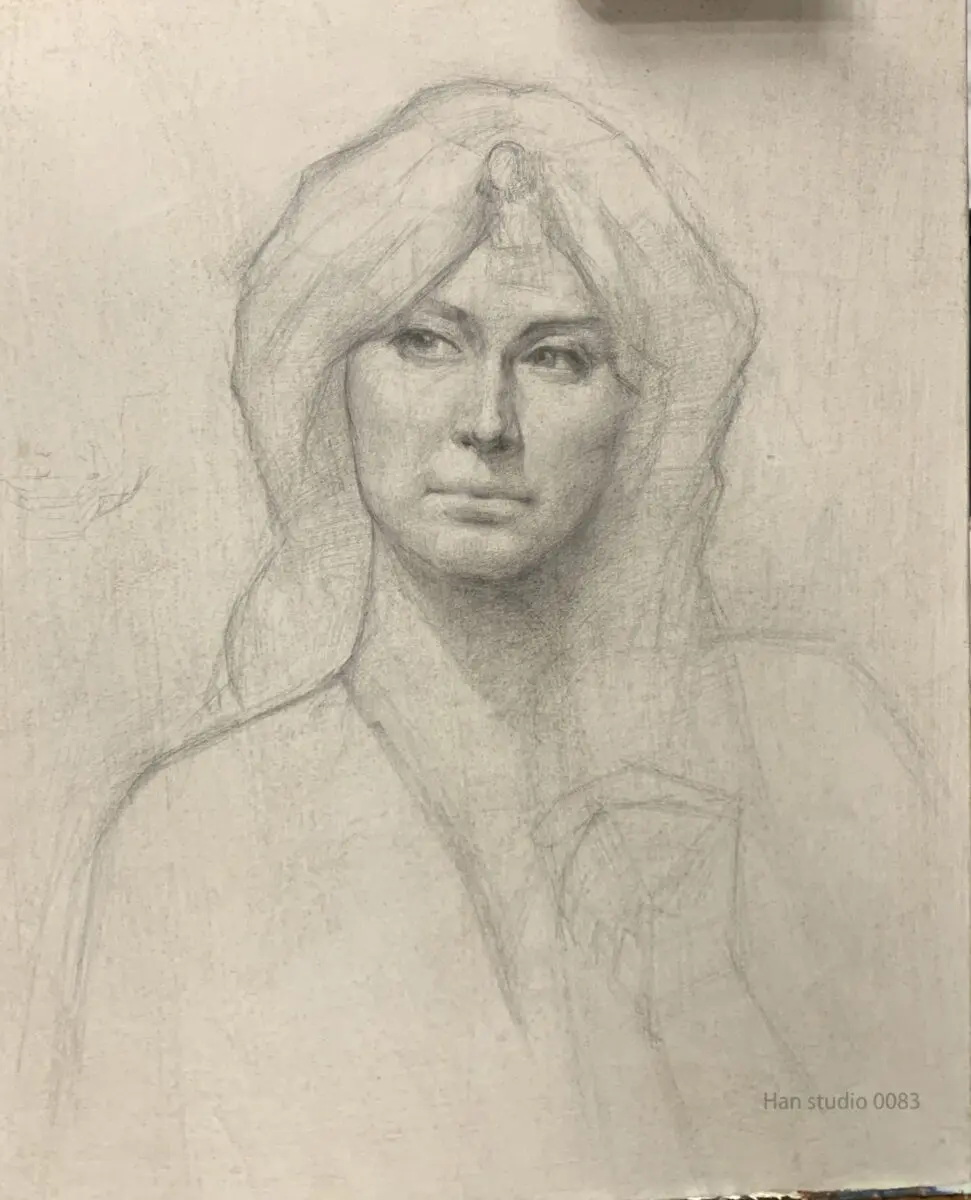
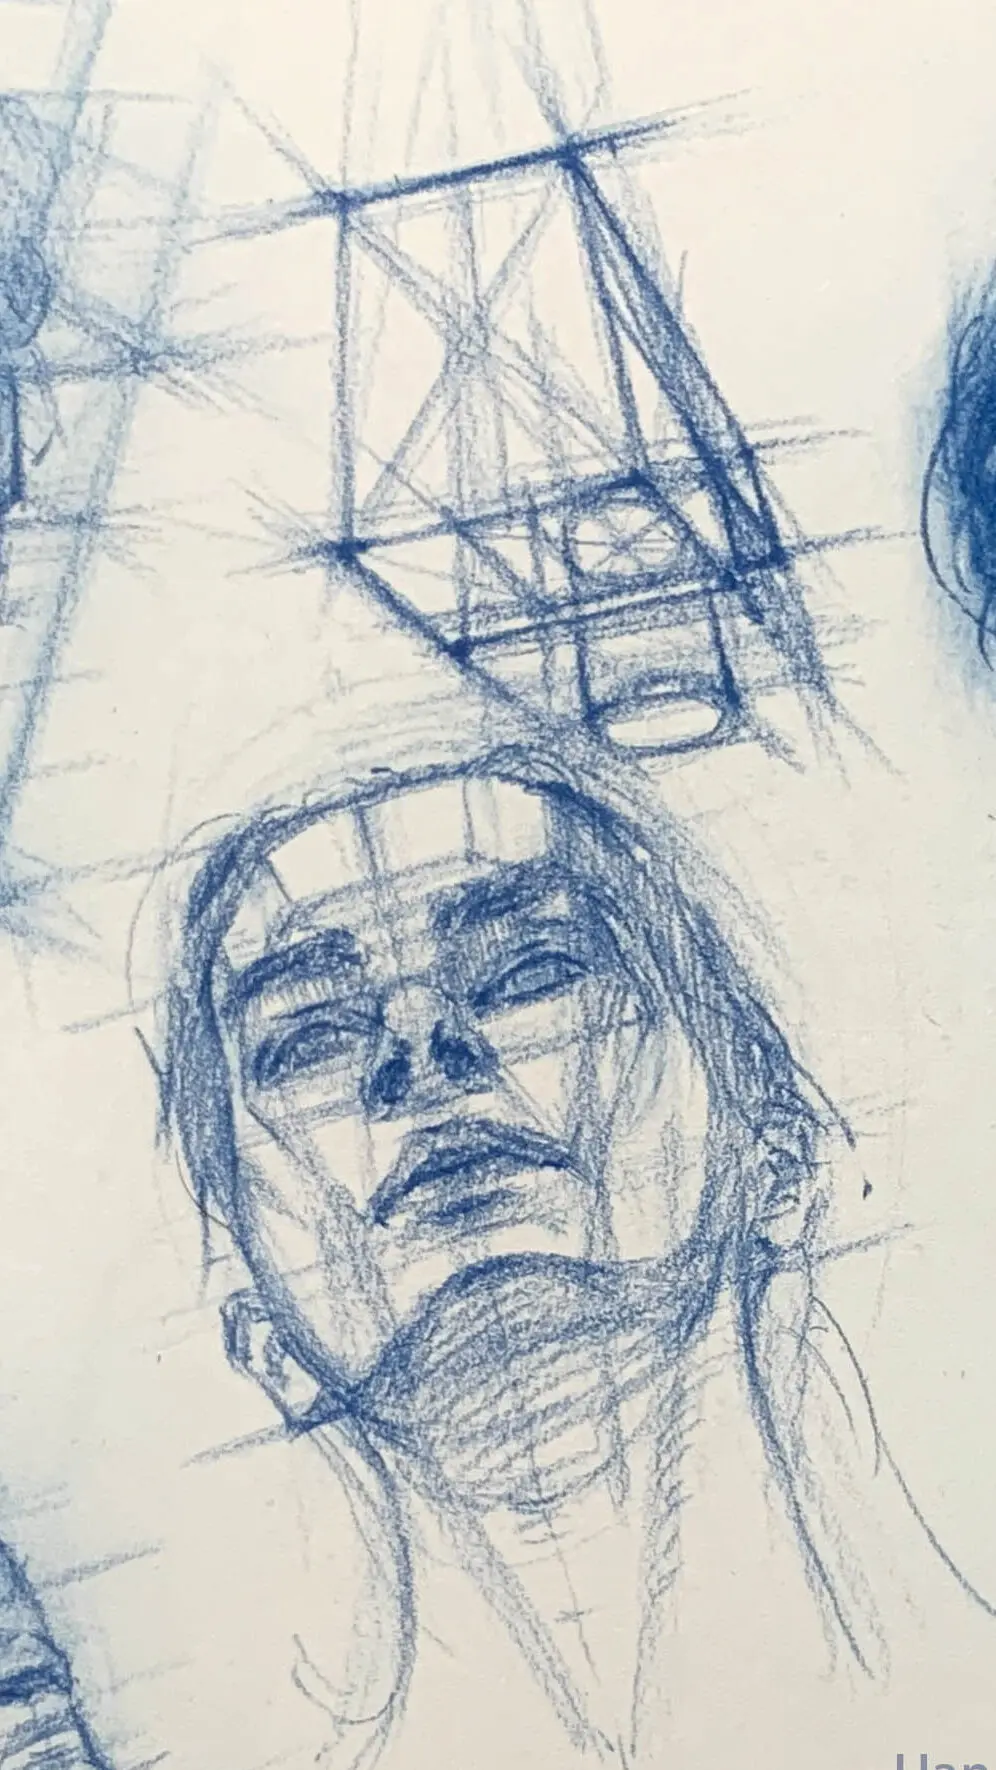
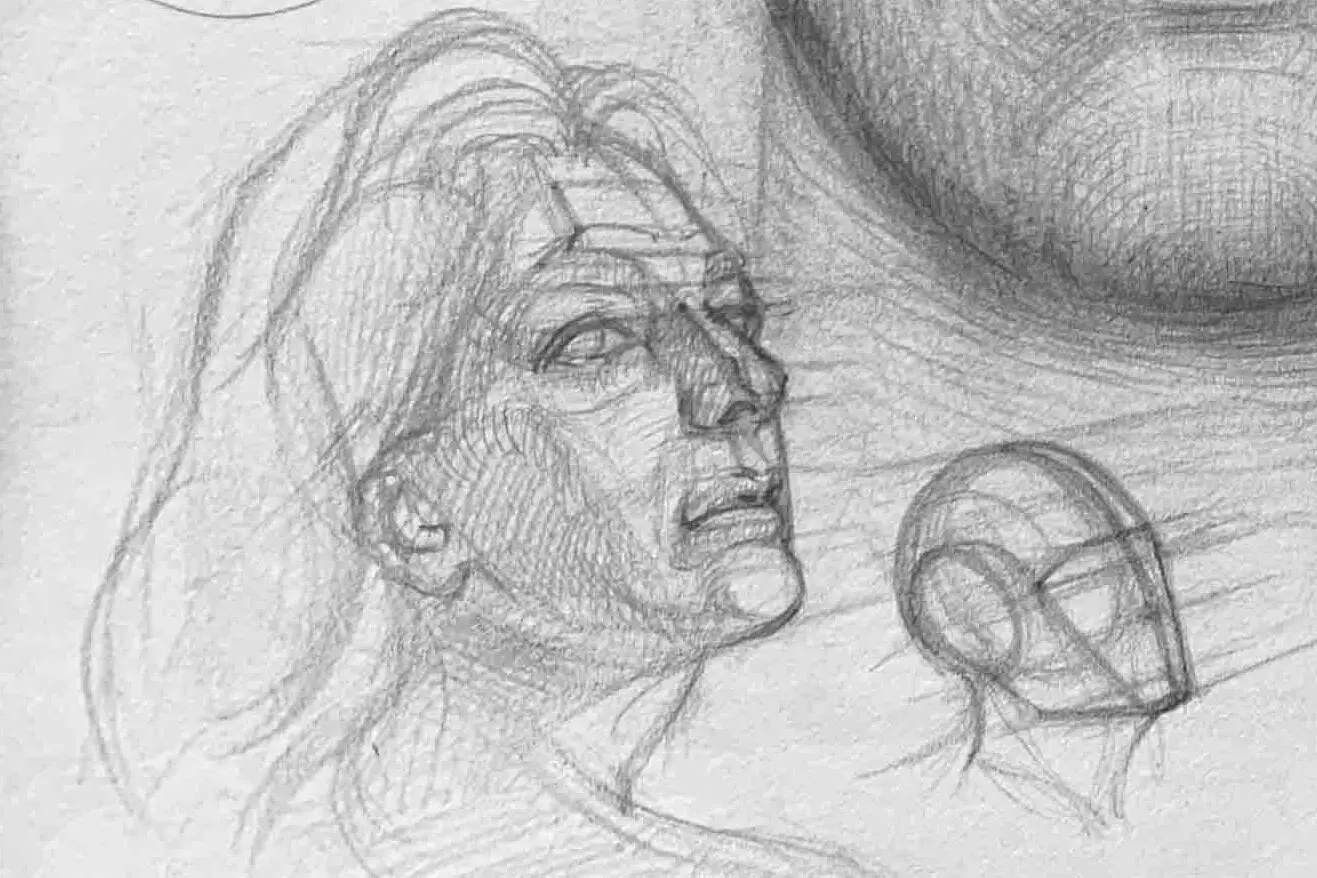
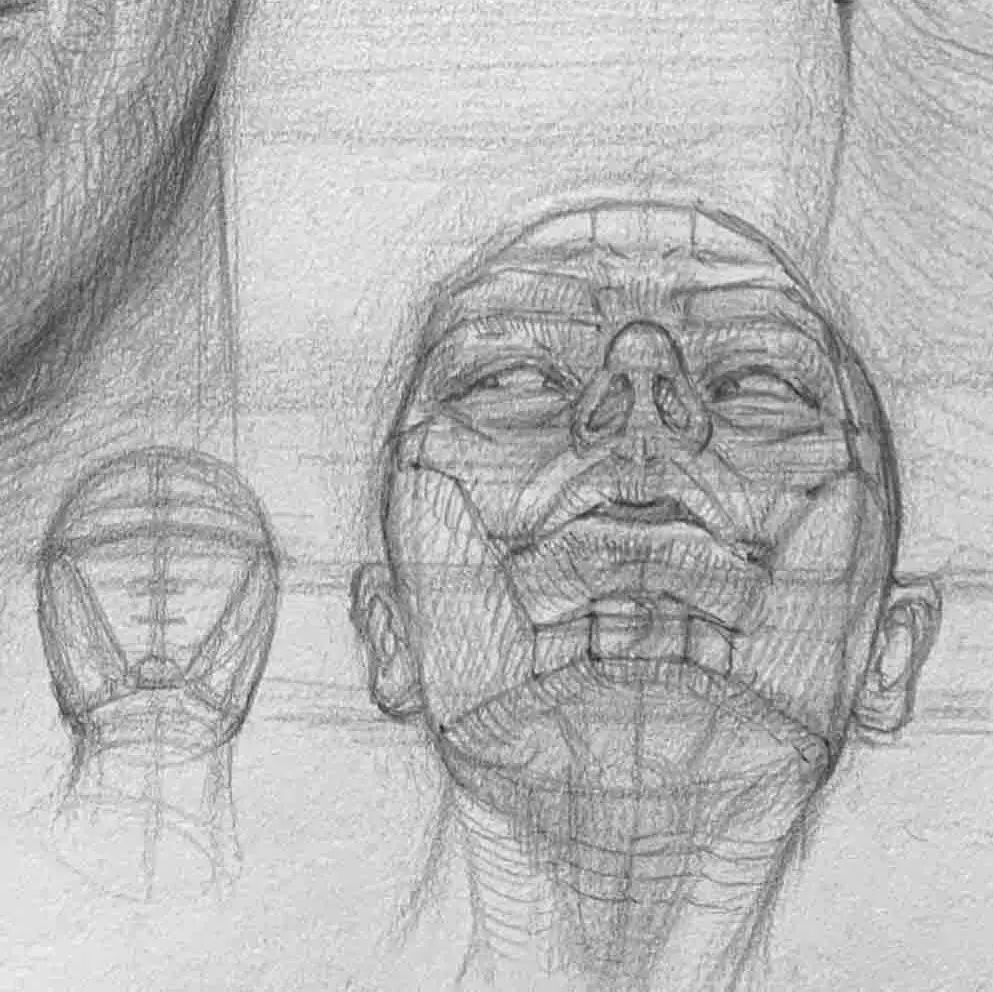
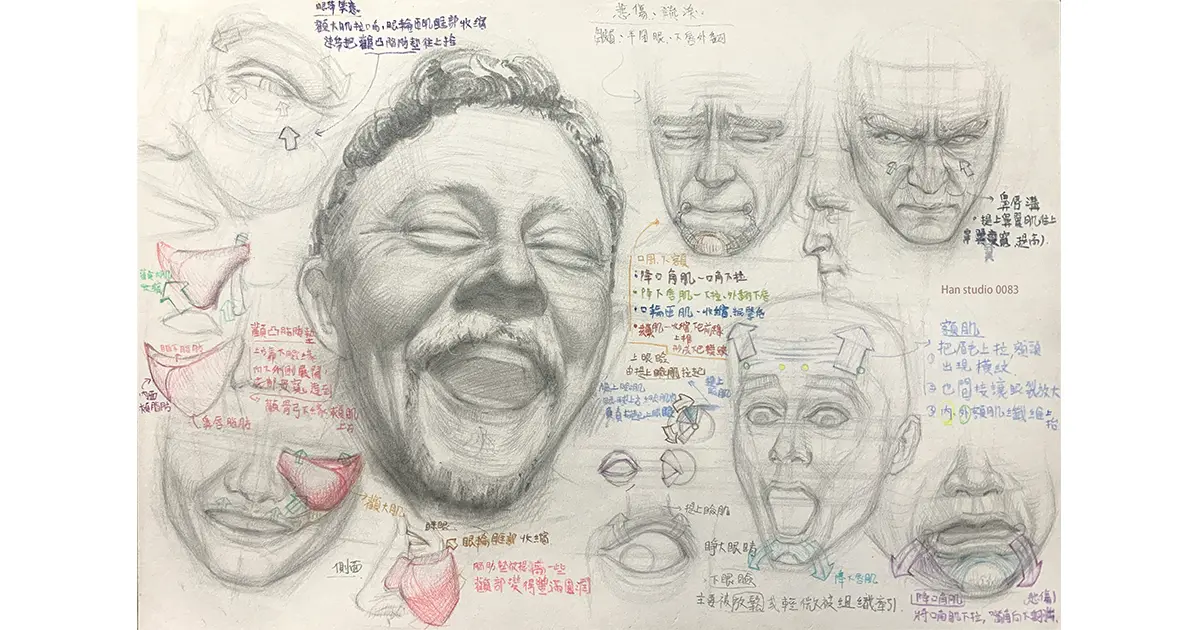
Please refer to the structural lines on the face to help us understand the changes in face transitions.Structural point markings on the face help us to understand the undulating shape of the face, and the position of turning points.
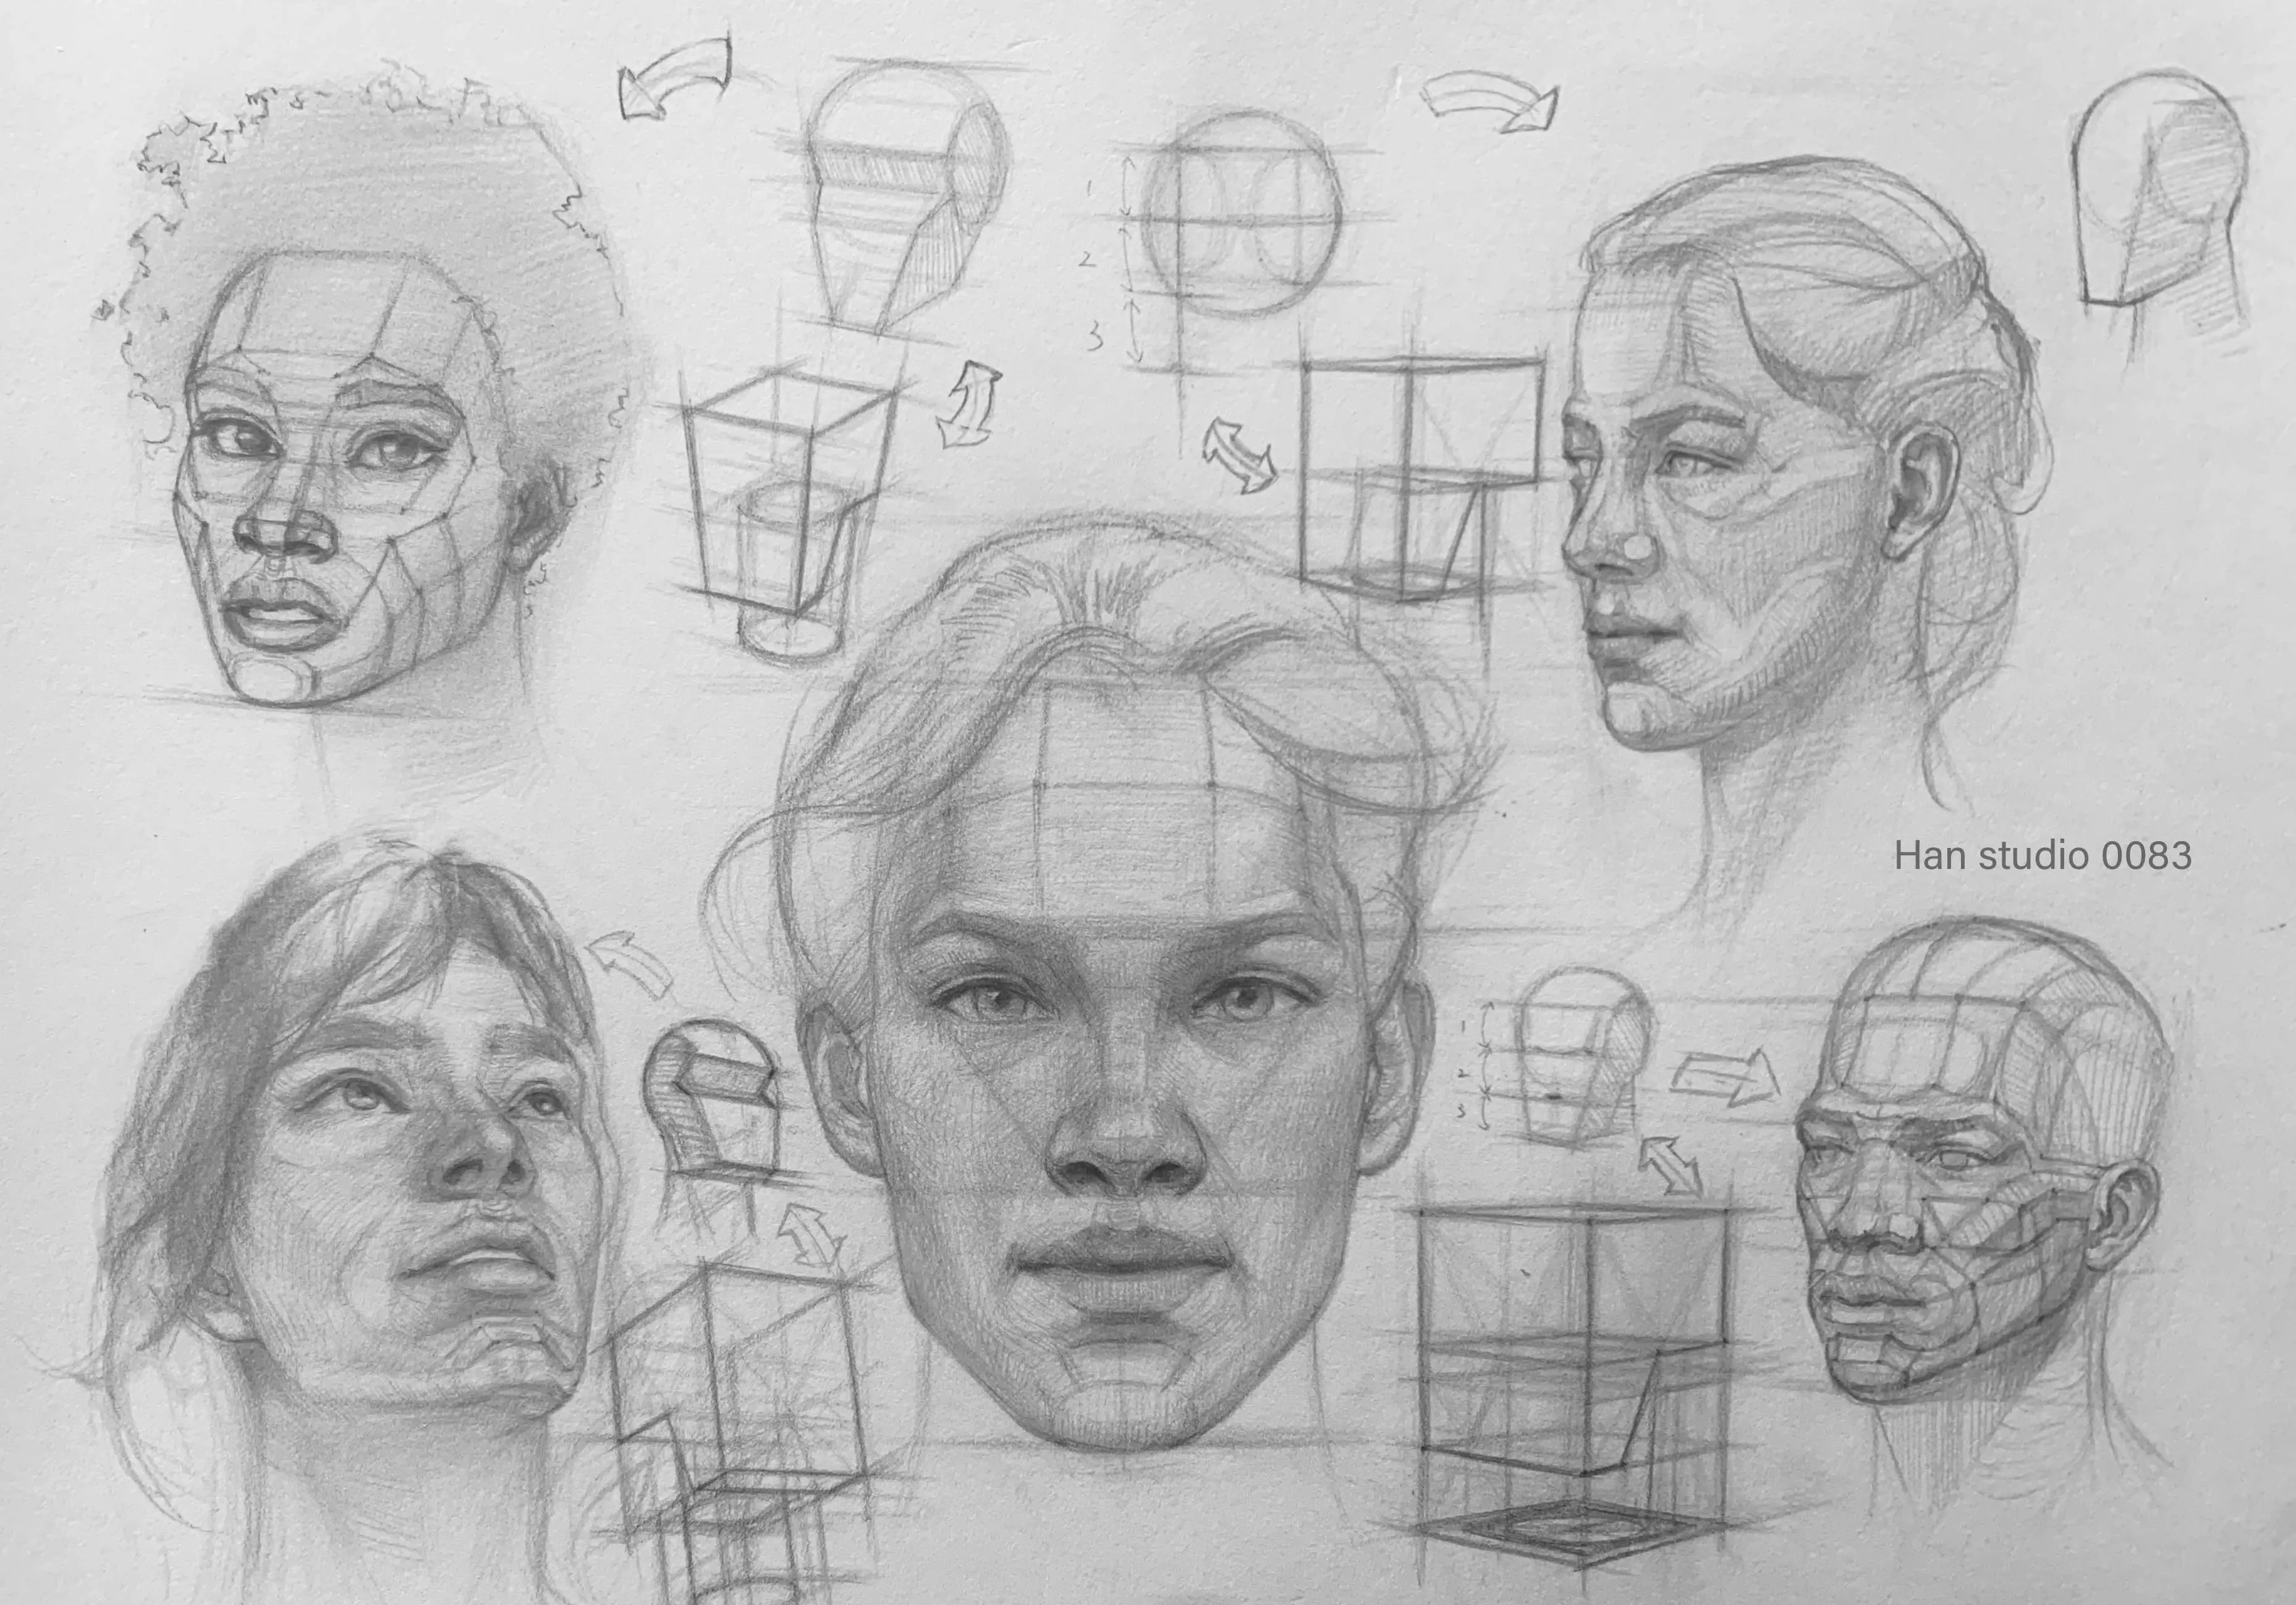
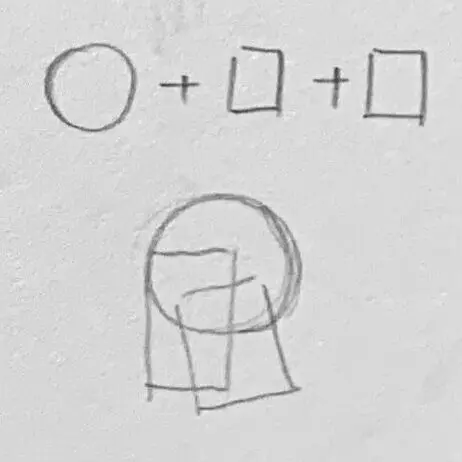
How to start an avatar? (geometric simplification)
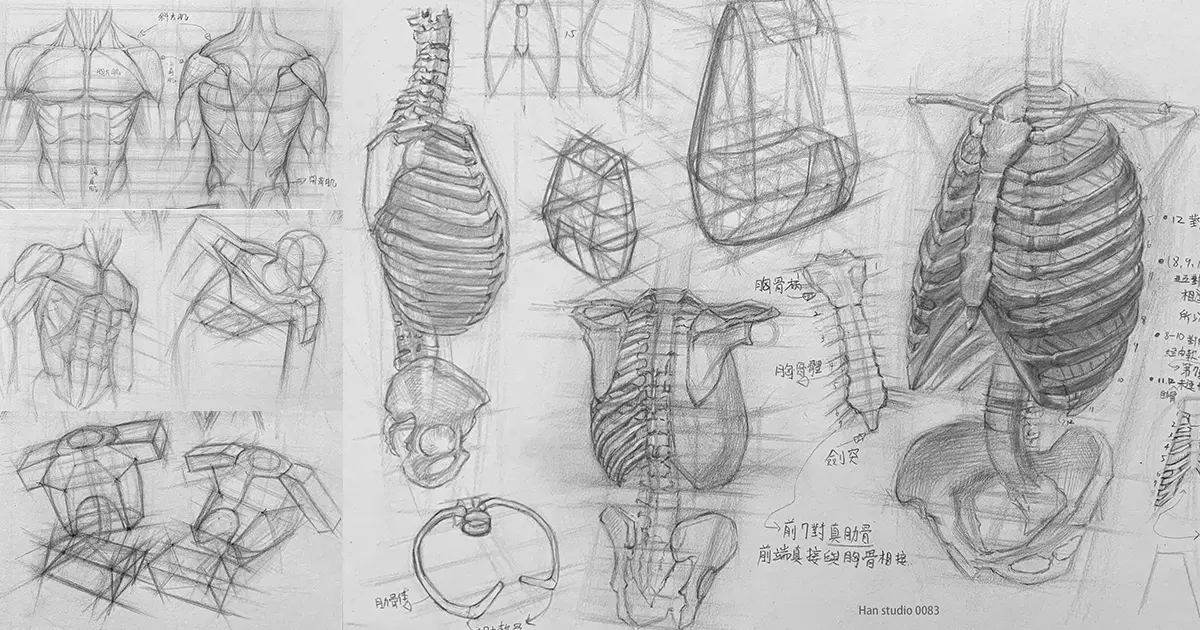
The head can be broken down into geometries such as spheres (skull), rectangles, and cylinders (face and neck).
Understanding the basic structure of the head helps in understanding and depicting the pose and angle of the head.
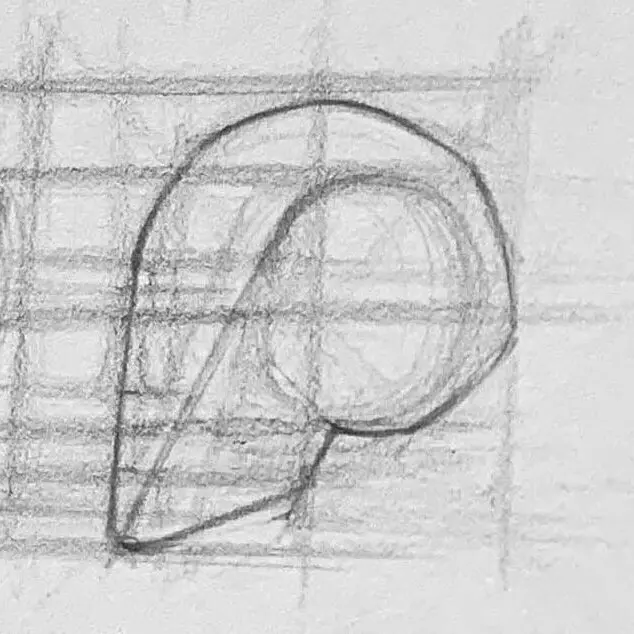
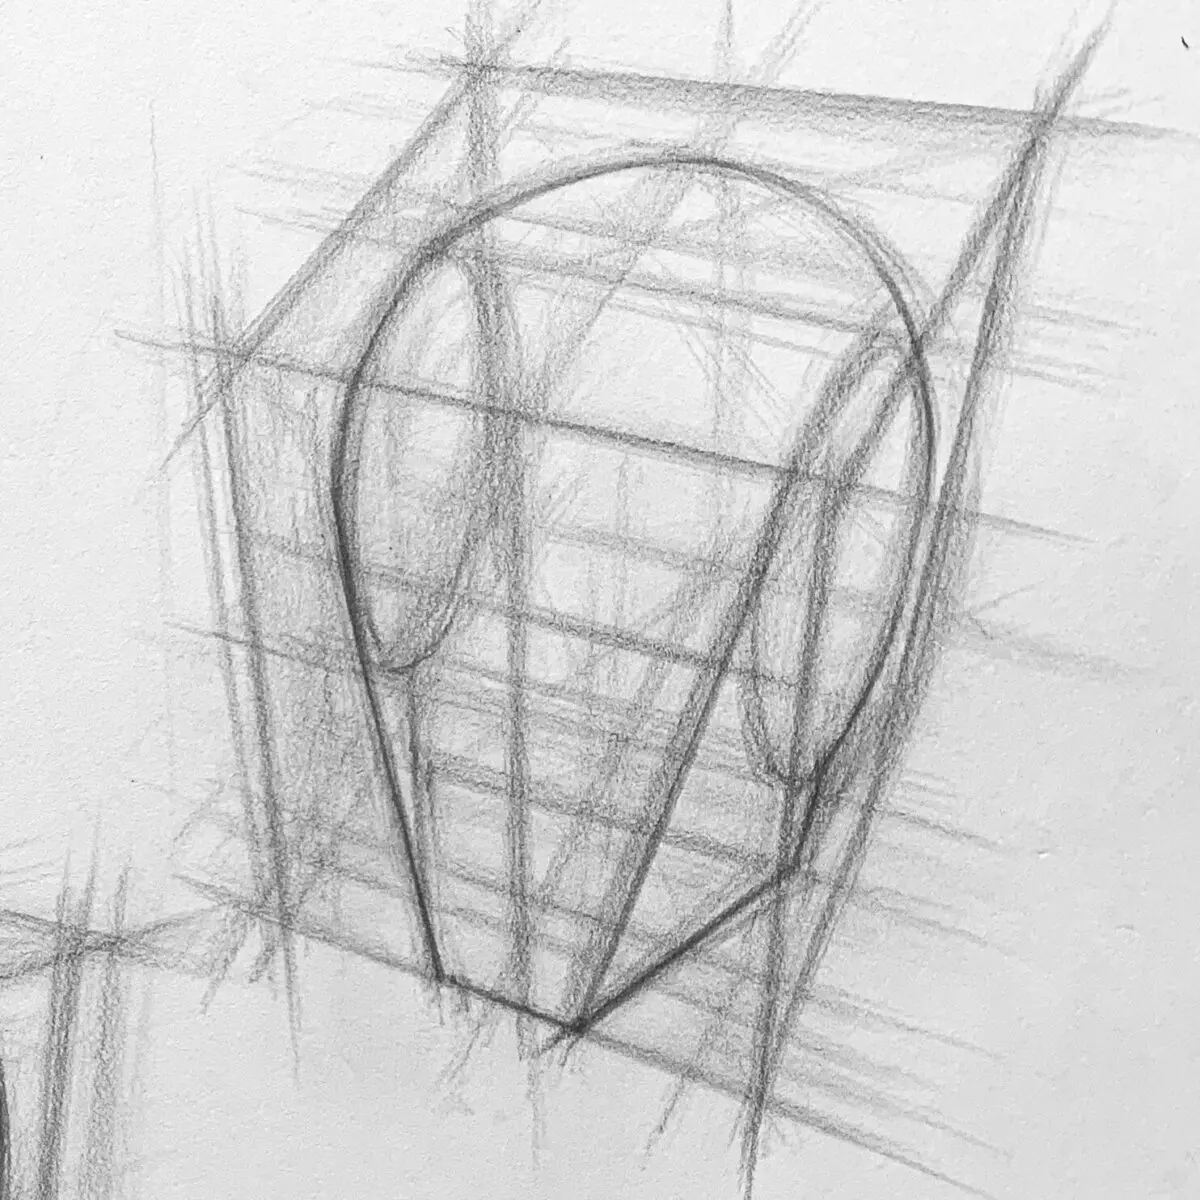
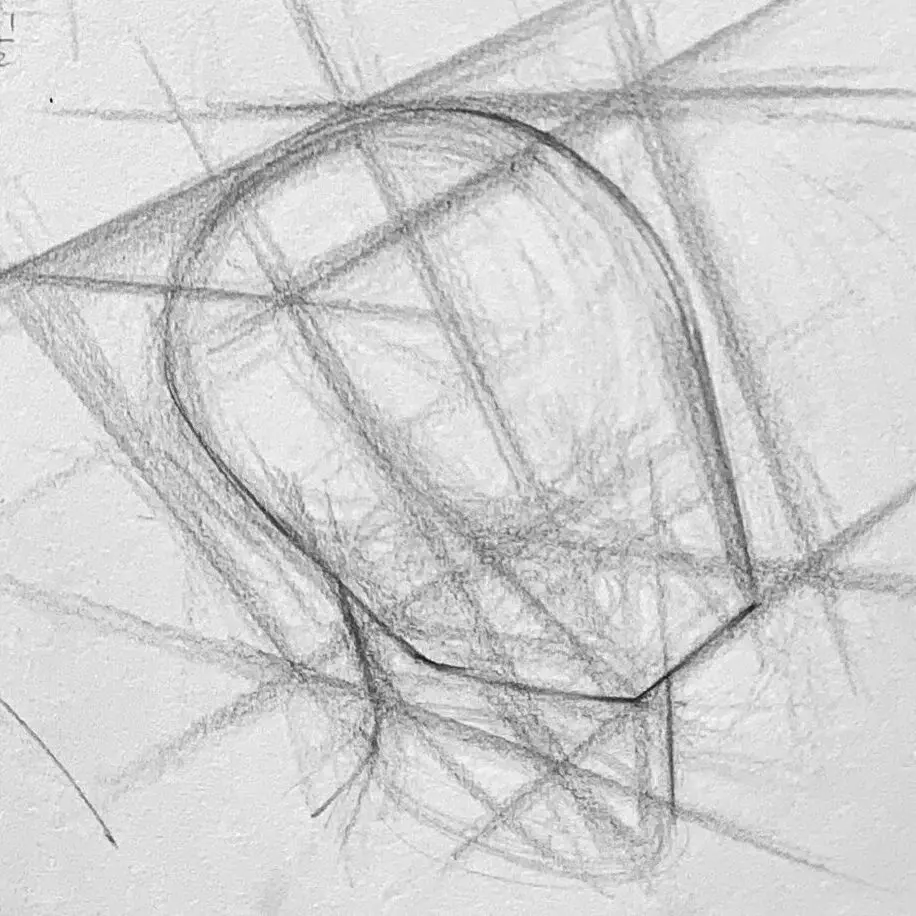
1. Simplify the overall shape of the head.
Draw one first.圓Heads up, bottoms down.mandible。
Half of the circle is approximatelyarch (of the eyebrow)position; the arch of the brow further down iseye socket。
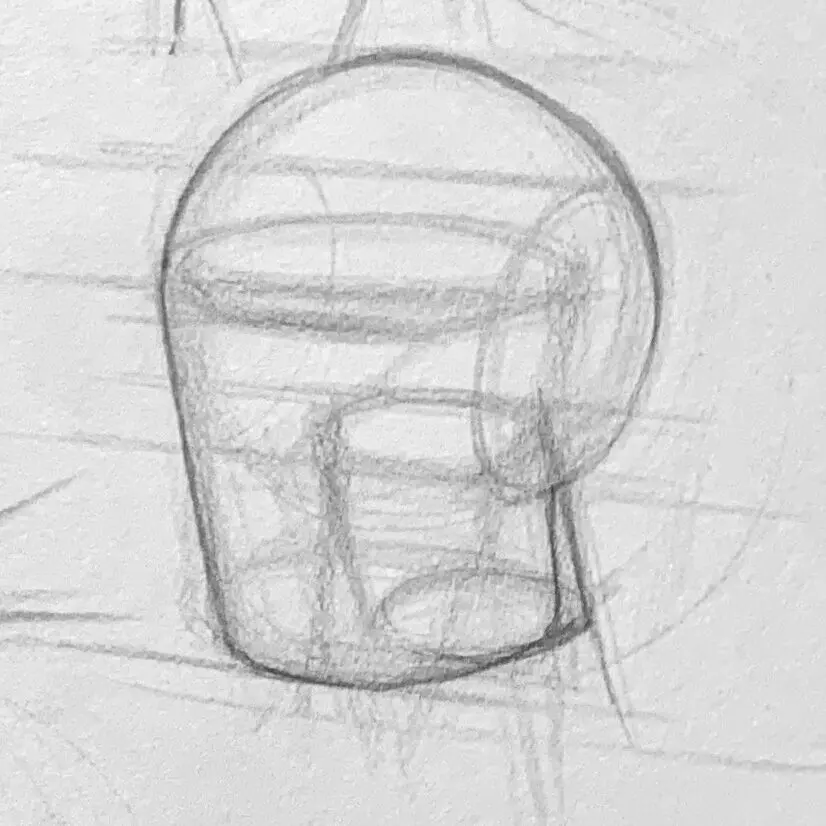
Can also be changed tosquare frameAngle of View: The angle of view is determined first, and then the square angle is established.
Tip: Use a square toControlling Perspective DirectionIt is a more stable position for the head.
You can also use the Square Assist to grab the head facing, a simplified method:
Determining the viewing angle will determine the angle of the cube (head profile).
Setting the line of sight and vanishing point. (Setting the line of sight and vanishing point helps us to check whether the direction of the perspective line is connected to the vanishing point.)
* Use a square frame to control the direction of perspective. To assist us in capturing the head position
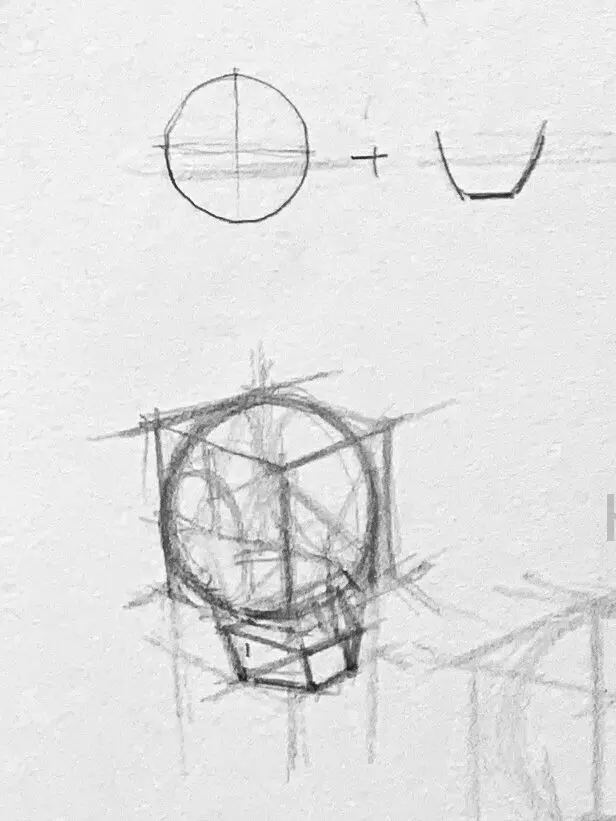
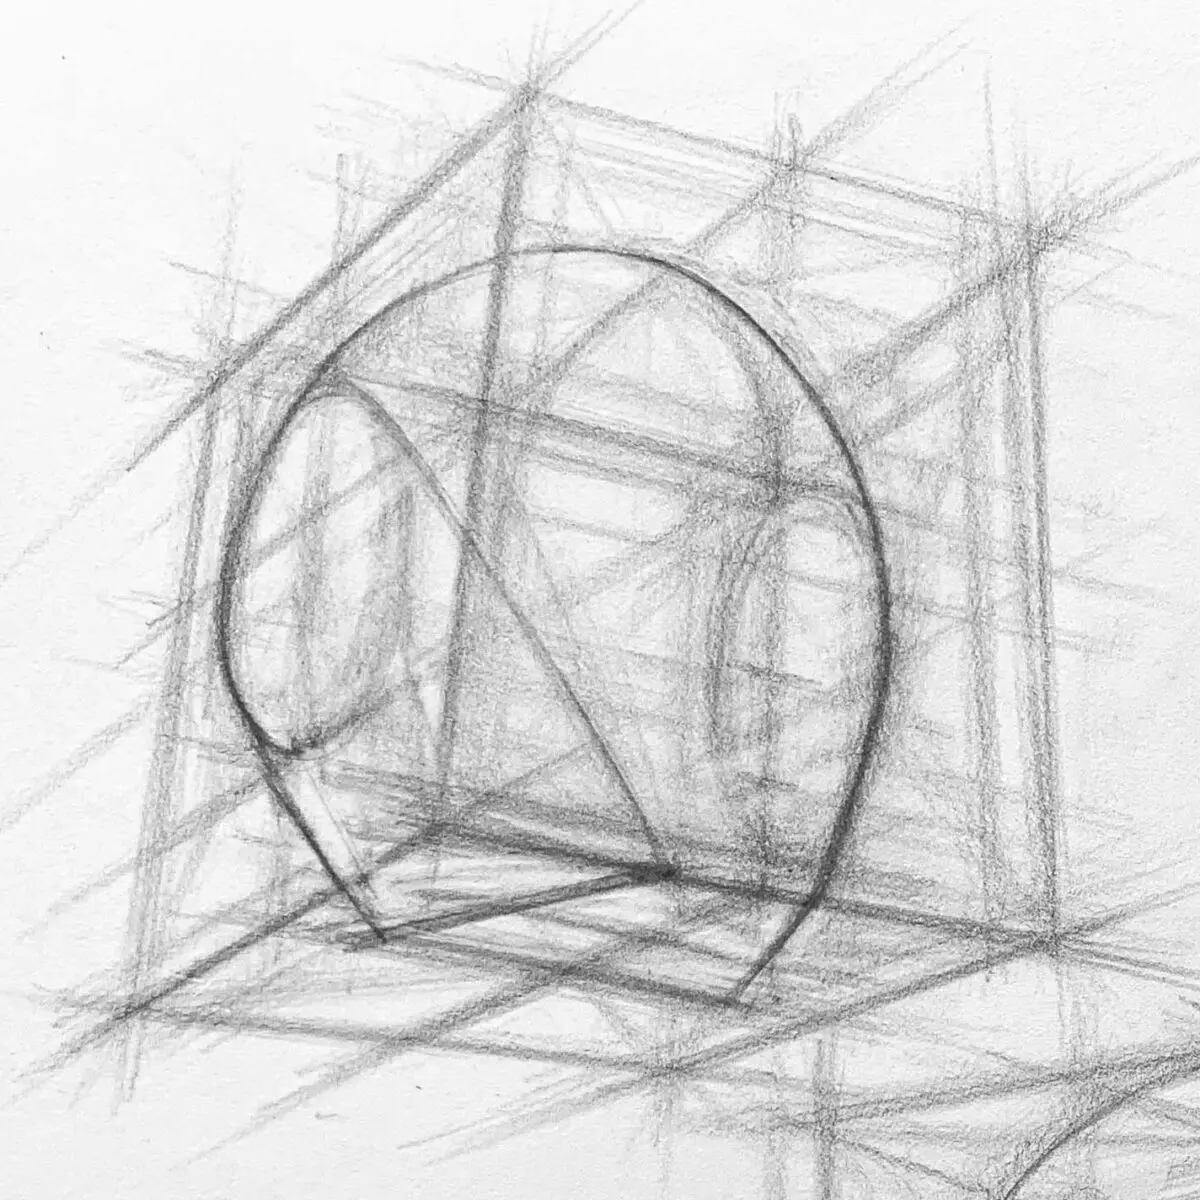
2. Position and draw the five senses
firstlyVertical/Horizontal Auxiliary LinePosition the five senses in relation to each other.
Apply facetrisection (math.)(hairline → eyebrow arch → under nose → chin) to determine the approximate height, and then gradually refine the shape.
―――――――――――――――――
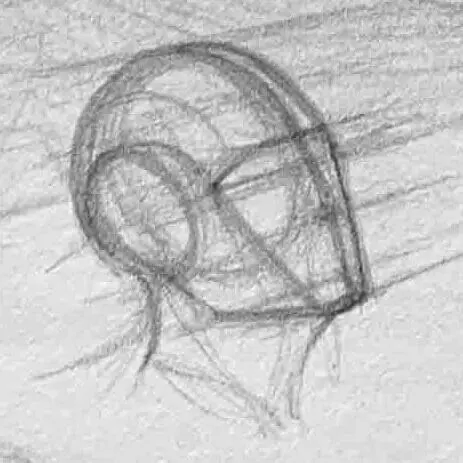
3. Different angles for headshot reference
The following provides different angles of the head, and it is recommended to grasp the perspective of the head at different viewing angles by simplifying it into a square.。
Each angle of the head has its own specific vanishing point and perspective shortening (near and far).
Start by cutting three sides out of a square:positively、Inferior aspect of mandible to neck、sideAnd then the five senses are placed.
View from bottom to top: due to the fact that the proximity of the large and the smallMandible to NoseIt will be slightly extended.lie back: Simplify the head into a geometric shape, focus on the proportions, and then add details.The angle of view from the bottom to the top. Because the left side of the face is smaller when the angle of view is changed, the centerline of the head is shifted to the left.The head is slightly tilted downward and to the left, so the length from the top of the head to the center line of the eyes is longer.
Application Recommendations: Practice the importance of different viewpoints of the head and you are encouraged to try to reduce the head to a square shape to facilitate our understanding of proportions as well as structural placement.
If you want to draw a rotating head today, there are more structural methods to assist you in drawing it. ―――――――――――――――――
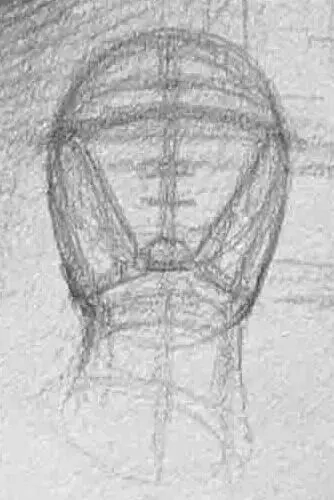
4. Structural line marking undulation, checking position
以Structural LinesLabeling the location of transitions (bulges/depressions) on the face helps to understand the continuity of form.
The undulations and recesses of the surface are marked with structural lines.
The structural lines do not exist on the actual face, but doLearning and CheckingVery practical.
―――――――――――――――――
5. Head Characteristics of Different Ages
How to grasp the characteristics of different age groups when we are drawing subjects of different ages? The following are the characteristics of characters of different age groups
1. Characteristics and structure of the child's head
A child's head is slightly different from an adult's in proportion and structure:
● Ratio:Children's heads are relatively large, taking up about 1/4 to 1/3 of their body length. Cranial development:Incomplete development of the lower jaw, shorter chin, and overall rounder facial features.
The overall proportion of children's head is shorter than that of adults, as shown in the frontal and lateral views.
The eyes are positioned low:On adult faces, the eyes are usually at the center line (1/2 line) of the overall head, but children's eyes are slightly lower on the center line of the head.
Distribution of the five senses:
Nose is short and flat. The cheekbones are not visible and the overall face is rounded.
Underdeveloped mandible, small and rounded chin.
Skin and Muscle: The child's skin is smoother, with no visible muscle lines or wrinkles.
The face has fewer variations in light and darkness than in adults.
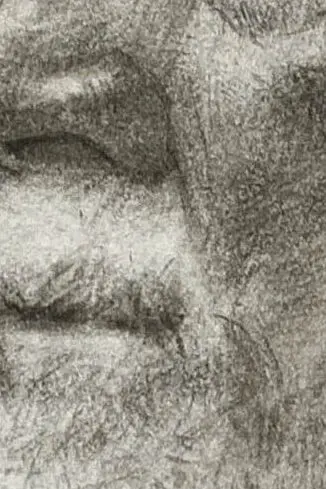
Elderly Head Characteristics
There are several key changes in the structure of the head in the elderly:
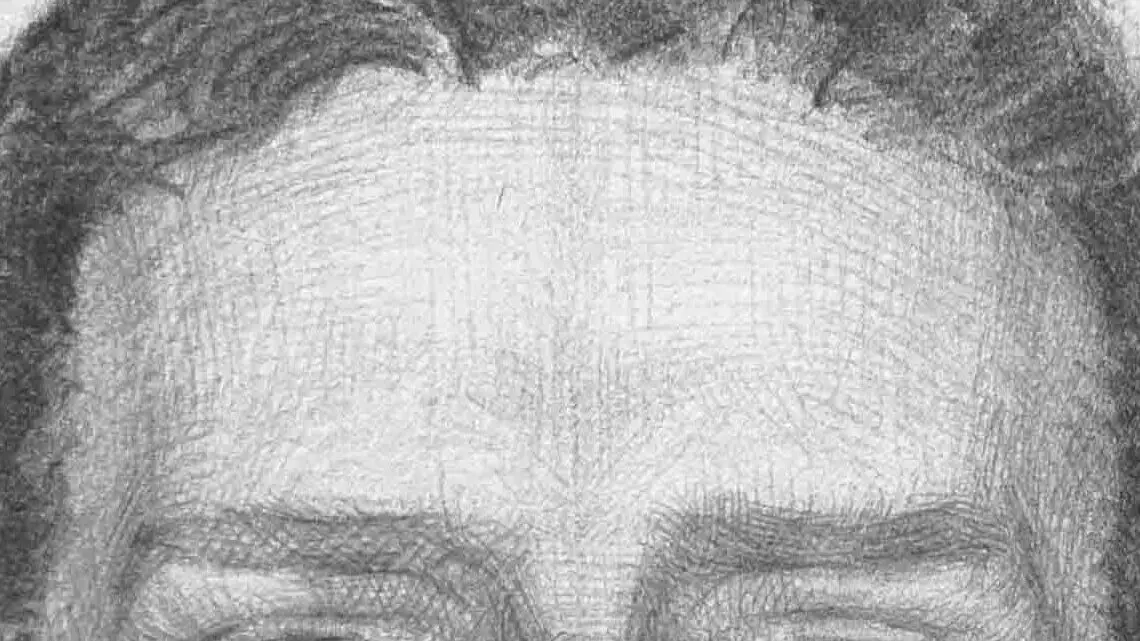
● Skeletal changes: The overall structure of the skull becomes more pronounced, especially the cheekbones and the angle of the jaw. Deeper eye sockets and sunken eyes due to loss of subcutaneous fat. The bones of the jawbone become osteoporotic and smaller, and there may be a slight inward contraction that changes the contour of the mouth. 2-1 Skin and Wrinkles: ● Forehead wrinkles:Associated with the facial expression muscle groups, transverse lines are evident.
Elderly people have more visible skin folds, which are more colorful and better rendered in sketches. ―――――――――――――――――
Crow's feet:Fine lines around the eyes are common and deepen with age.
● Lines:Deepening of the lines from the corners of the mouth to the sides of the nose, and skin laxity.
● Neck wrinkles:As the skin loses its elasticity, vertical lines become visible on the neck. ● Light and shadow and volume: The contours of the face in the elderly, due to the loss of protein muscle, the shadow change is more obvious. Loose skin may cause crease shadows, especially in the chin and neck area.
Elderly people have more visible skin folds, which are more colorful and better rendered in sketches. ―――――――――――――――――
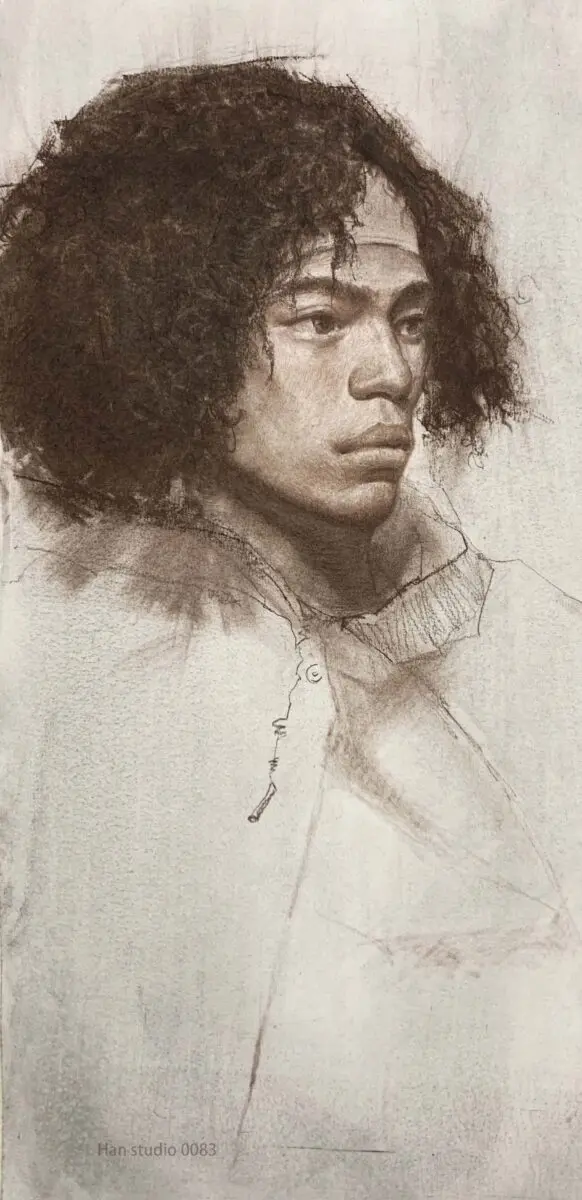
How to draw shadows in portraits?
The previous paragraphs provide the position of the face structure, then we enter the upper shadow part, the face shadow will be in accordance with the light source of the soft, sharp, near and far to produce different changes.
Want to understand more about portrait proportions and the origin of light and shadow? Extended reading is recommended:
If you don't know how to draw face shading, we recommend simply dividing the face into.
glossy - Forehead, zygomatic arches, area around the mouth (orbicularis oculi)
dark part - Sunken eye sockets, shadows under the nose, gaping mouths
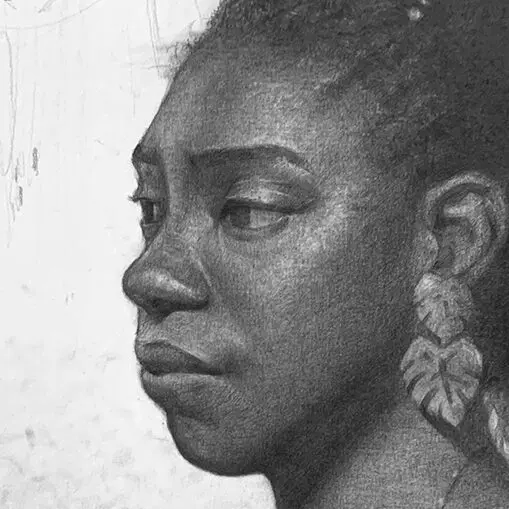
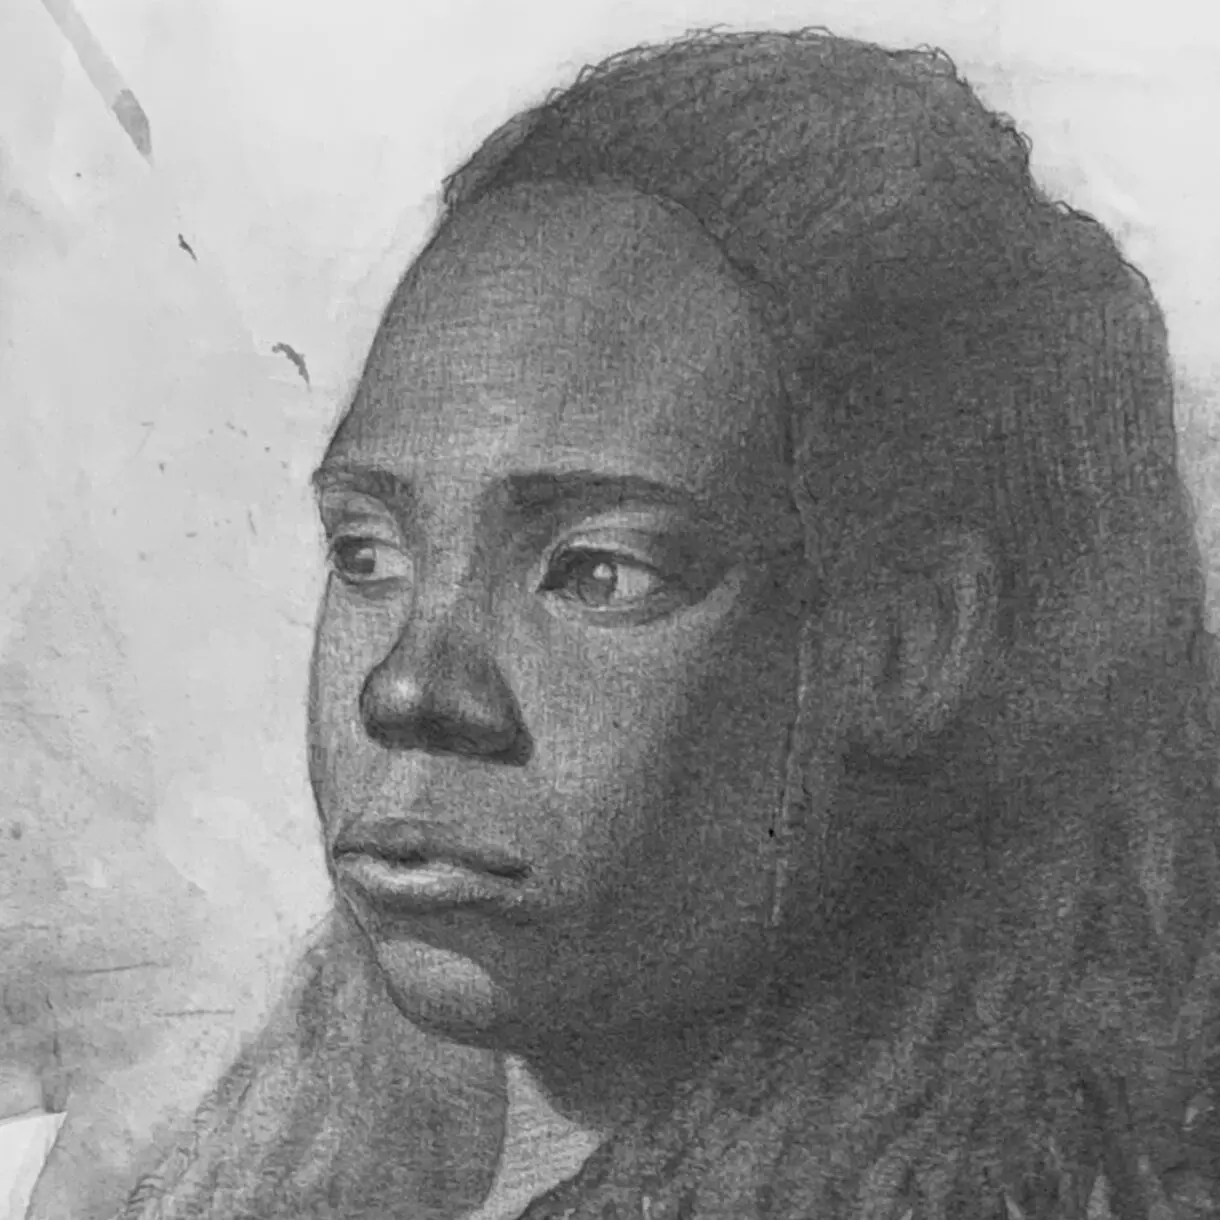
Observation of skin color: darker skin tonesBright and dark baseline valuesAll of them will affect the overall brightness distribution; different lighting positions, the light and dark zones should be adjusted accordingly.
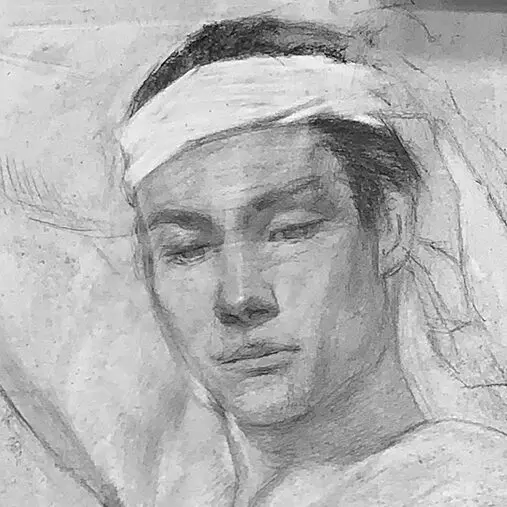
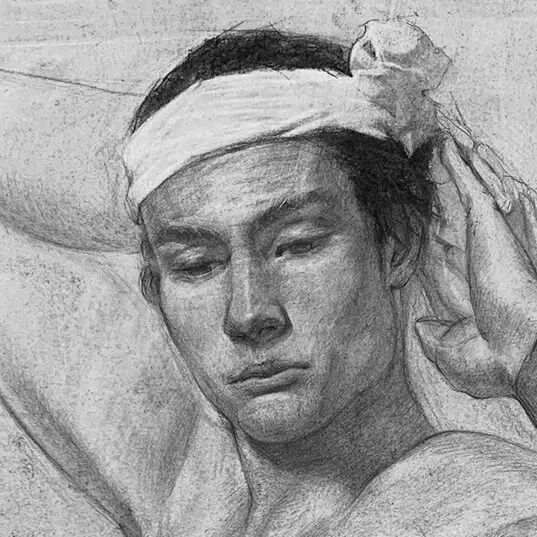
Here are some examples of light and dark skinned models.
Note that the upper light and dark surfaces are distributed in shapes to simplify excessive detail (left).After determining the intensity of the focus area in general, lay down a large block of color.The undulation of the face varies in depth according to the position of the structure. This model has a dark skin tone, so the base gray scale shades are darker on both the light and dark sides of the face.Tied hair with the above picture of the same model, different position lighting The face can be simply divided into the front face light side, and the side face dark side, so the shadow on the face should pay attention to the overall color of the area.Bright skinned models with lighter base gray shades on the light side of the face. This is an indoor light source with no additional side lighting. When we paint, we have to consider the strength and weakness of the light source, the distance and proximity of the light source, and the degree of influence on the area of the face to create a transition.
When sketching a bust model, the rise and fall of the face needs to match the overall lightness relationship.
Example: Like the overall brightness of the face is too bright.
Therefore, when you draw the fluctuation of the brightness of the face, pay attention to the subtle changes, and master the changes in brightness when you squint your eyes close to the brightness.
How to paint a portrait with one color and two colors?
After understanding the use of black, white and gray to create a sense of three-dimensionality, we try to use one or two colors to draw portraits.
Reverse the expression, draw the focus on the light side, the black background color of the paper as the dark side Ordered into: brightest, second brightest, darkest Dark-skinned model with deeper contours of Aboriginal features. Lighting is on the face, so separate the brightness of the chin to below the neck from the brightness of the face and the color gradation.African-American ethnicity is characterized by a rounder nose and fuller lips. Because the dark skin color brightness is close, you need to pay attention to the darkness of the brightness fall small Two-color (red brick, brown) sketching, drawing similar to single-color Understand the structure of the face and observe which parts of the face are darker. Divide the brightness into 3-4 shades.Red and purple colors. When painting the light side of the face, pay attention to the brightness, whether it is separated from the dark side (e.g. the shadow of the chin).
The use of backing paper helps us to simplify the coloring process and focus on the dark structure and shape of the design.
Extended Portrait Timelapse Analysis
After determining the proportions of the portrait's features (0:08 on the time axis), put the undulations of the face into shadow to create a sense of body.
This video uses procreate for easy understanding. If you want to try it out, you can use the built-in charcoal brushes.
―――――――――――――――――
Want to learn how to draw human parts and what to know? Read more
I hope that this introduction to the structure can help you recognize and understand the structural importance of the head, if there are any subjects you want to see or painting methods you want to know, welcome to leave a message or private message me, I wish you a happy painting!