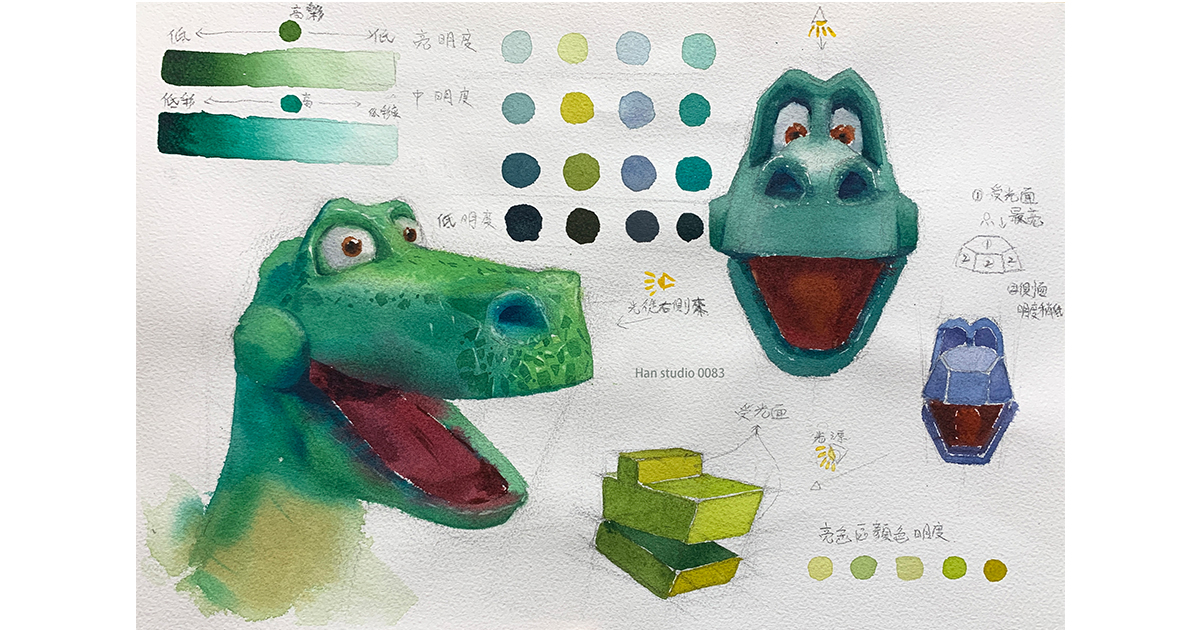
Continuing last week's dinosaur watercolor topic, I experimented with various green combinations and found it quite challenging to create subtle variations. Below, let’s further explore the relationship between color brightness and saturation. If you're interested, keep reading!
● Primary Colors:
In color theory, primary colors refer to base colors that cannot be mixed from other colors. For watercolor pigments, these typically include red, blue, and yellow (or magenta, cyan, and lemon yellow).

● Secondary Colors:
Secondary colors are created by mixing two primary colors. Examples include:
- Yellow + Blue = Green
- Red + Blue = Purple
- Red + Yellow = Orange
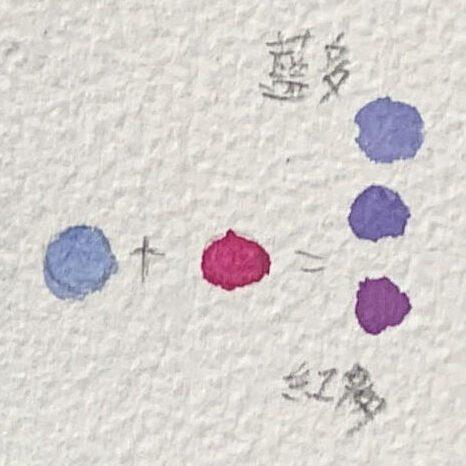
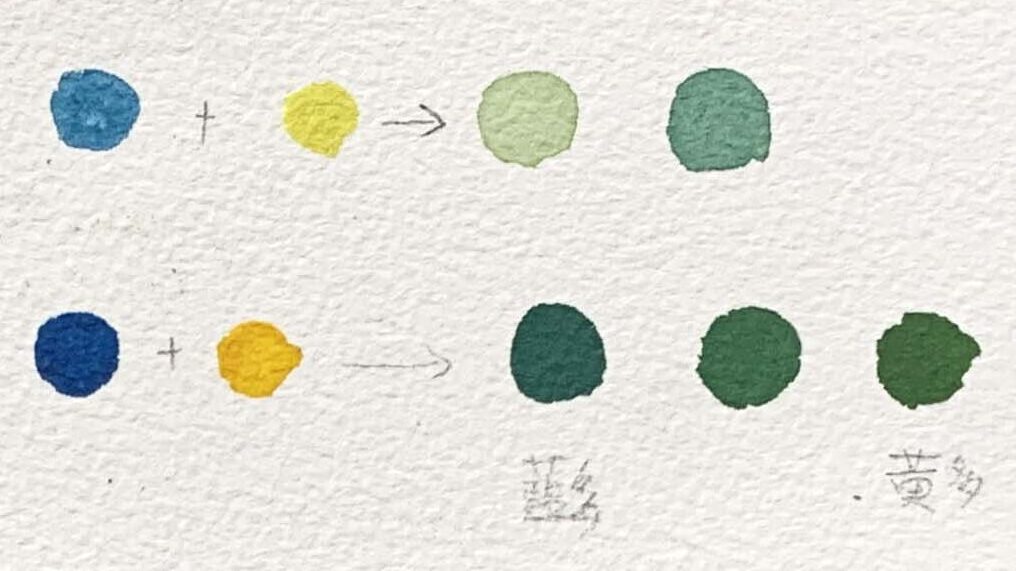
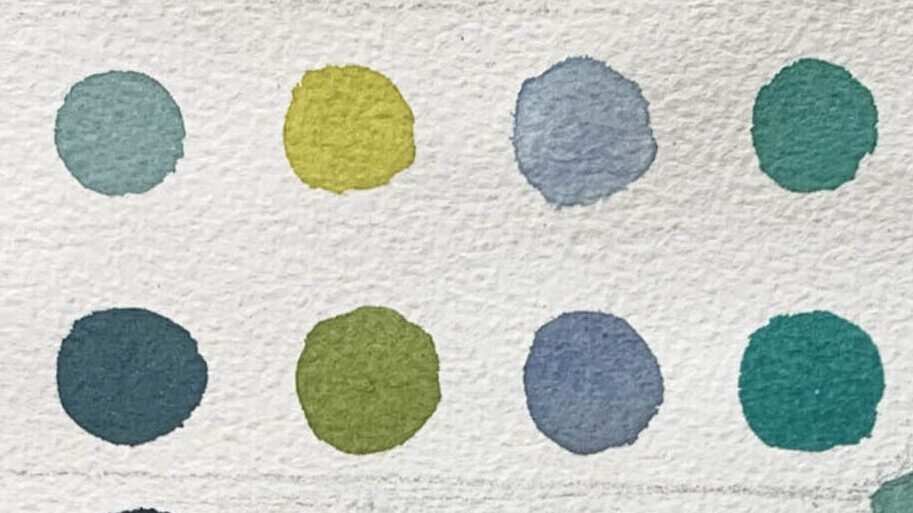
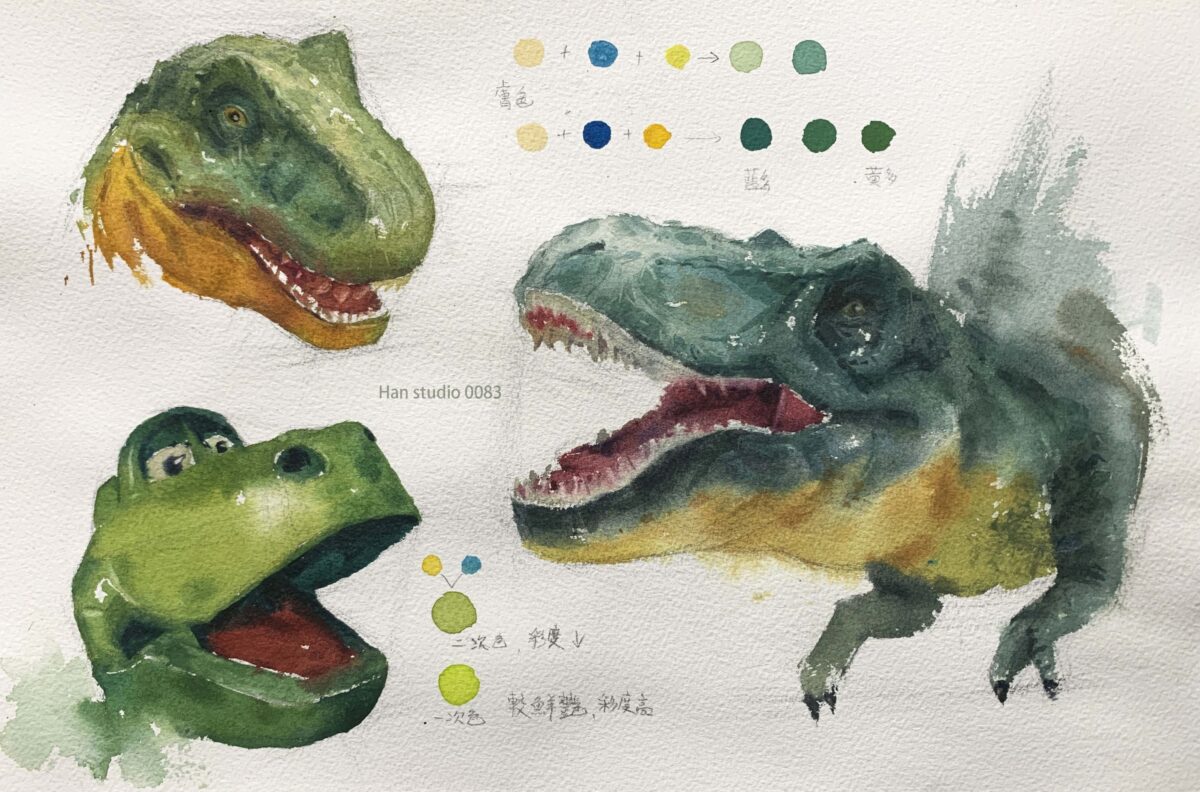
The first row uses lemon yellow (a yellow with a green bias) and sky blue (a greenish blue) for mixing.
The second row uses a warmer yellow to mix the green, which makes the lower row of green appear slightly warmer compared to the upper row.
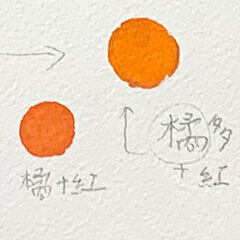
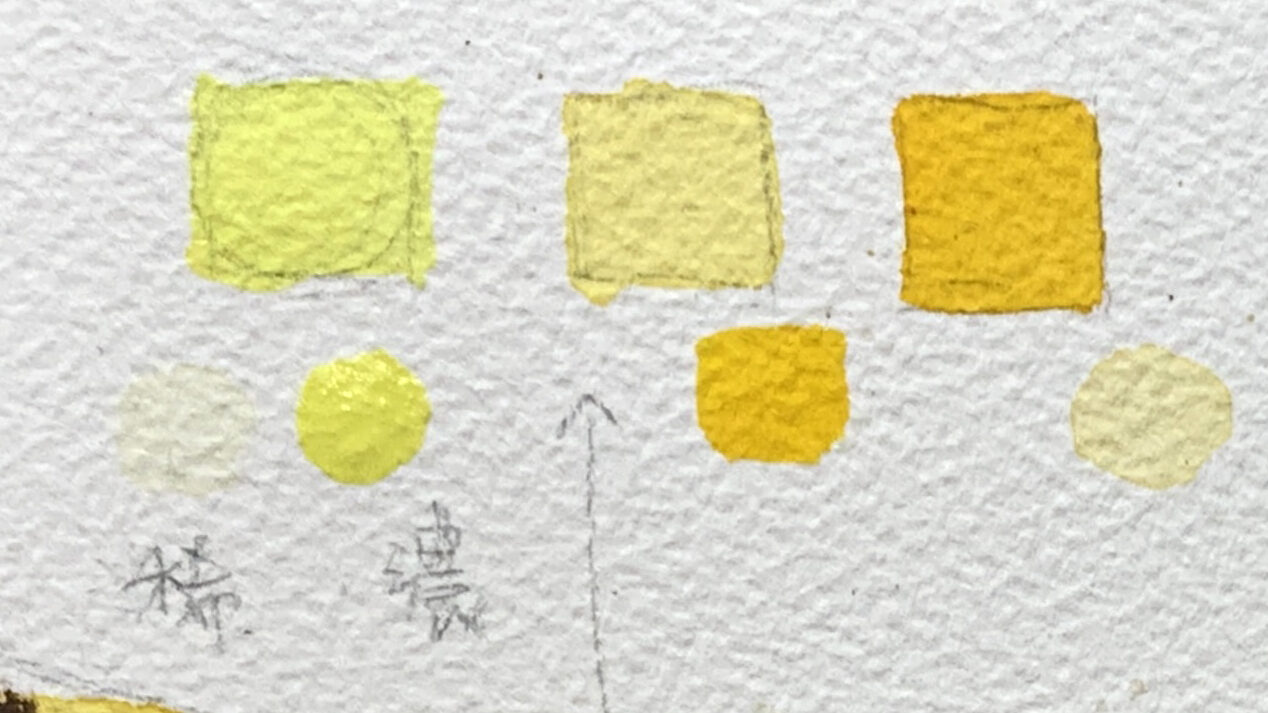
There are ready-made cadmium orange paints available on the market, which are more vibrant. If you want to maintain the color's saturation and brightness, you can choose a pre-mixed paint.
● Unmixed Pigments:
These are colors squeezed directly from paint tubes, such as orange, purple, or emerald green. These may be pre-mixed during the manufacturing process but are not considered primary colors.
● What Is Color Saturation?
Saturation refers to the purity and intensity of a color, indicating how vivid it is.
- High Saturation: Colors appear bright and pure, undiluted by gray or white.
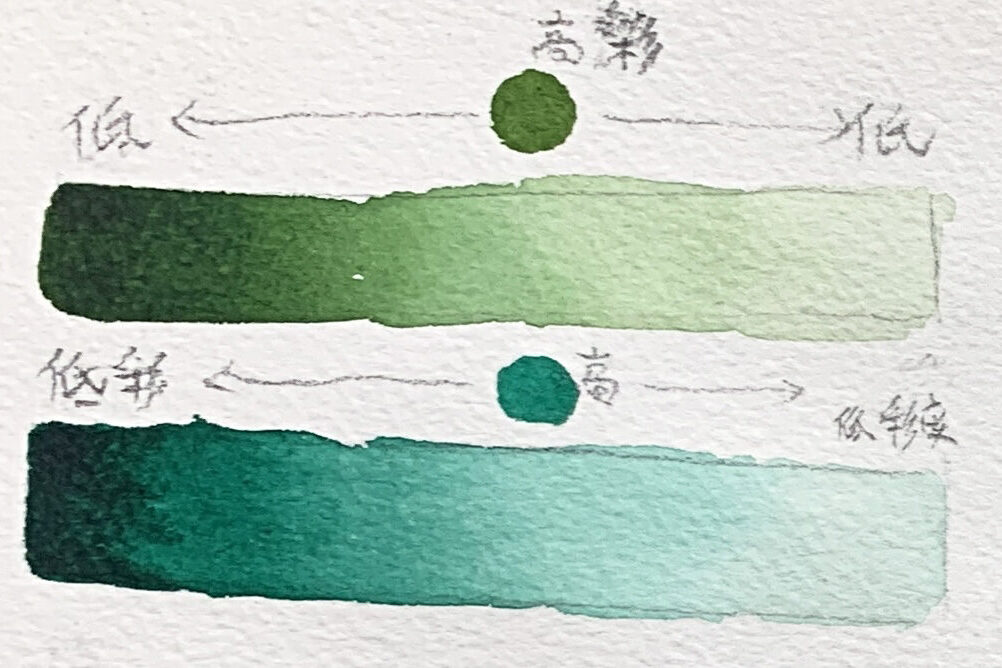
- Low Saturation: Colors lean towards gray, appearing softer or more muted. Mixing colors generally lowers saturation.
Saturation is like the flavor of fruit: high saturation is like freshly squeezed orange juice, full of intensity; low saturation is like diluted juice with a much weaker taste.
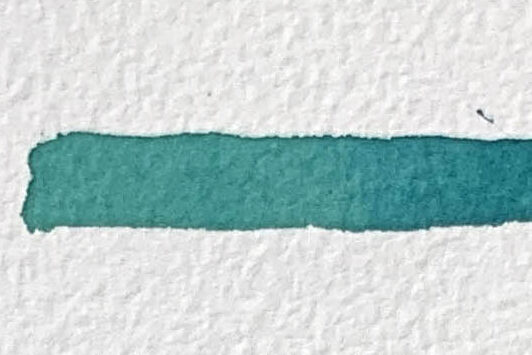
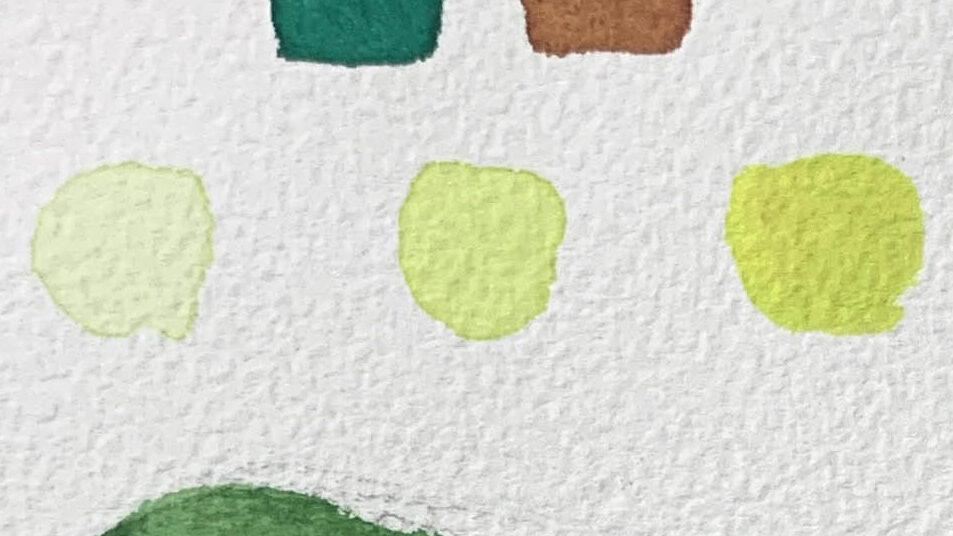
● Principles of Color Mixing:
The saturation of a color decreases with increased mixing. For example, mixing yellow and red to create orange results in a less saturated color compared to orange directly from the tube.
The gradient bar in the upper-left diagram illustrates how varying saturation affects depth, transitioning from vivid to muted tones.
● What Is Color Brightness?
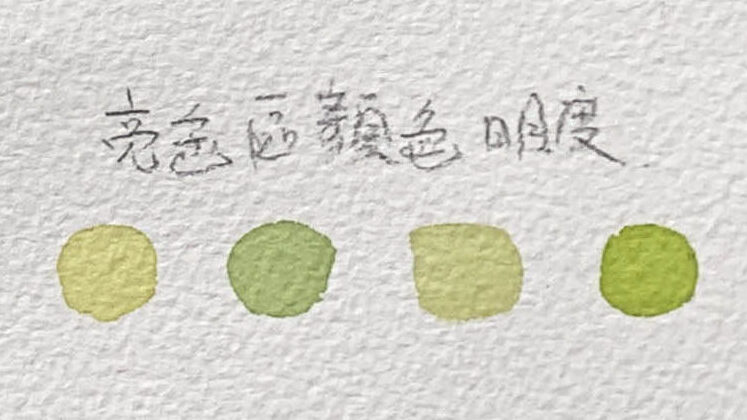
Brightness refers to how light or dark a color appears.
- High Brightness: Colors are closer to white and look lighter.
- Low Brightness: Colors are closer to black and look darker.
Brightness is like the intensity of light: high brightness is like sunlight filling a room; low brightness is like a dimly lit corner.
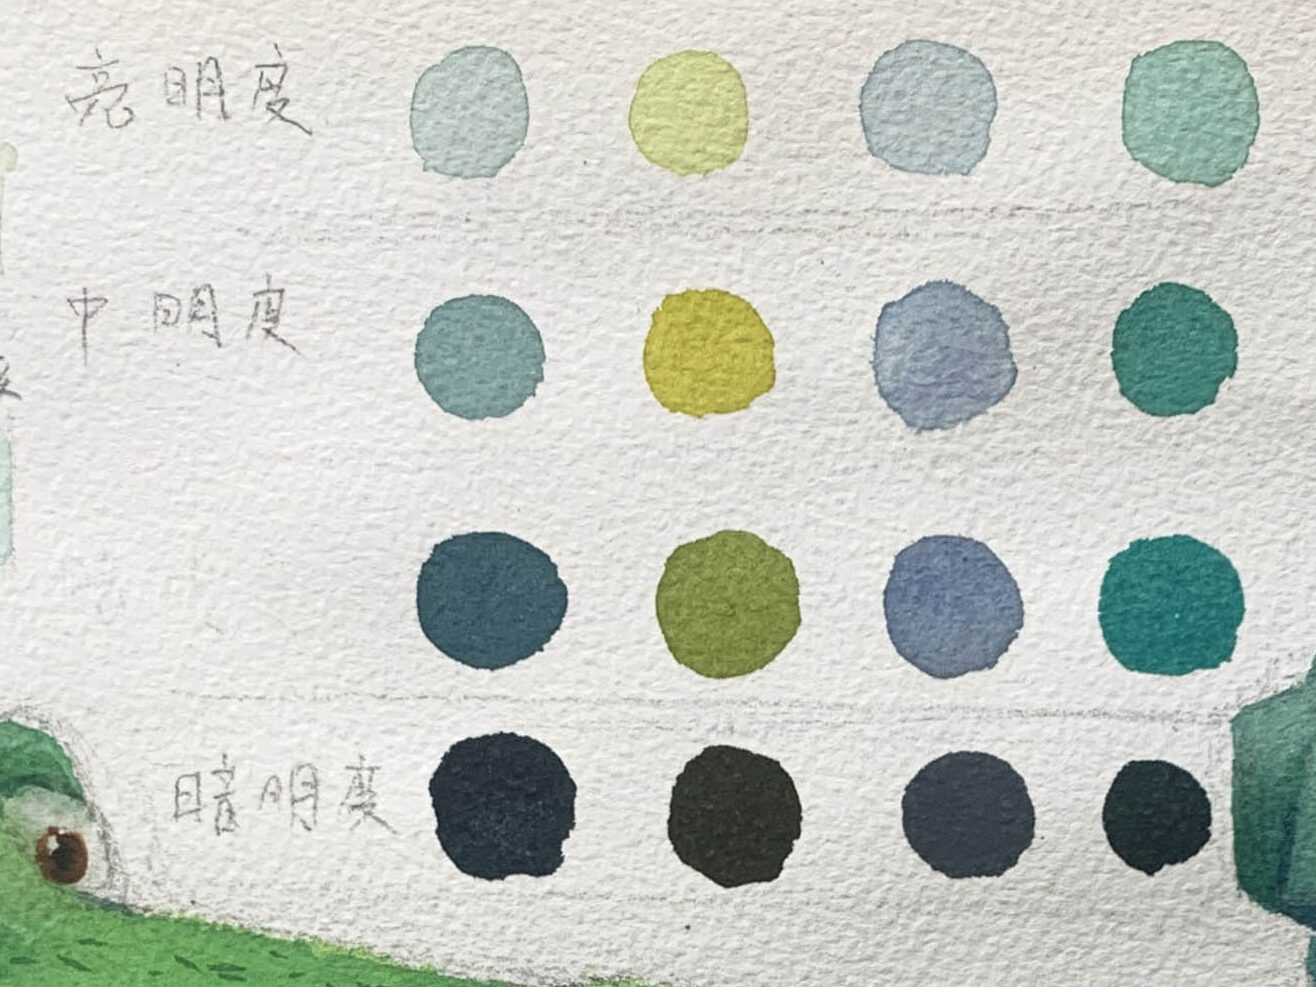
Refer to the central chart to see brightness levels from high, to medium, to low.
● Brightness Distribution:
Brightness is essential in expressing light, space, and depth in painting. It can be simplified into three levels: light, medium (gray), and dark.
● Practical Example:
Green Cube Example:
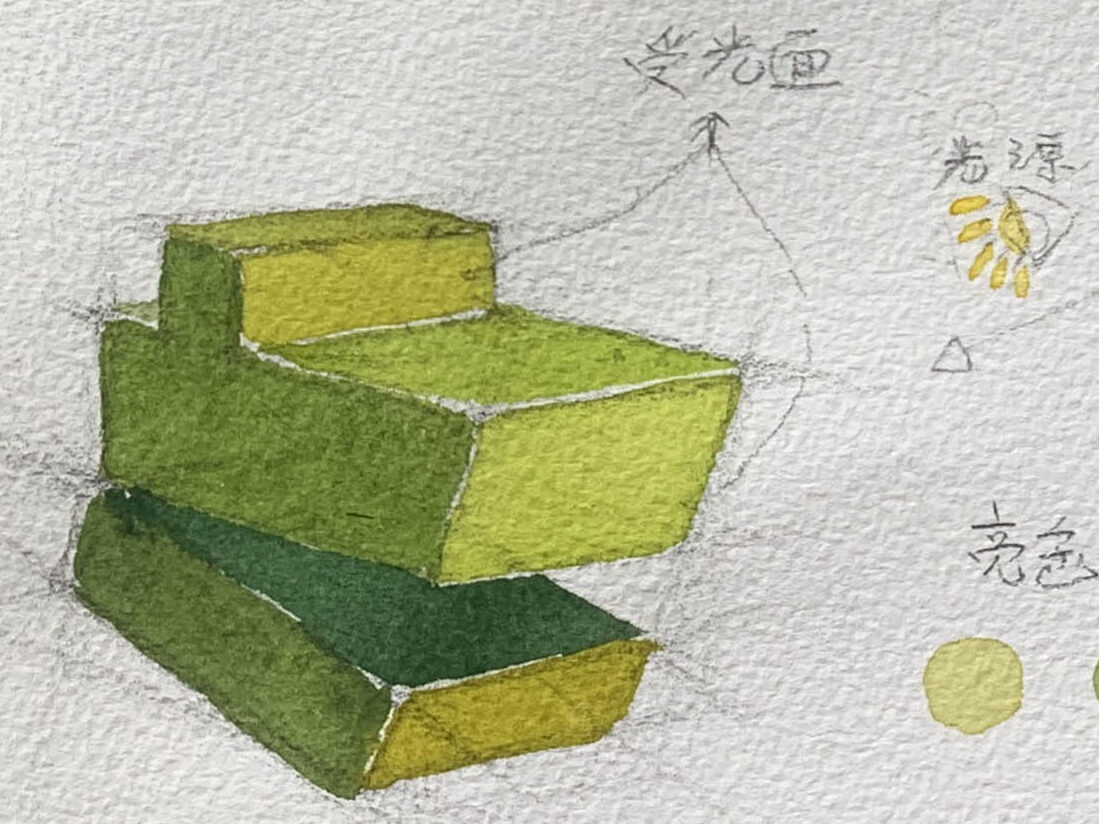
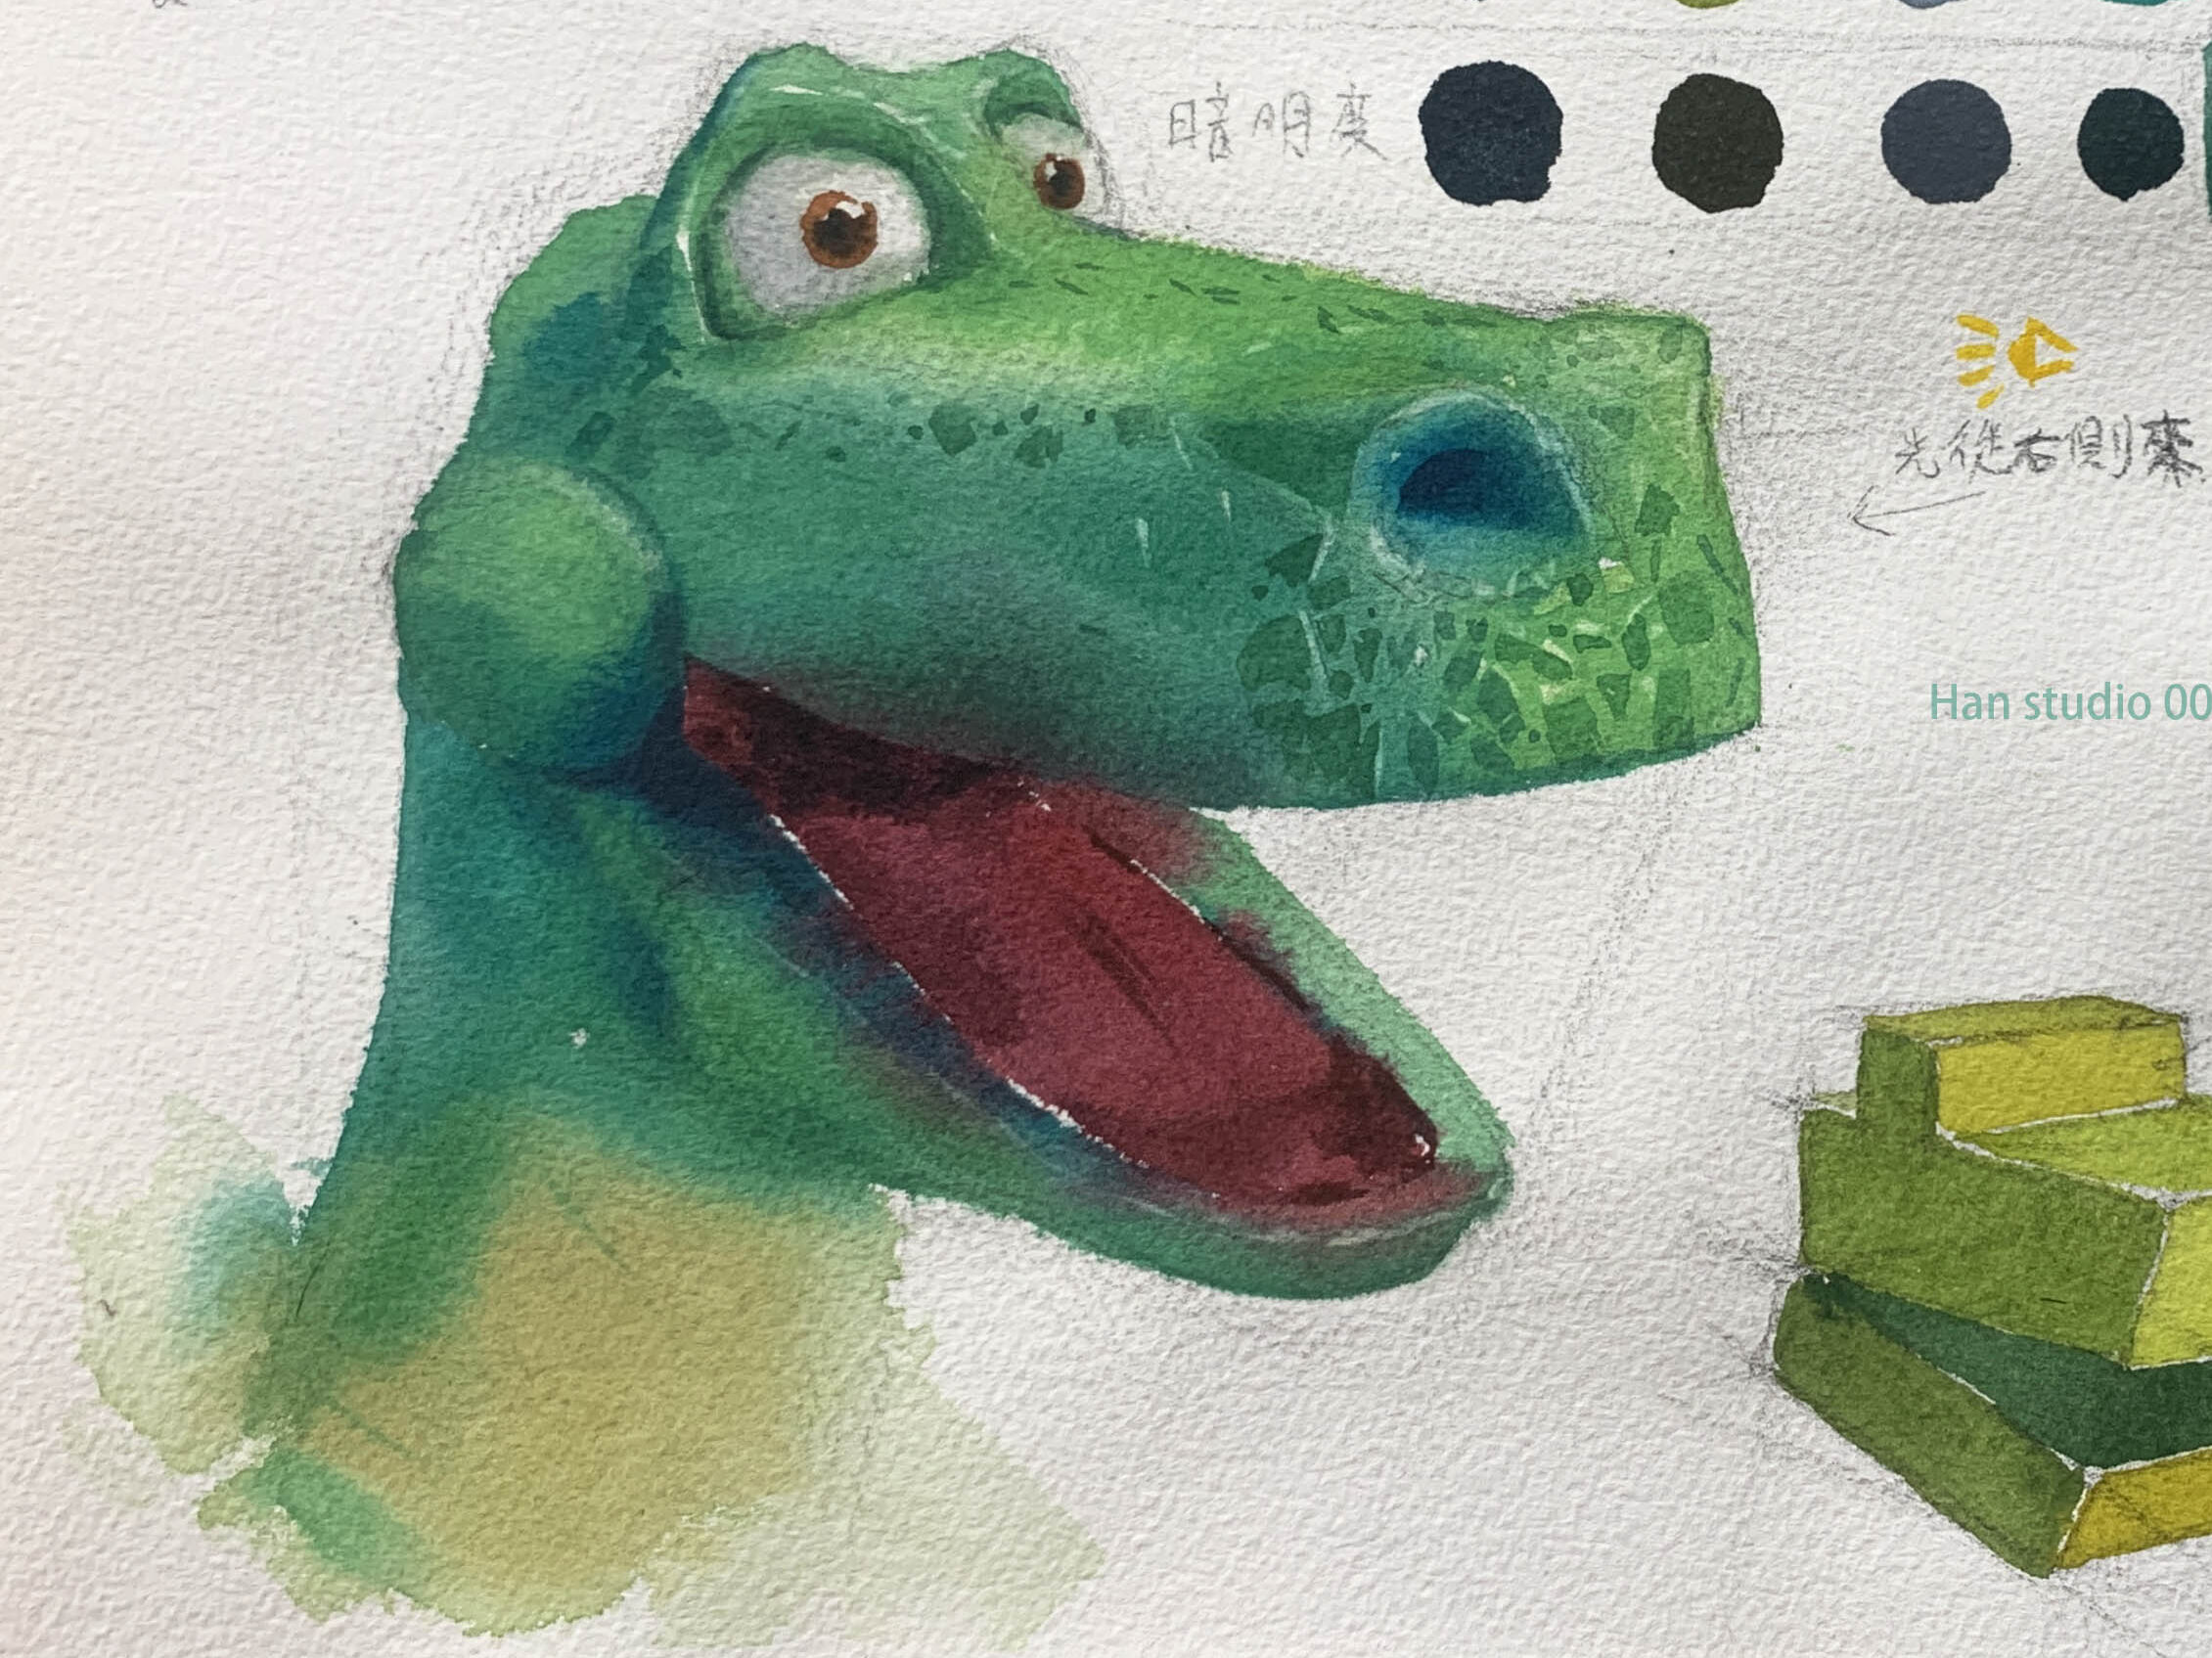
The green cube at the bottom illustrates light coming from the right. Divide the head into lit areas and shadowed areas,
Lit areas: Use cadmium yellow, lemon yellow, or sky blue while maintaining brightness.
Shadowed areas: Use darker green tones distinct from the lit areas.
1.Dinosaur Head Example
After understanding the simplified logic of light and shadow on a rectangular form, let’s use the left dinosaur head as an example:
For lit areas, use sap green (Holbein W277) or diluted green—refer to the bright color section.
For shadows, mix Prussian blue (a greenish blue) with yellow. Add more blue for deeper tones—refer to the medium brightness section.
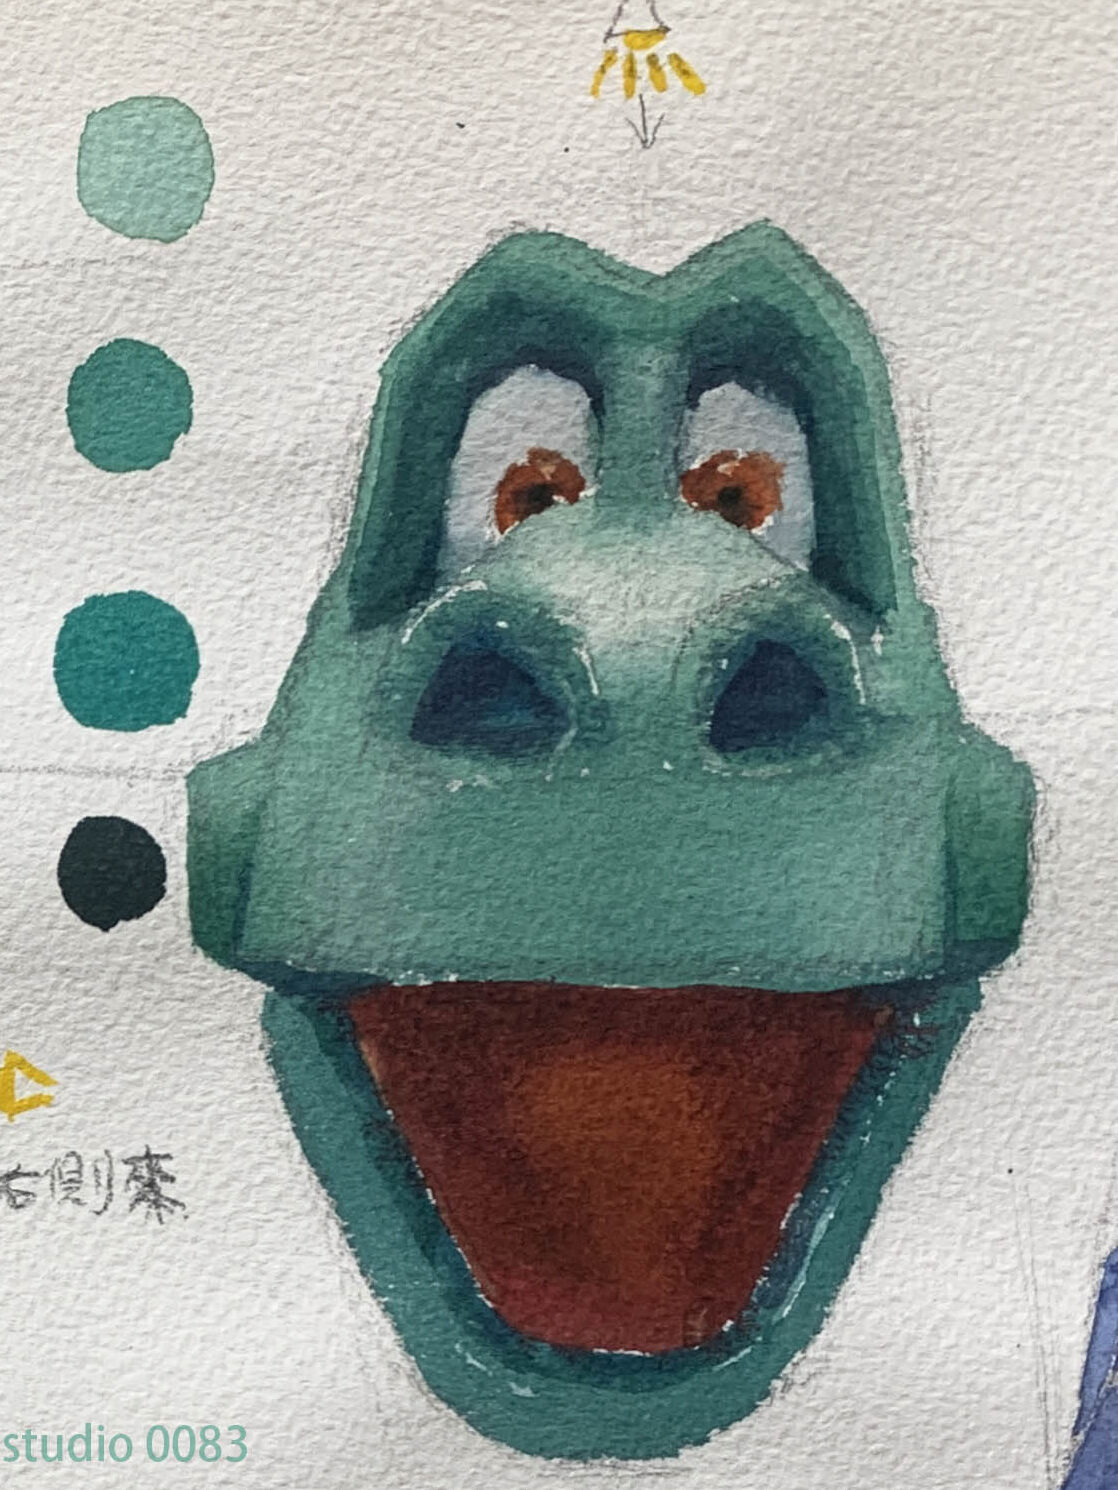
You can see that the illuminated surface is bright and translucent, while the shadow areas, blended with cadmium yellow and a deeper shade of blue, create a clear contrast in brightness between sections, establishing a sense of depth and volume.
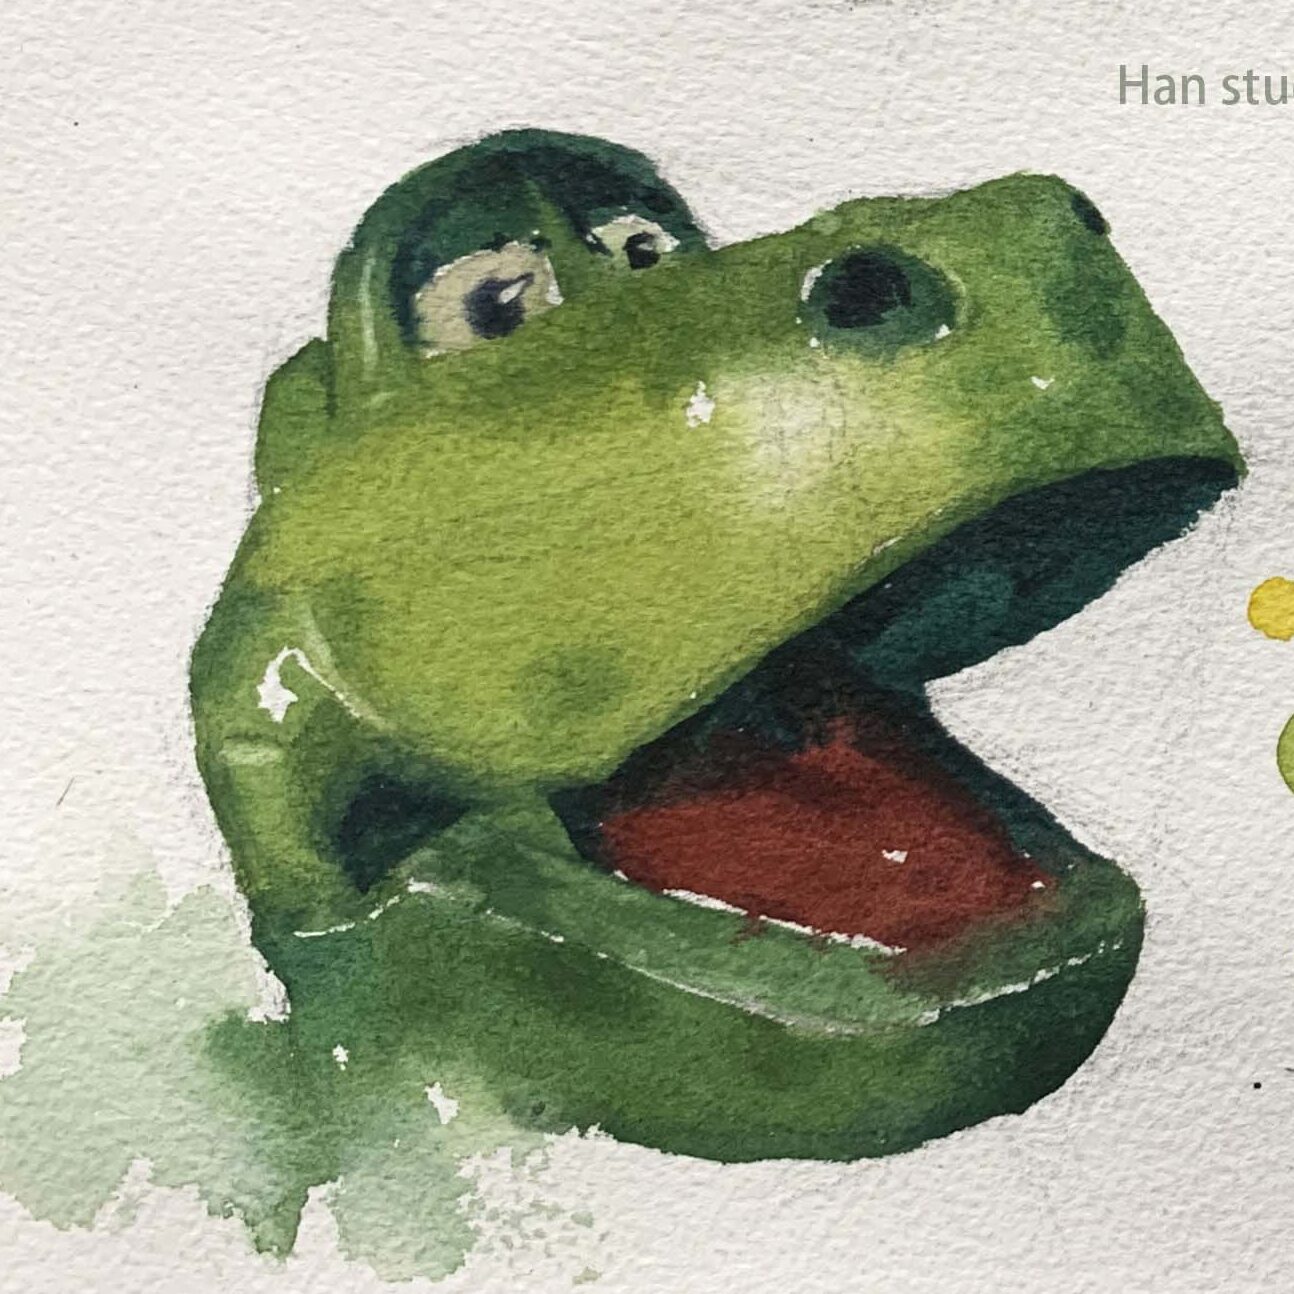
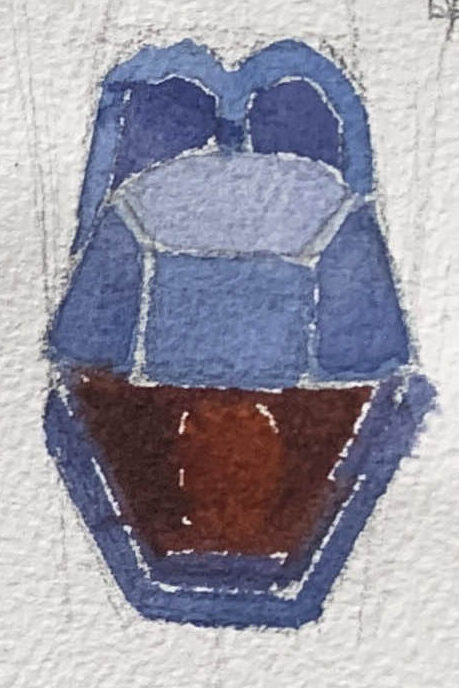
2.Dinosaur Head Example :
Divide the head into upper and lower sections:
Upper: Simplify into two brightness levels. Light purple for brightness level 1 (lit areas), and bluish-purple for brightness level 2 (sides).
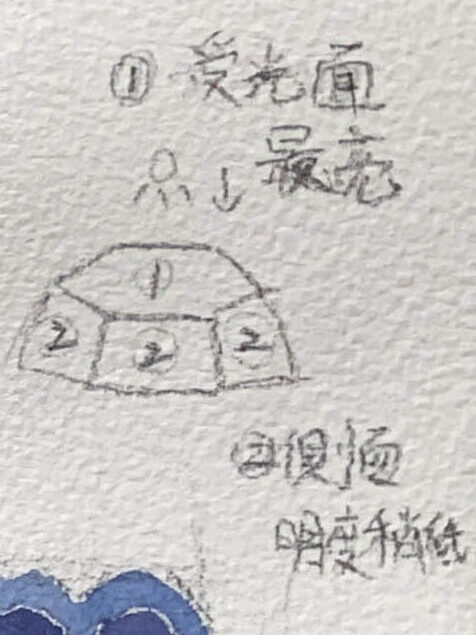
Lower (jaw): The base brightness is darker than the upper section. Use deeper blue-purple tones. These differences in brightness establish the dinosaur head's three-dimensional feel.
● Final Summary:
To achieve a three-dimensional effect:
- Consider the light source's distance, angle, and intensity to determine brightness and shadow placement.
- Understand how the object's shape affects color application (e.g., spheres, cubes).
- Match the brightness of mixed colors to the appropriate areas in your painting.
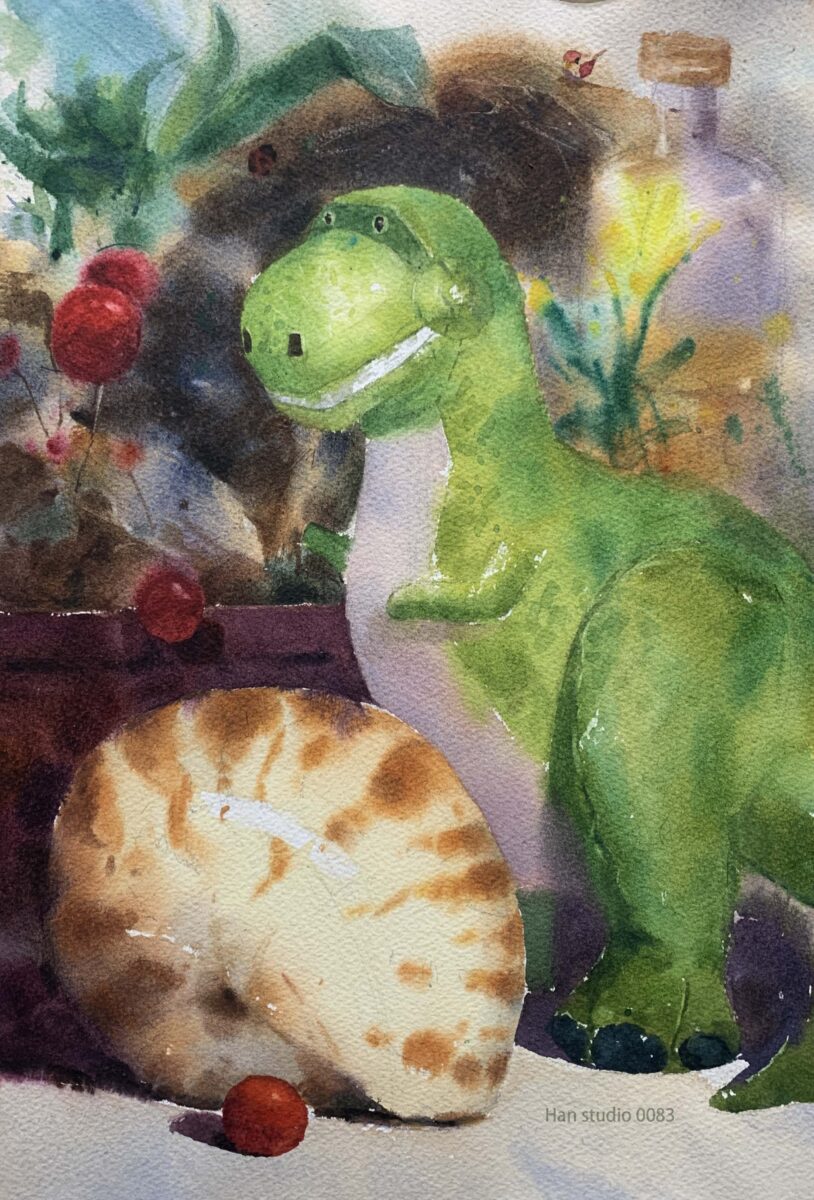
This is an introduction to color mixing, saturation, and brightness. Have you encountered challenges in watercolor painting or color blending? Feel free to share your thoughts or ask questions!
If you're interested in learning to draw but don't know where to start, or if you'd like to understand the knowledge behind drawing,
feel free to join my LINE and contact me. In my classes, I organize drawing methods in a clear and structured way.
Click here to learn more about my drawing courses!
Want to explore more articles on extended drawing techniques?
- Watercolor Topics
How to Watercolor Grapes: Master Light, Shadow & Gradients
How to Paint the Light and Dark Layers of a Monstera Leaf
How to Paint a Vibrant Yellow Bell Pepper Still Life
How to Paint a Luminous Banana with Watercolors
- Portrait Topics
How to Draw Arms: Learn Arm Movements and Bone Proportions
Human Skull Sketch: Learn Anatomy for Accurate Portraits
How to Accurately Master Hand Proportions and Joint Structure
How to Draw Ears:Simplified Ear Structure and Shading Tips
How to Use Two-Tone Shading: Simple Shadow Techniques
How to Sketch Facial Muscles: Capture Realism and Expression
How to Draw Masks: Use Perspective and Shadows
Building Up from Simple Contours to Detailed Eye Portraits
Capturing Realism in Lip Drawing: Key Structures and Shading
Understanding the Three Key Elements of Head Structure
Mastering the basic proportions and structure of portrait drawing
- Still Life Topics
How to Draw Perspective: Basic to Complex Structures
Boots Sketch Tutorial: Learn Proportions and Structural Lines
How to Master the Proportions,Shape, and Symmetry of a Teapot
