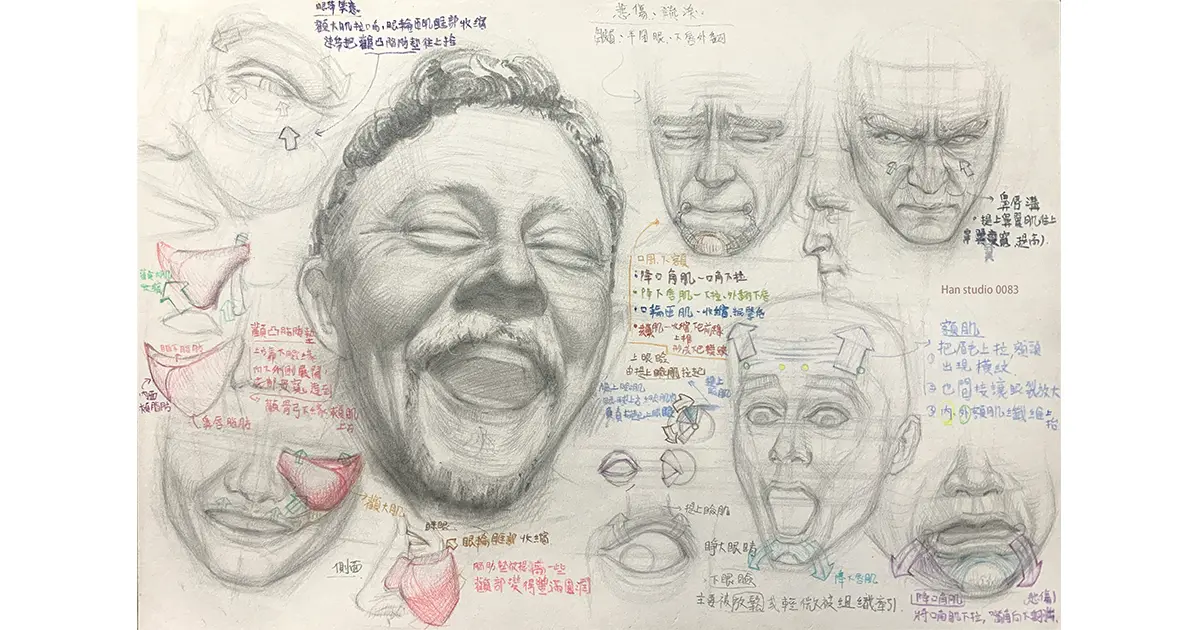
This week, I've been practicing the nose still life group in my studio classroom, and I've spent some time organizing my nose painting techniques and hidden structures. If you like to draw people or want to know how to draw noses and understand the structure of knowledge can read on!
Why learn nose structure?
The nose is one of the most prominent parts of the face.
Enhance the structure of the nose and the surrounding face.
By understanding the structure, it is possible to avoid "sticking on the nose" and let it grow naturally on the face.
Appearance of the nose
The three main areas of the nose:
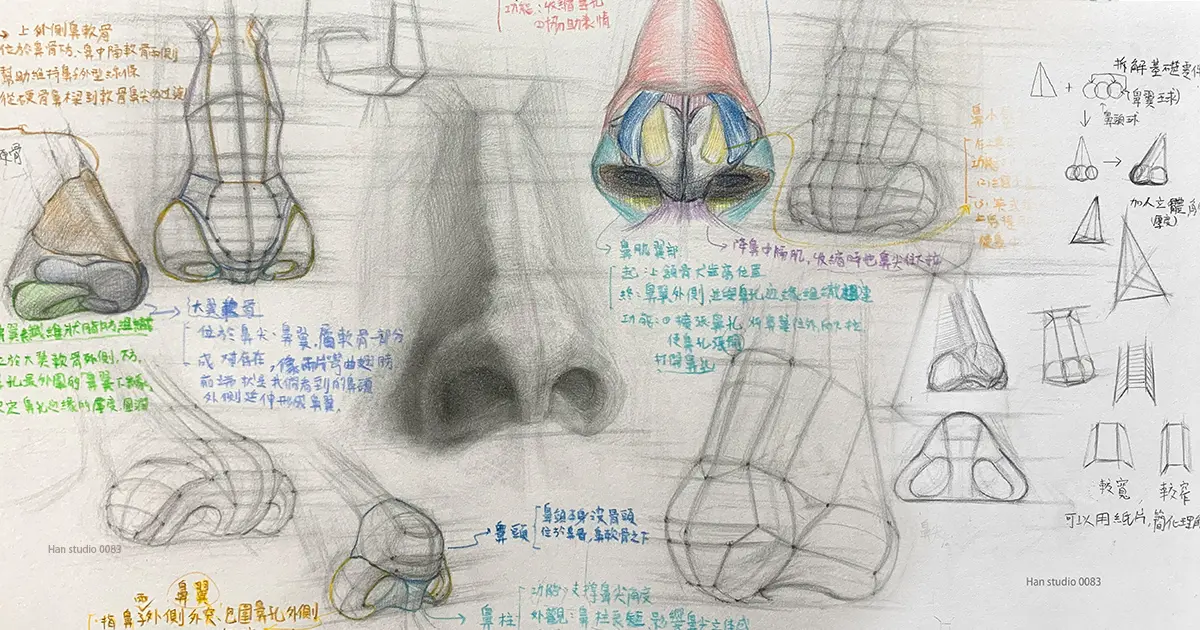
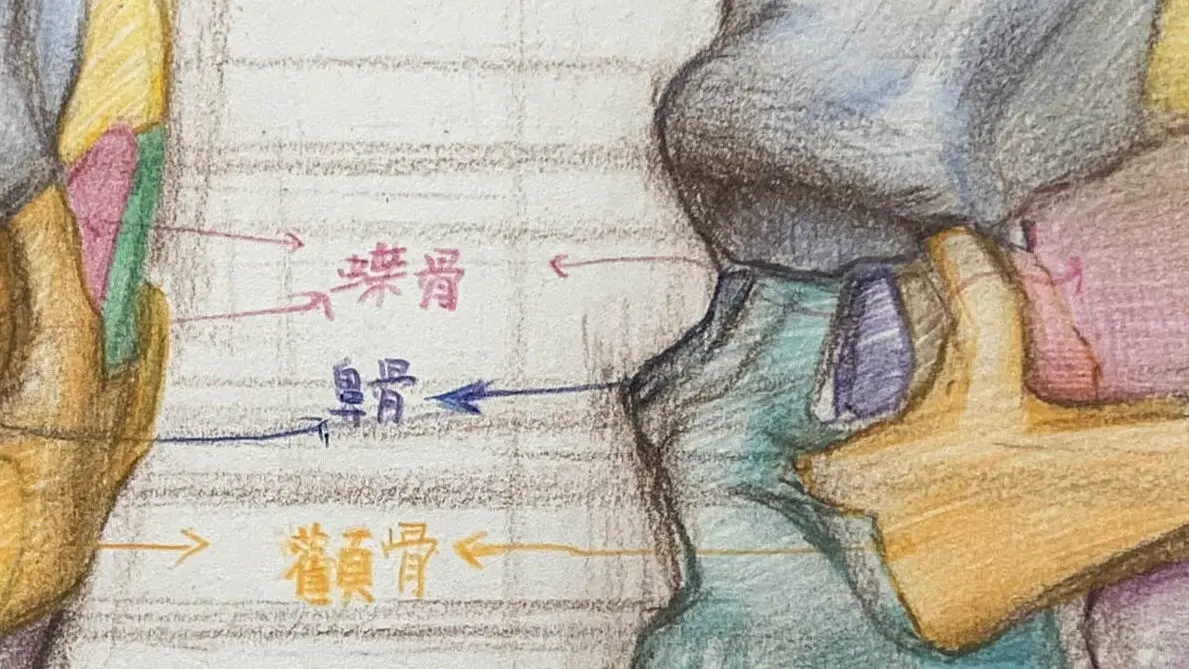
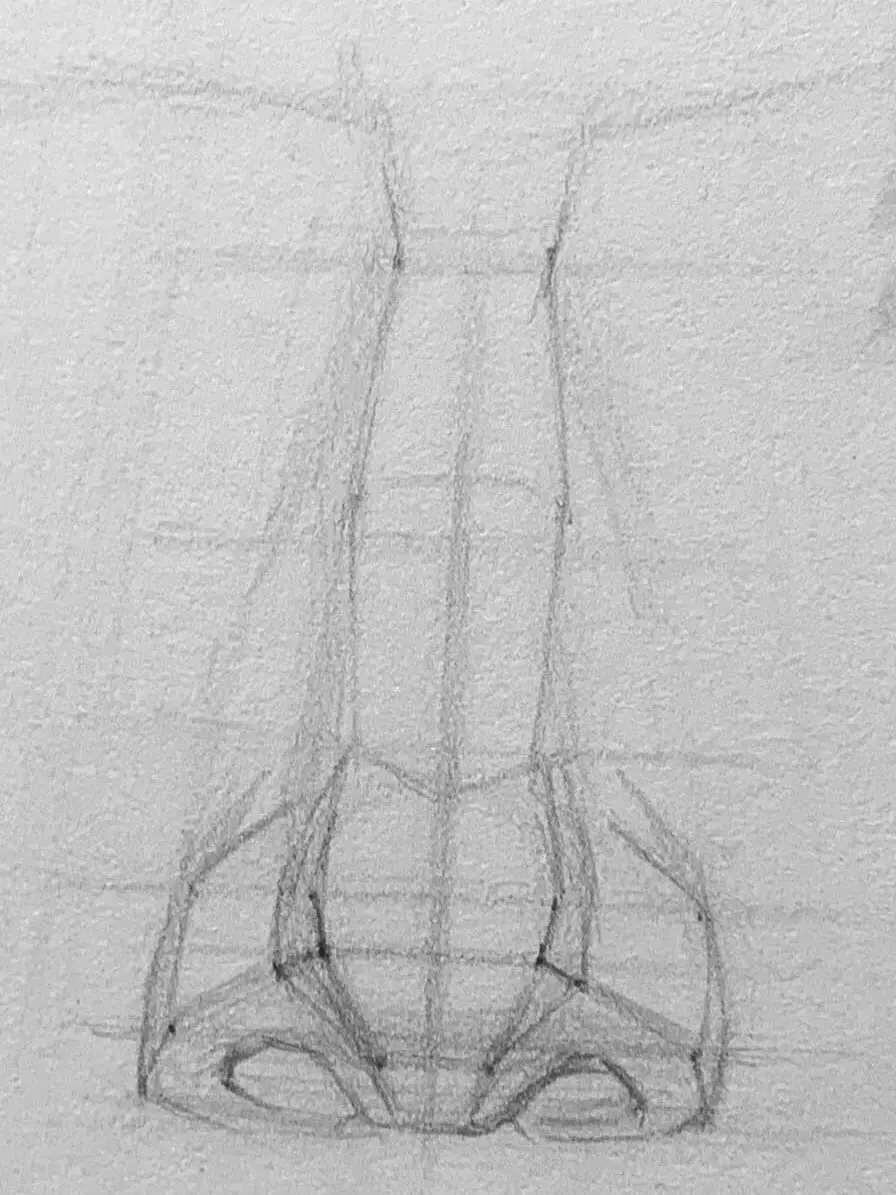
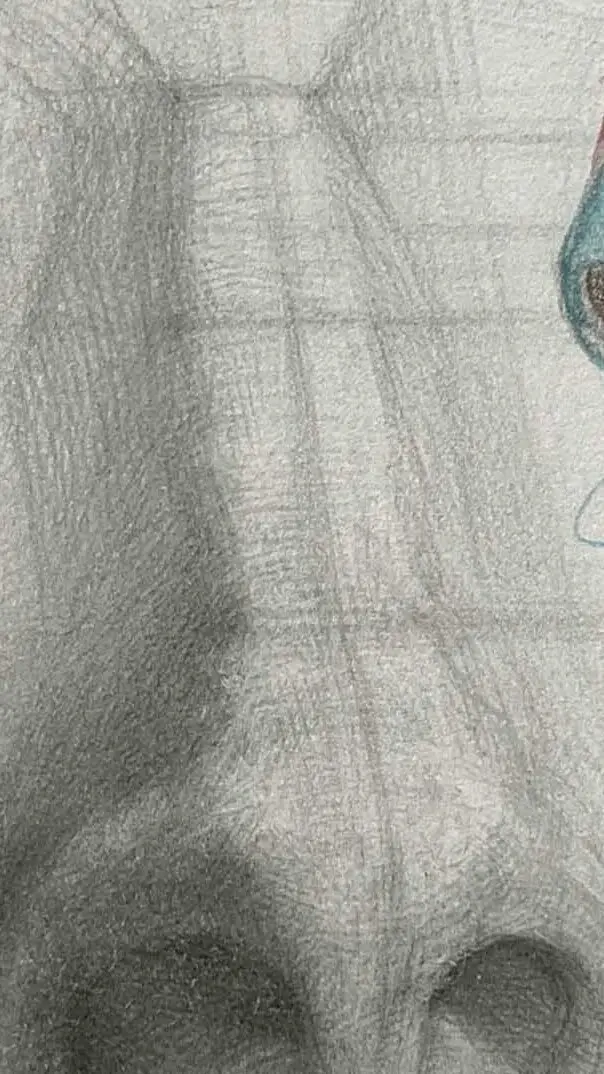
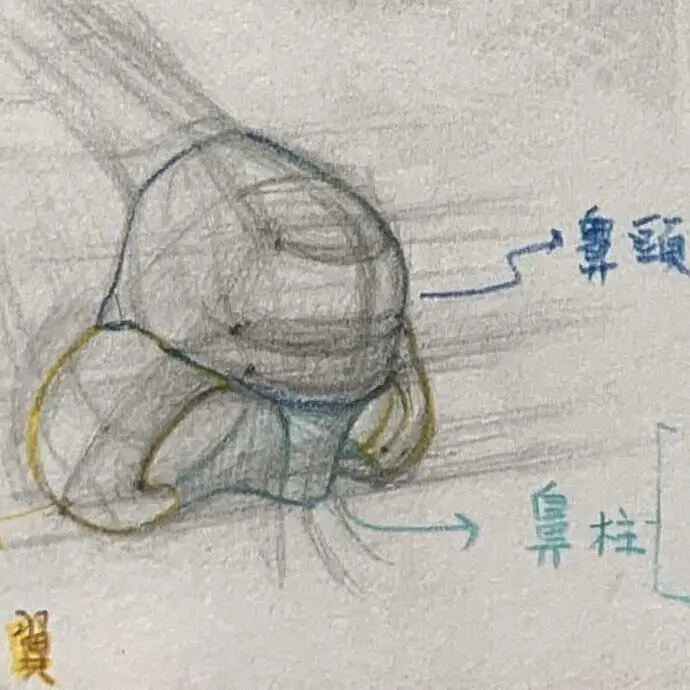
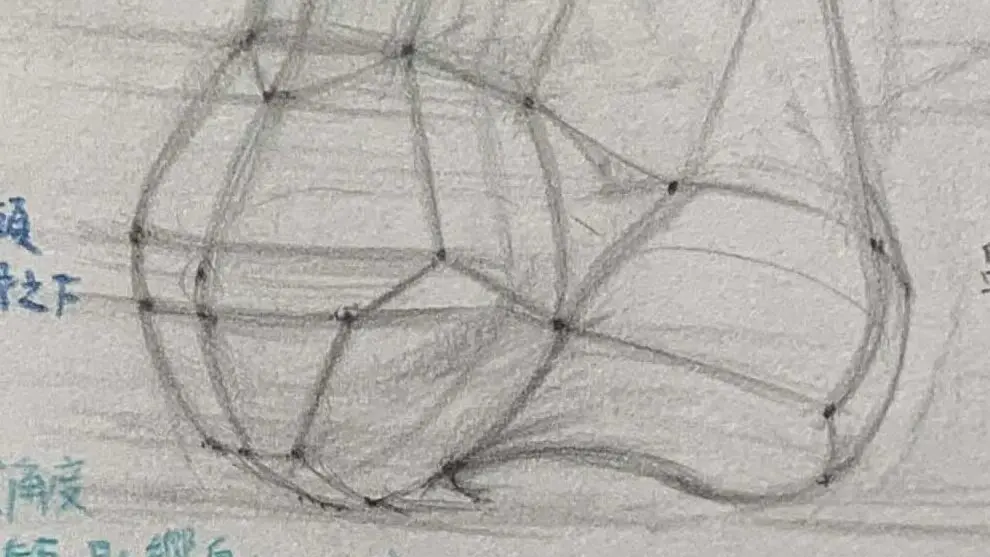
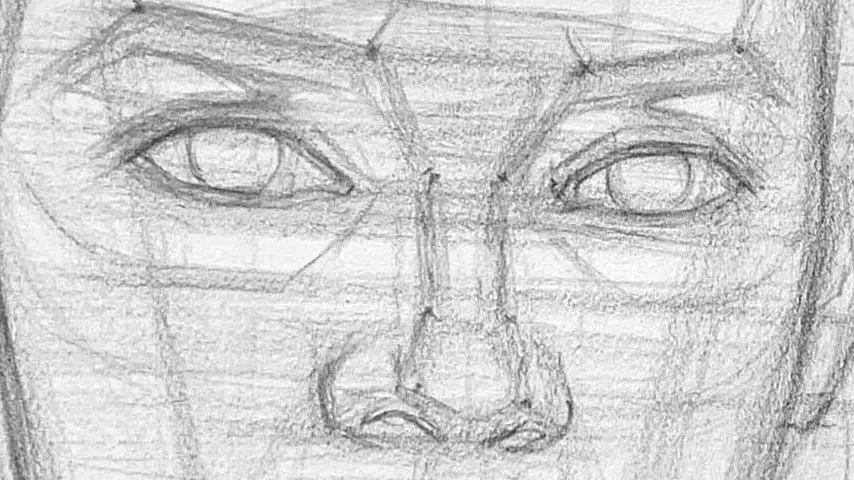
Nose structure
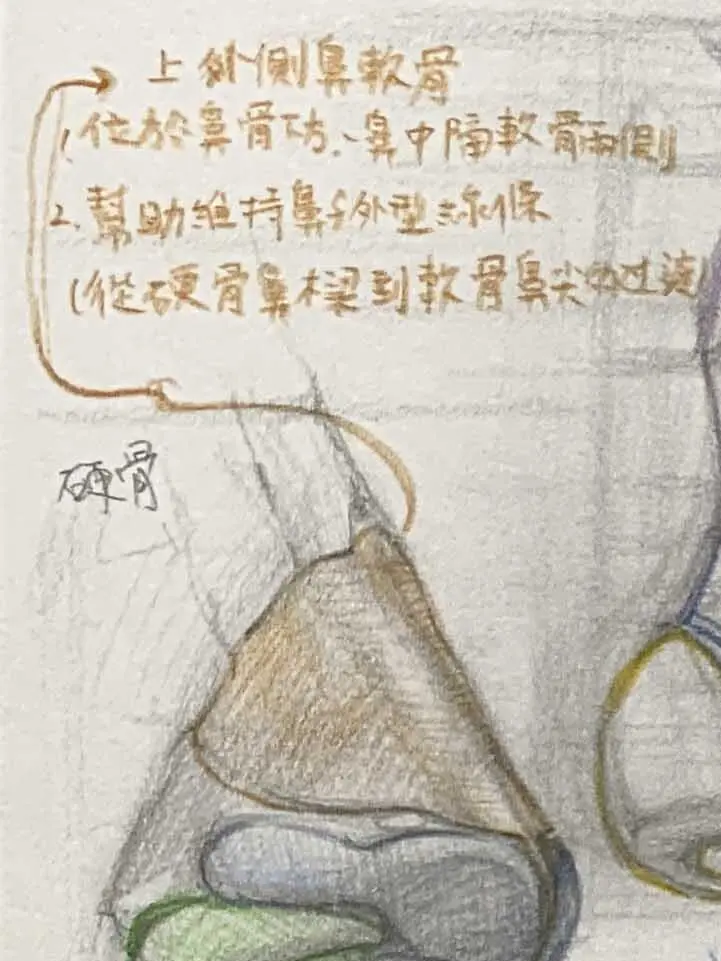
Bone base (hard mount)
Superior sclerite: nasal bone → connected to anterior frontal bone
Lower cartilage: no bone, supported by cartilage tissue and skin
Function: shapes the nose height, extends down from the eyebrows and controls the nose's firmness and dimensionality.
Shape Characteristics:
呈Slender trapezoid or inverted triangleThe height is gradually widening as it extends downward.
Males are usually straight and upright; females are slightly curved or softer (note: but it depends on ethnicity and personal characteristics).
bridge of the nosefunctionality
Determine nose stiffness, width, and thickness.
The main channel connecting the forehead to the tip of the nose
Suggestions for drawing the nose:
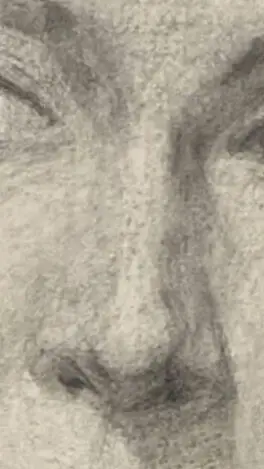
Obverse: The bridge of the nose is a "bright band" that extends from the inner corner of the eye to the tip of the nose.
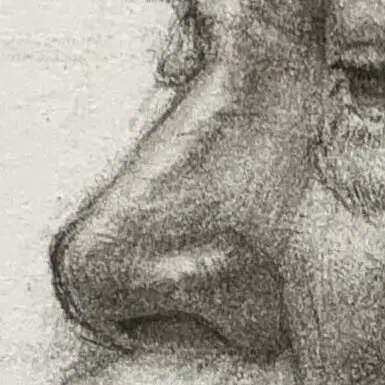
The side of the nose:
A continuous slope from the forehead to the tip of the nose, with a slight "bone → cartilage" transition in the middle section.
3/4 half-lateral: the bridge of the nose often forms a light side, the sides turn into a dark side
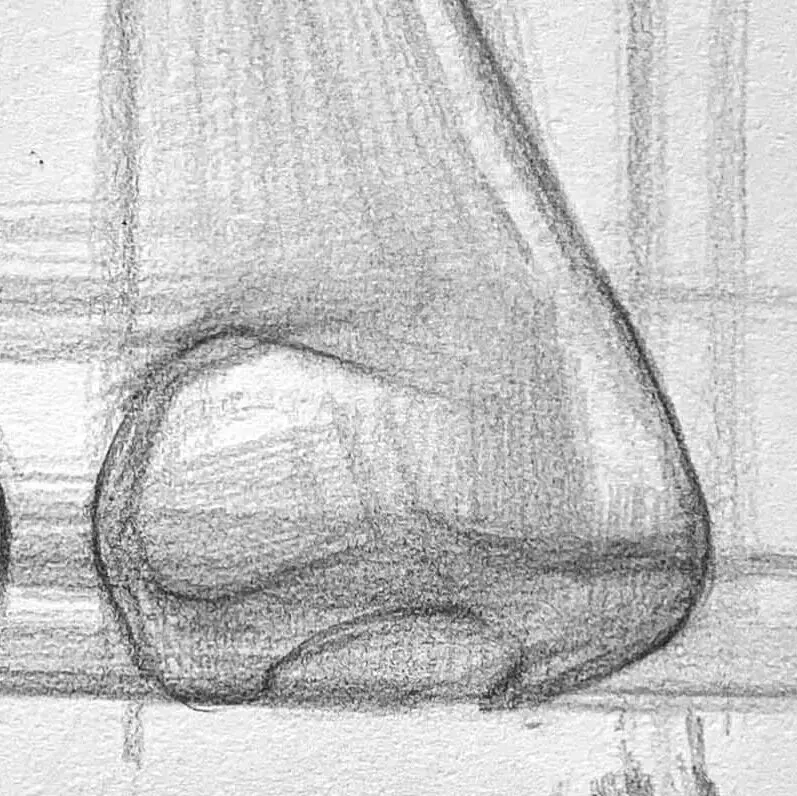
Cartilage structure (pushers that shape form features)
Middle - upper lateral nasal cartilage: Takes up the nasal bone and extends the bridge of the nose
Lower segment: septal cartilage (the main bridge supporting the tip of the nose)
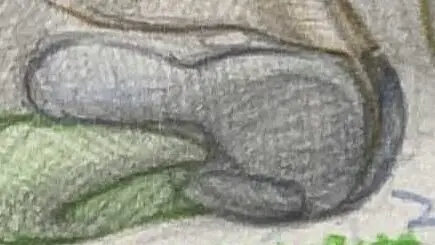
Large Wing Cartilage(Key): Form the tip of the nose and the curve of the nose.
Middle leg → support the tip of the nose
Outer leg → Determine the curvature of the nose and the outer frame of the nostrils.
Winglet cartilage: next to the nose, affecting the shape of the nostrils
Skin and fat thickness → determines whether the tip of the nose is "straight" or "rounded".
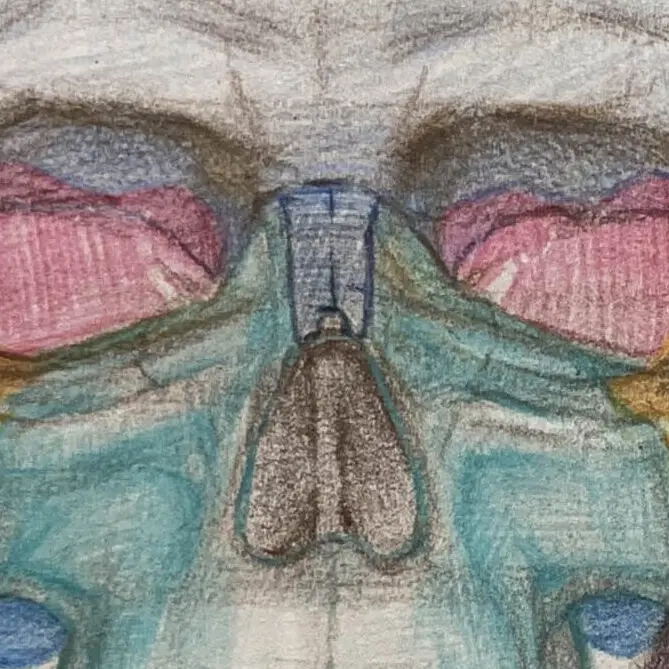
Nose structure
consist mainly of Medial foot of the greater flank cartilageComposition+ Fat Pad
middle of the nose
placement
A "column" that extends downward from the midline between the nostrils on either side.
Admiralty tip of the noseunderneath The upper edge of the middle of the human bodyIt is the separation between the nose and the upper lip.
From the front, it is the straight column of septum flesh between the nostrils.
Nasal Column Deep Structure
The nasal column is not just a soft tissue of skin, it is supported by an internal cartilaginous framework:
Large winged cartilage foot → The left and right inner legs converge at the midline, forming the main stiffness of the nasal column.
Caudal end of septal cartilage → It extends forward to the back of the nasal column and is the "back plate" of the nasal column.
Soft Tissue/Skin → The skin and subcutaneous fat covering the cartilage determine the thickness and visibility of the nasal column.
Nasal Column Function
Structural supportThe tip angle is determined by the tip projection and the upper lip-nasal column angle.
Airway Separation: Separate the nostrils on both sides to stabilize the breathing passages.
Exterior ratioThe length of the nasal column and the degree of exposure affects the shape of the nasal tip and nostrils.
Short nasal column → the tip of the nose lacks support, and the nostrils are "horizontally wide".
Long nasal column → The tip of the nose is raised too much, and the nostrils resemble a "high oval".
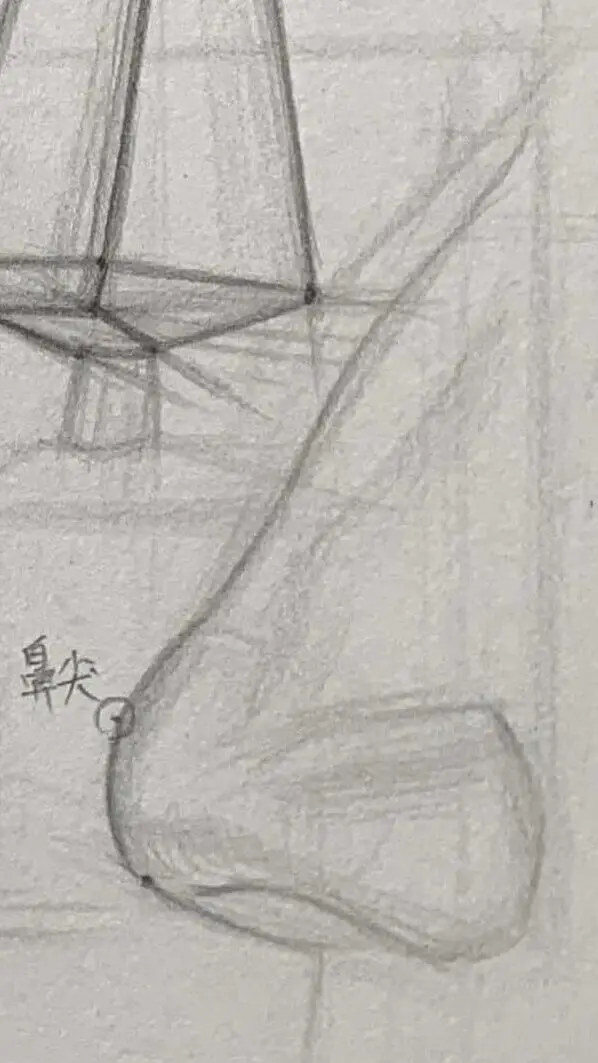
The outer skin layer is mostlyThick, greasy, spherical skin
nosefunctionality
The tip of the nose is the softest and most flexible part of the nose.
Nasal Columns Determine Nostril Shape and Dimension
noseDrawingobservationRecommendation
呈Oval or SphericalThe size varies from person to person.
是The most prominent tip of the nose is high
The tip of the nose usually formsBright Highlight Dots
Nasal Columns: form the thickness between the nostrils and should not be ignored
Nasal Wings and Nostrils
由 Lateral foot of the greater flank cartilage + Winglet cartilage + Fibrofat Tissuecompose
The outer side is the softest, with support coming from fat and fibrous tissue.
ala nasifunctionality
Keep your nostrils open.
Can be opened or closed during breathing/expression.
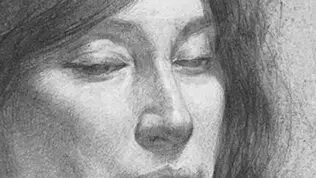
Nose Painting and Observation
Positive: The shape of the wings of the nose affects the width of the nose.
Side view: the outer edge of the nose is thick, and the transition to the cheek is not sharp, but soft and gradual.
Elevation: the nose forms the outer frame of the nostrils, and the left and right sides are approximately symmetrical.
The nose is a transition from "flat to round", which is simply understood as: (Nose rectangular → Nose spherical → Nose curved)
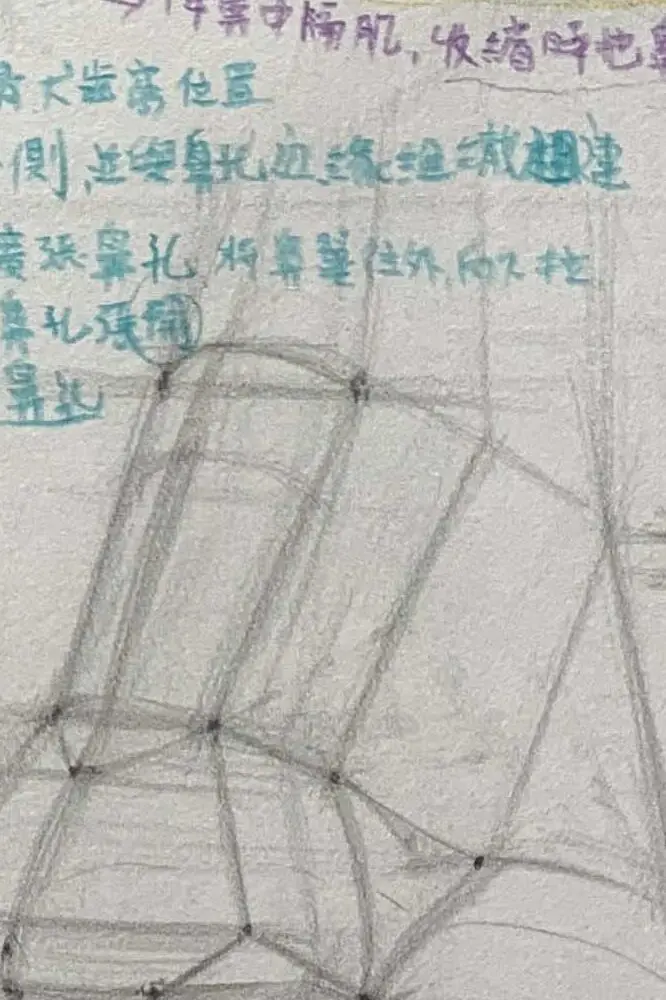
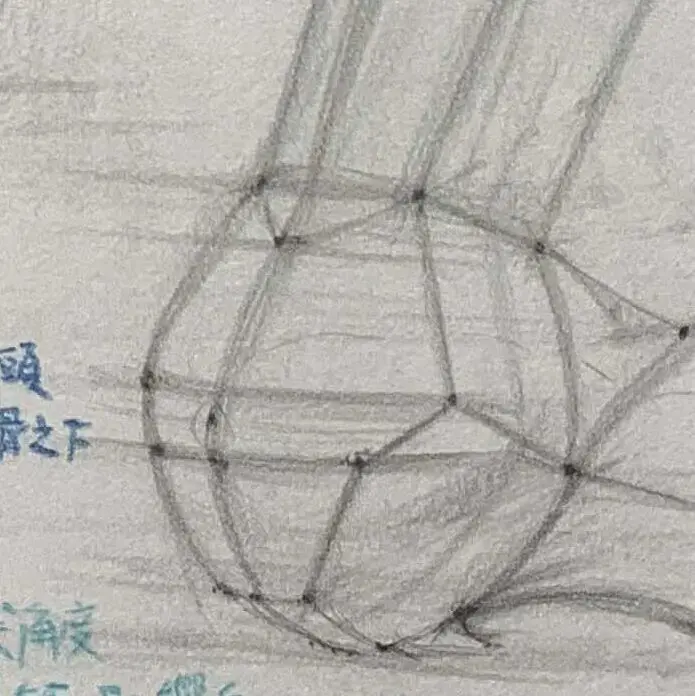
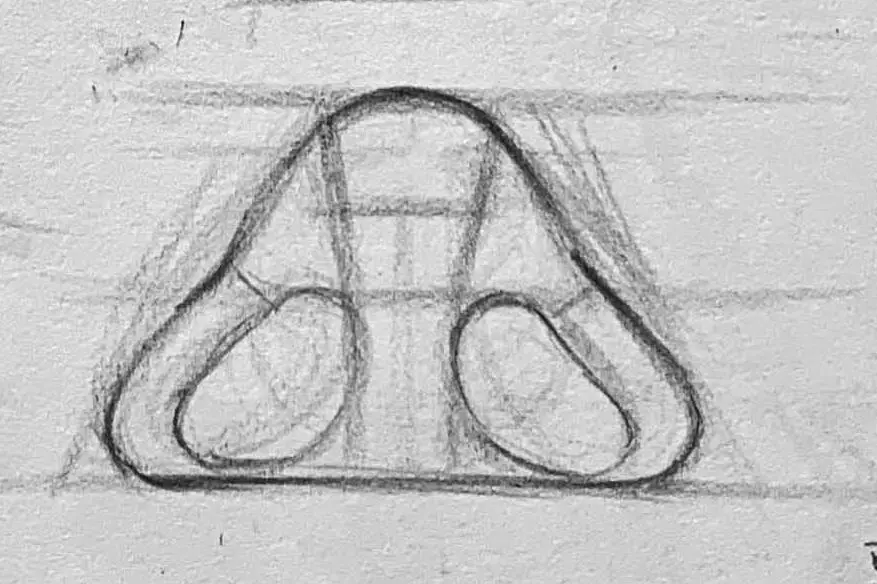
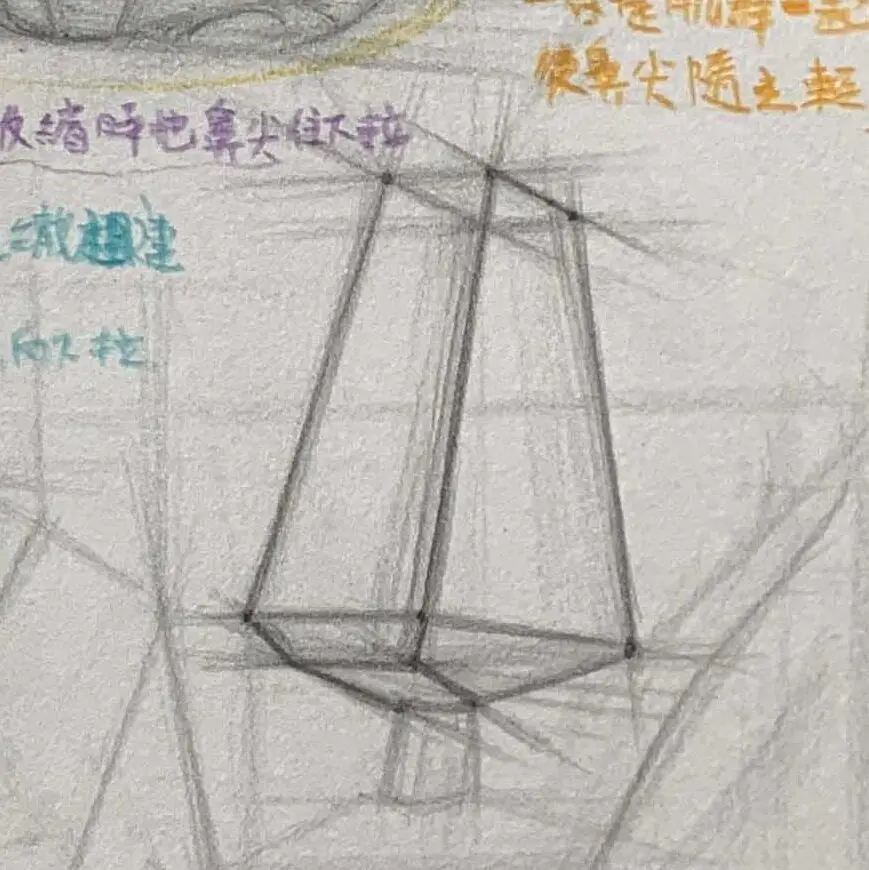
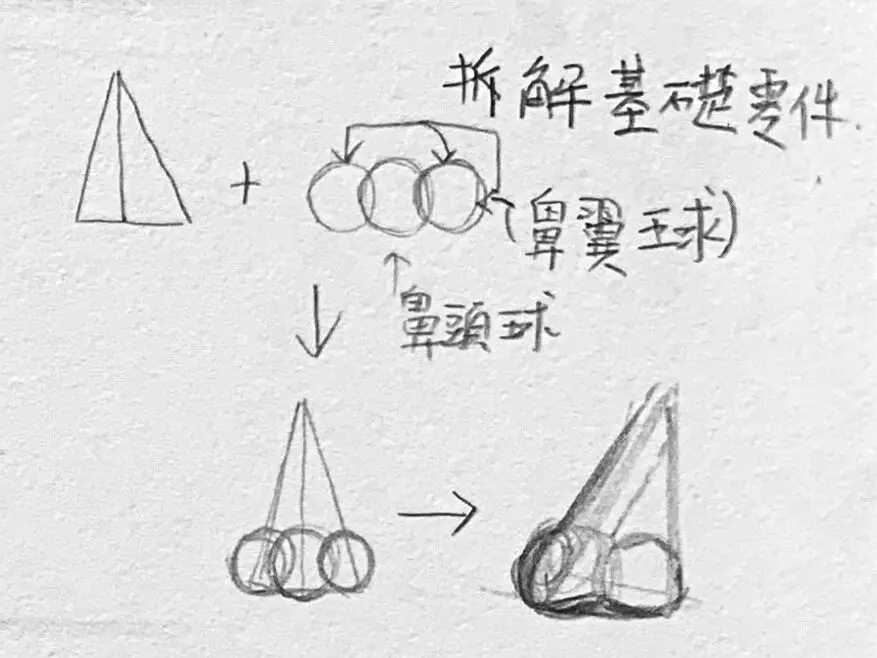
● Disassemble the nose base part area:
Understanding the basic shape of the nose will help you to understand the overall structure of the nose.
The nose can be thought of as consisting of several shapes.
Brick (Trapezium)
The nose and the nose wings together will look like a trapezoidal effect.
Triangular conical shape (bridge + nose)
Simplify the rounded portion of the nose to make the whole nose look like a triangular cone.
Spherical (nose bulb and nose bulb)
The use of spheres is an easy way to generalize and understand shapes, so we recommend that the first priority is to simplify complex shapes. When drawing a circle, you can partially stack the circles on top of each other.
Recognizing Perspective and Proportion in Nose Structures.
Although everyone's nose is individual (influenced by genes, ethnicity, age, gender, etc.), in painting, sculpture and medical aesthetics, theThere are indeed some "generalized approximate ratios"It can be used as a frame of reference for observation and drawing.
Nose and Face Proportion
Proportional analysis
rough description
Nasal width ≈ intraocular distance (distance between eyes)
Usually used to check if the nose is too wide.
Nose length ≈ 1/3 of face length
From hairline → eyebrow → under nose → chin in three equal parts, with the nose in the middle.
The tip of the nose is located between the eye lines (front face).
Helps confirm symmetry
Ensure that the features and proportions of each part of the nose are correct, e.g. wider bridge, rounder nose, etc.
Structural points affect the rise and fall of the surface, which in turn affects the light and dark changes.
● The nose has a bright and dark body:
If you want to create a stereoscopic nose.
Recommended to observe the direction of the light source
Follow the structure of the parts mentioned above, paying attention to the light and darkness, and the ups and downs.
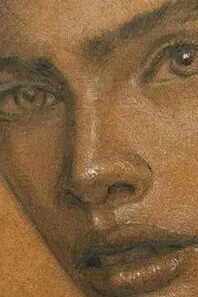
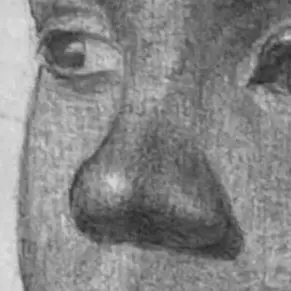
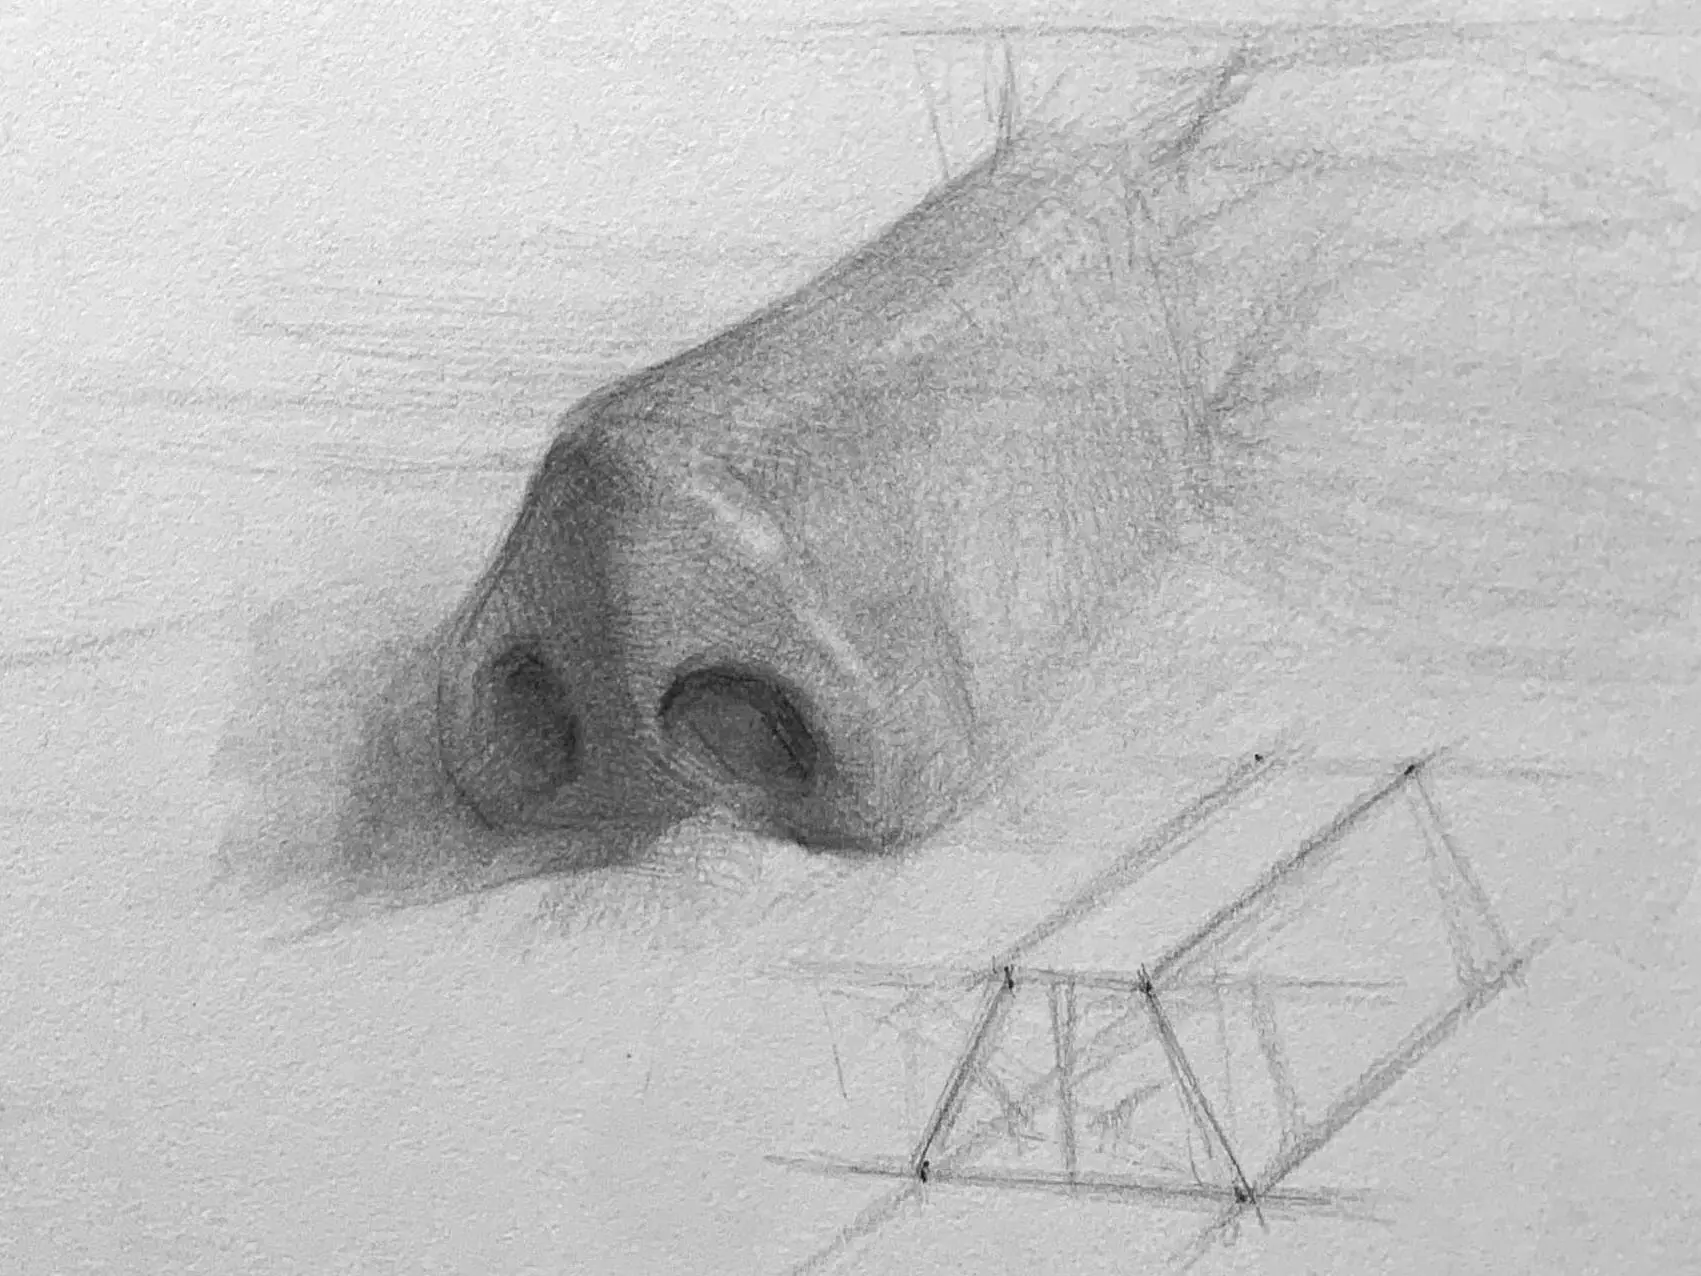
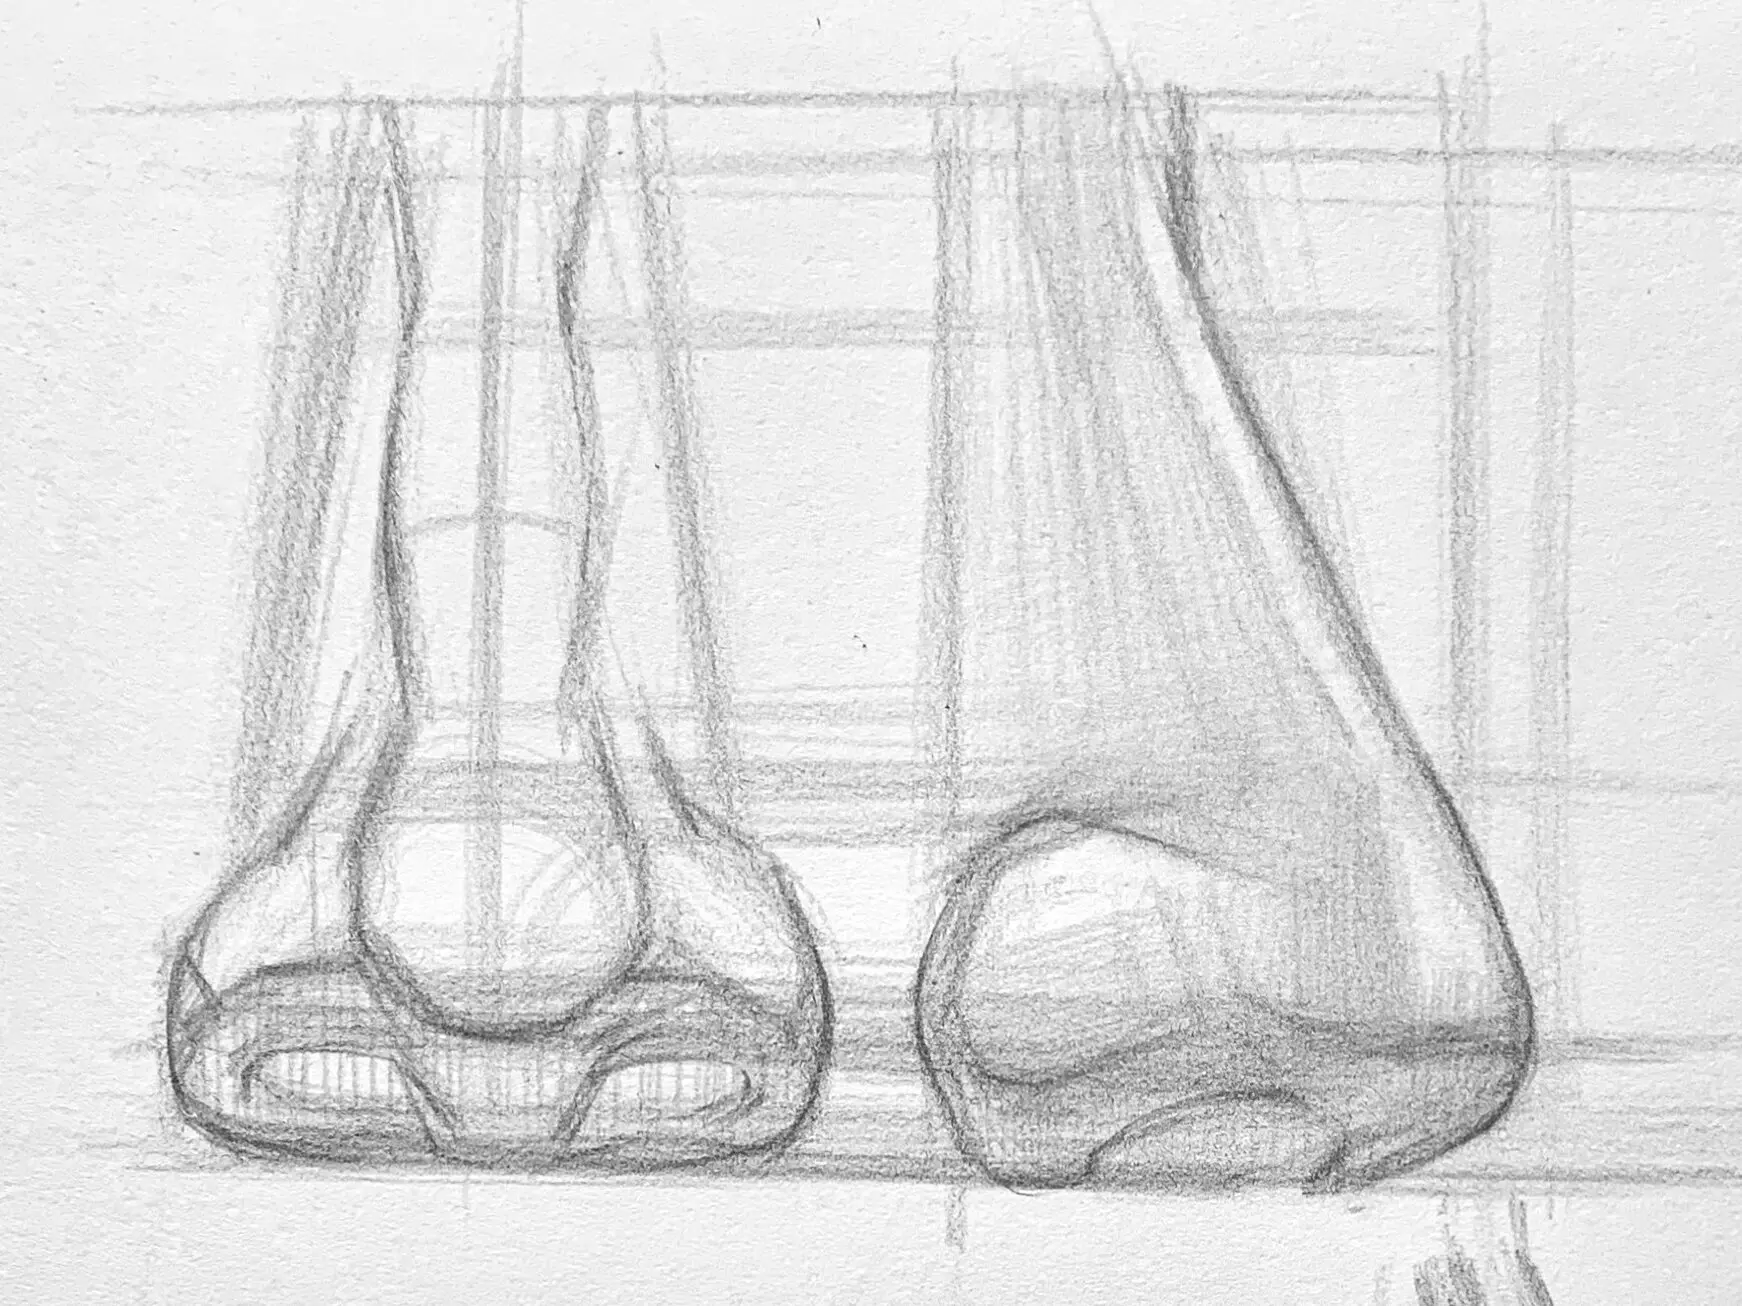
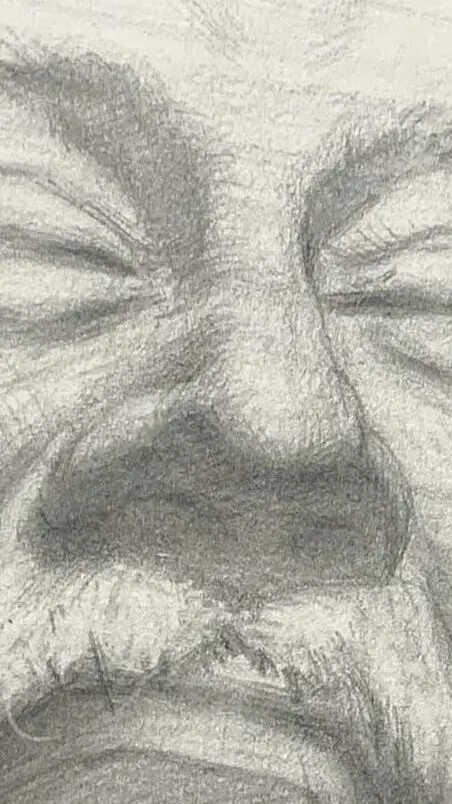
Nose shading details and edge treatments
The nose, as a three-dimensional protrusion, has a distinct distribution of light and dark. Common features are:
Reflective tape: On both sides of the nose, from the rounded surface to receive light, connected to the forehead.
Core Shadows: Nasal groove, nostril projection, lower edge of the nasal pillar
Edge Turning Treatment:
Nose (bone surface) → localized hard edge
Nose tip (fat bulb) → most of the soft edges
Mastering these variations in the texture of the edges helps to create a nose that is both solid and soft.
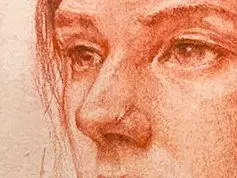
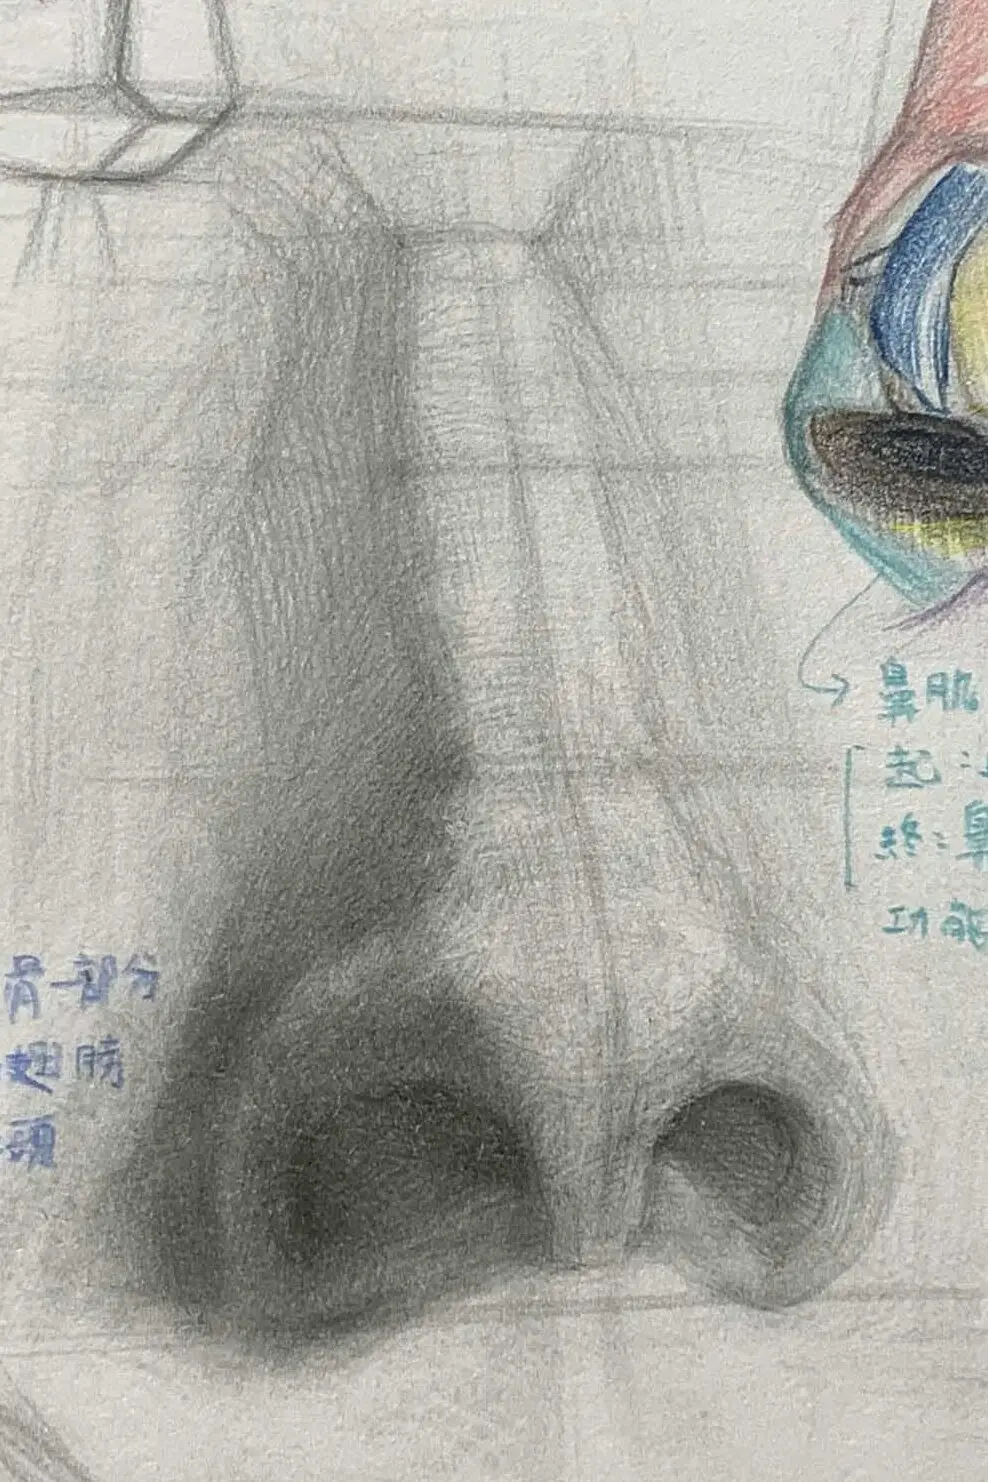
Nose treatment reference from different angles
Here is how I handle the nose in my life drawing, after understanding the knowledge points mentioned in the previous paragraph.
We start by deconstructing the position of the turning point to make changes in light and dark, and observe the reference diagram to find that in theNose-beam interfaceThe processing is a bit blurry (depending on the distance of the light).
Compared to the eyes and the mouth, the nose has a more subdued light and darkness, so we have to pay attention to the difference between the strengths and weaknesses of each other in the treatment.
Want to learn how to draw human parts and what to know? Read more
I hope this step-by-step description can help you recognize and understand how to paint the nose structure, if there are any subjects you want to see or painting methods you would like to know, please feel free to leave a message or private message me, I wish you a happy painting!
If you want to learn to draw, but don't know how to start, or are interested in understanding what drawing is all about.