- 登入
- 註冊
The torso is the core that connects the head and limbs, and mastering it allows us to draw characters in a more natural and powerful posture.
Bones are the structure that supports and protects our organs, and muscles shape the contours of the skin.
The following will help you build a good foundation for body painting by going from the skeleton to the muscles.
―――――――――――――――――
Before practicing chest painting formally.
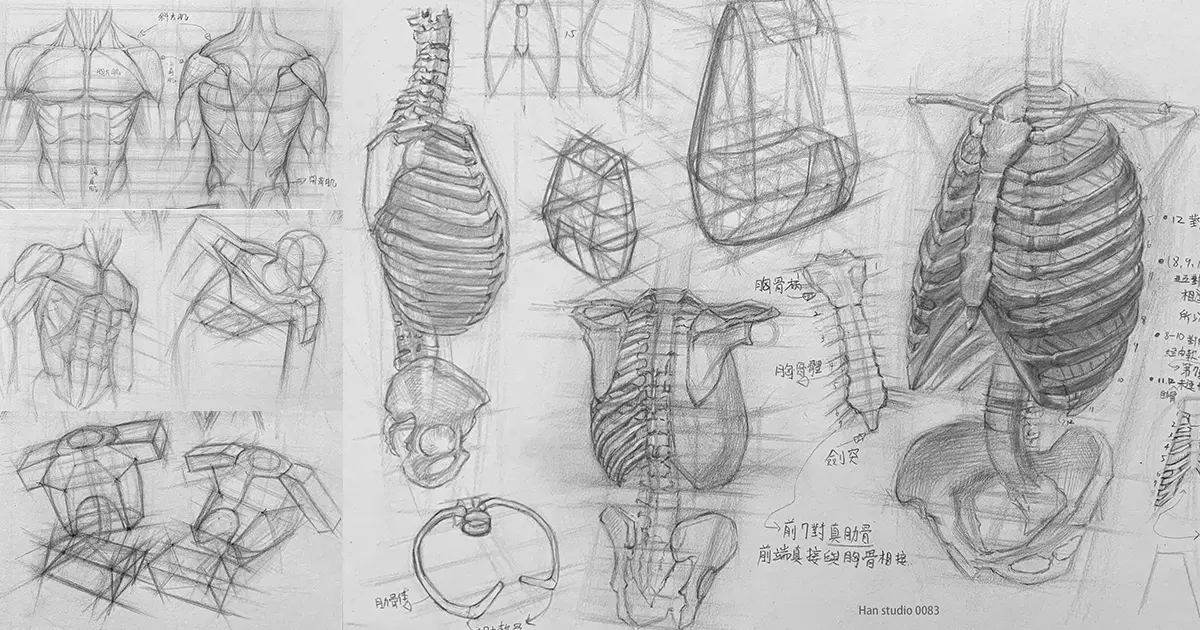
We need to understand firstSkeletal structure from the thorax to the pelvisBecauseBones are like the steel bars of a building.It is the proportion and direction of the shape that determines the overall proportion and direction of the form.
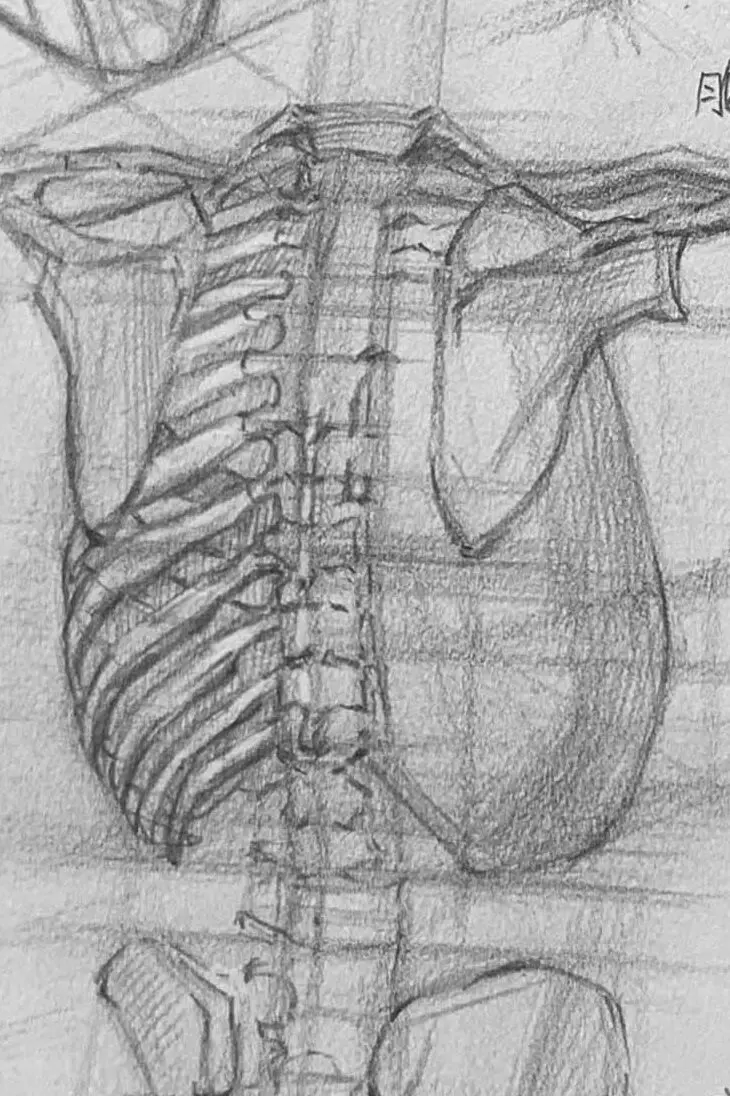
When drawing the trunk skeleton, note these major structures:
Total number of ribs is 12 pairs
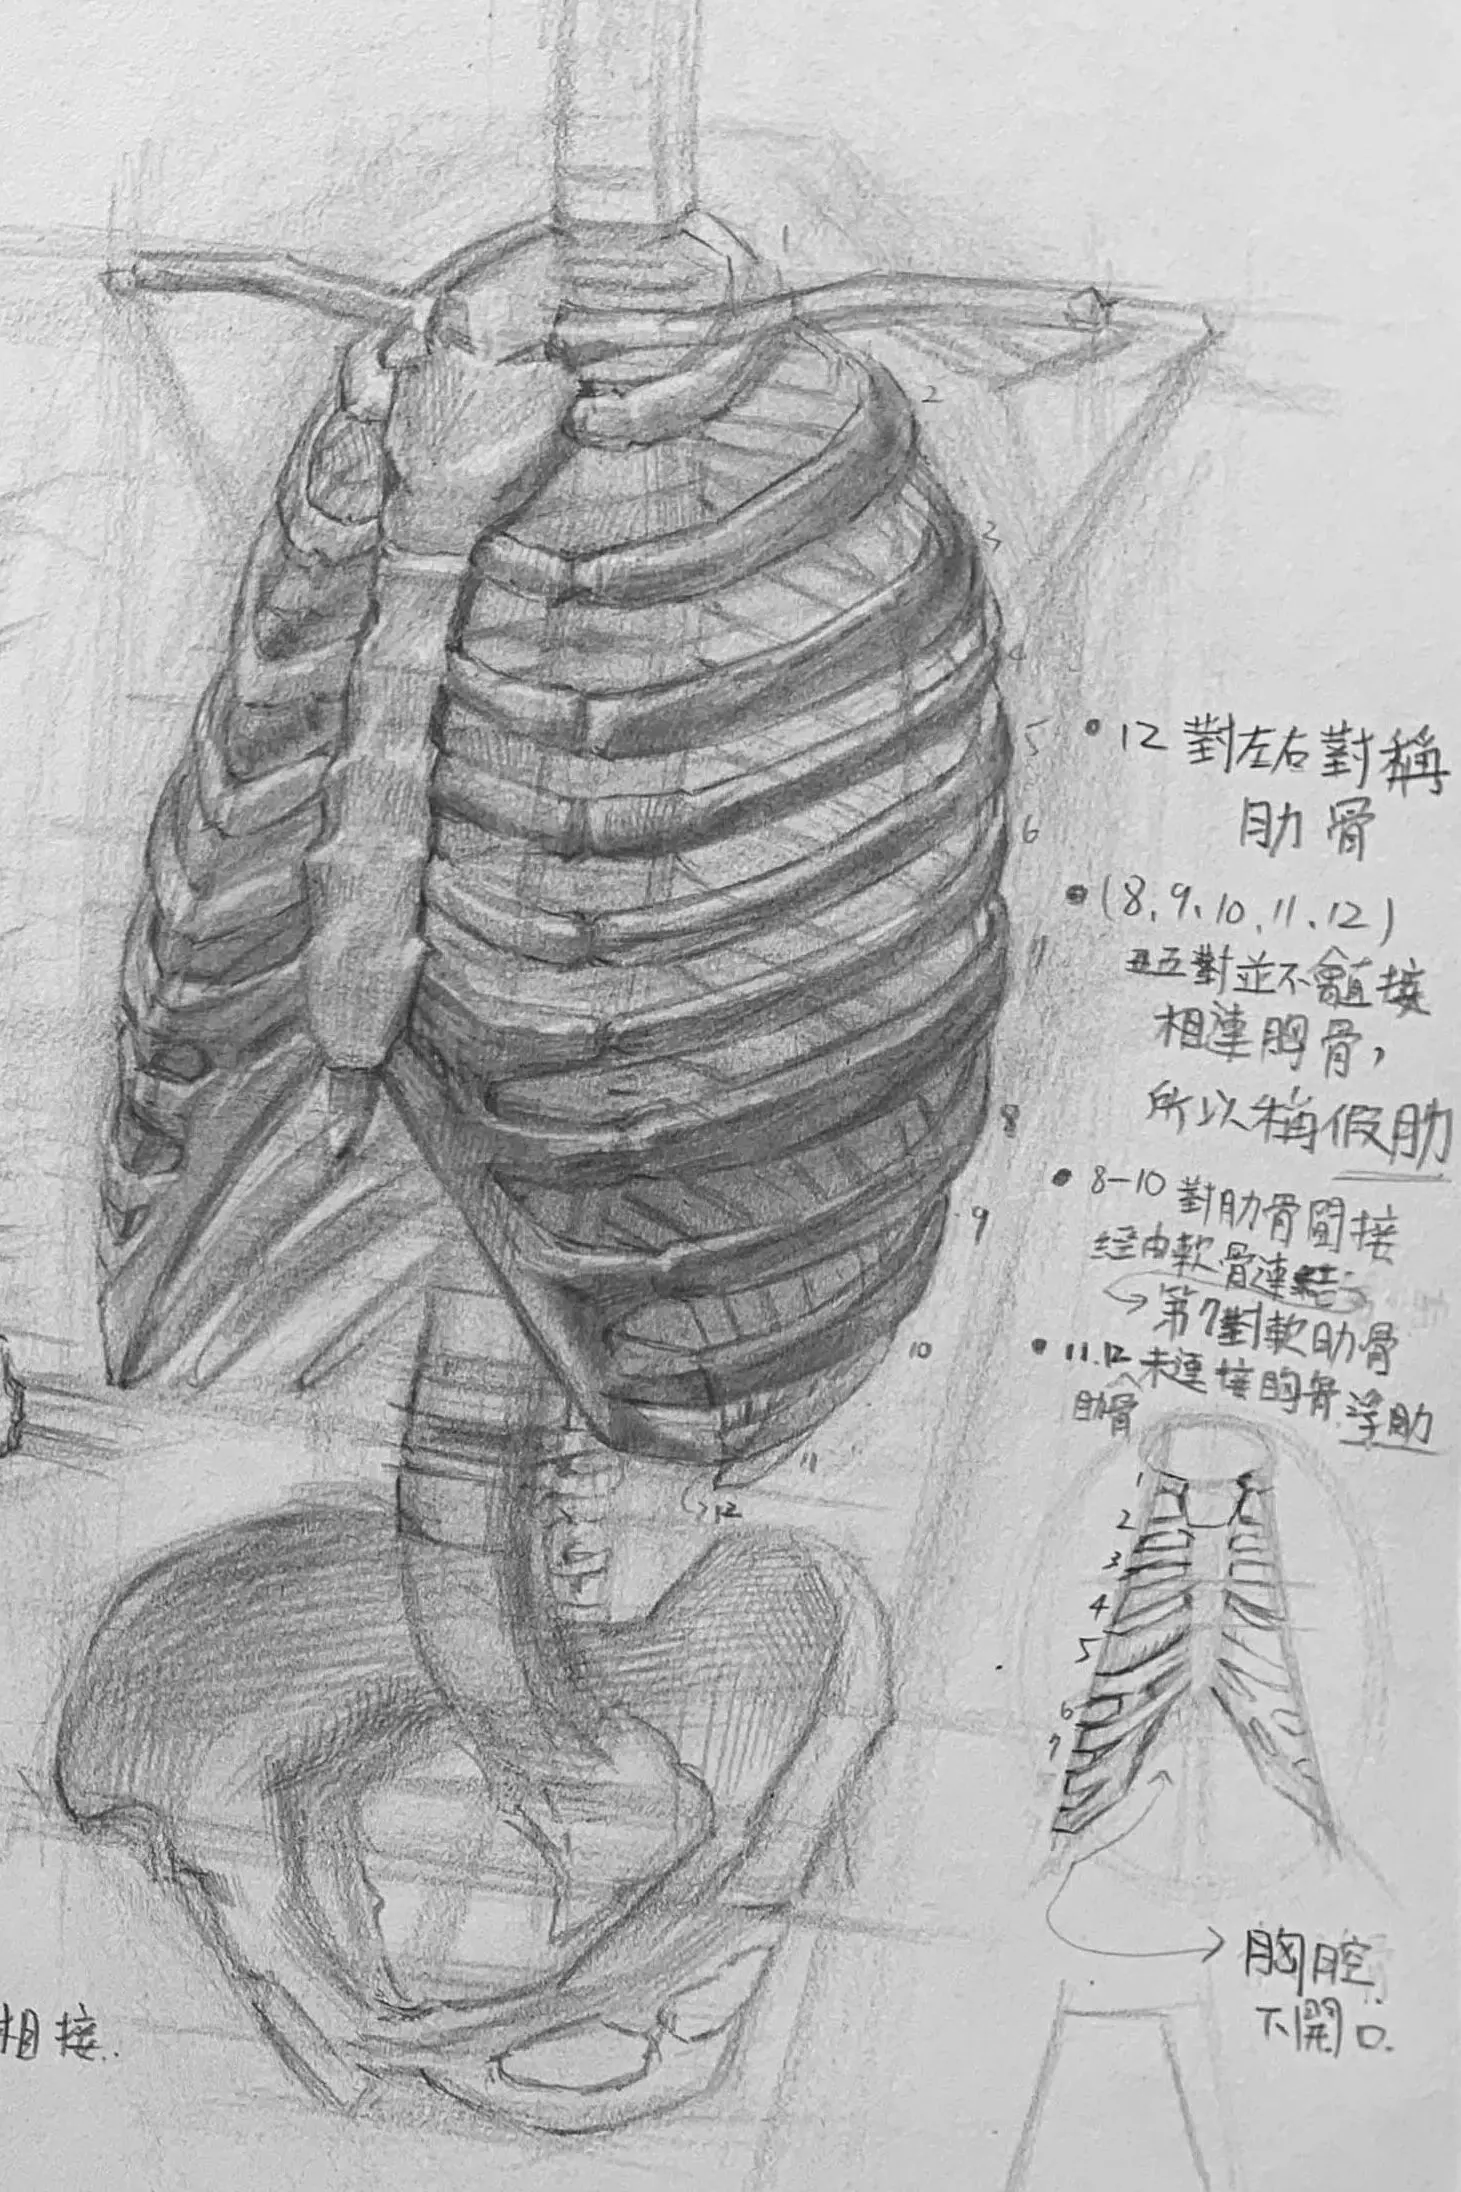
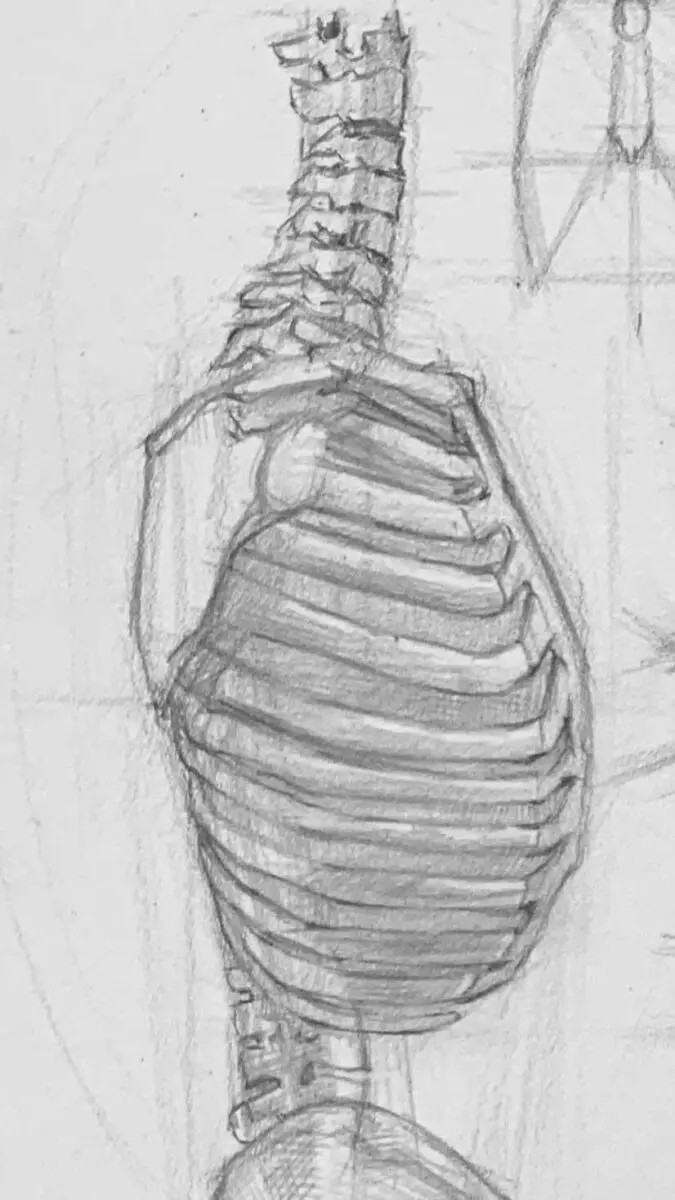
The ribs are not aligned horizontally, but have a "downward slant" from back to front.
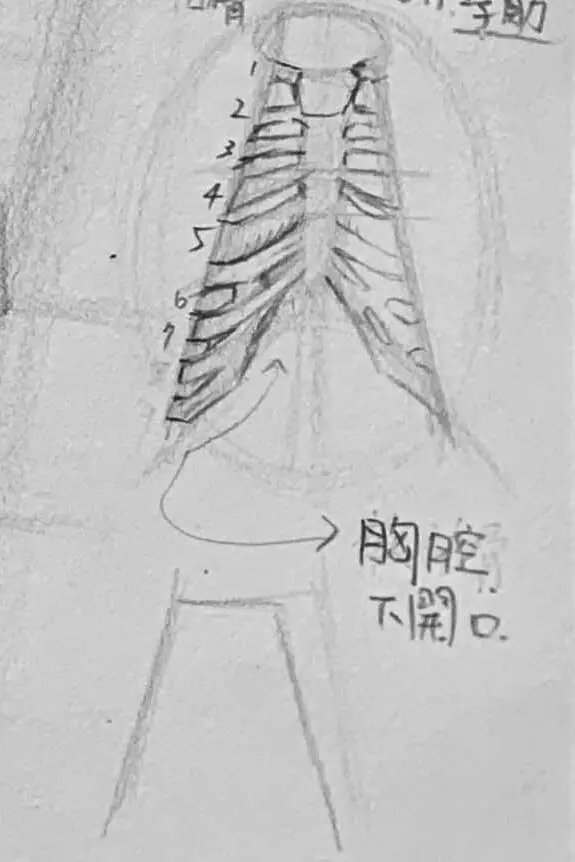
With perspective shapes to help understand how the ribs wrap around the chest cavity.

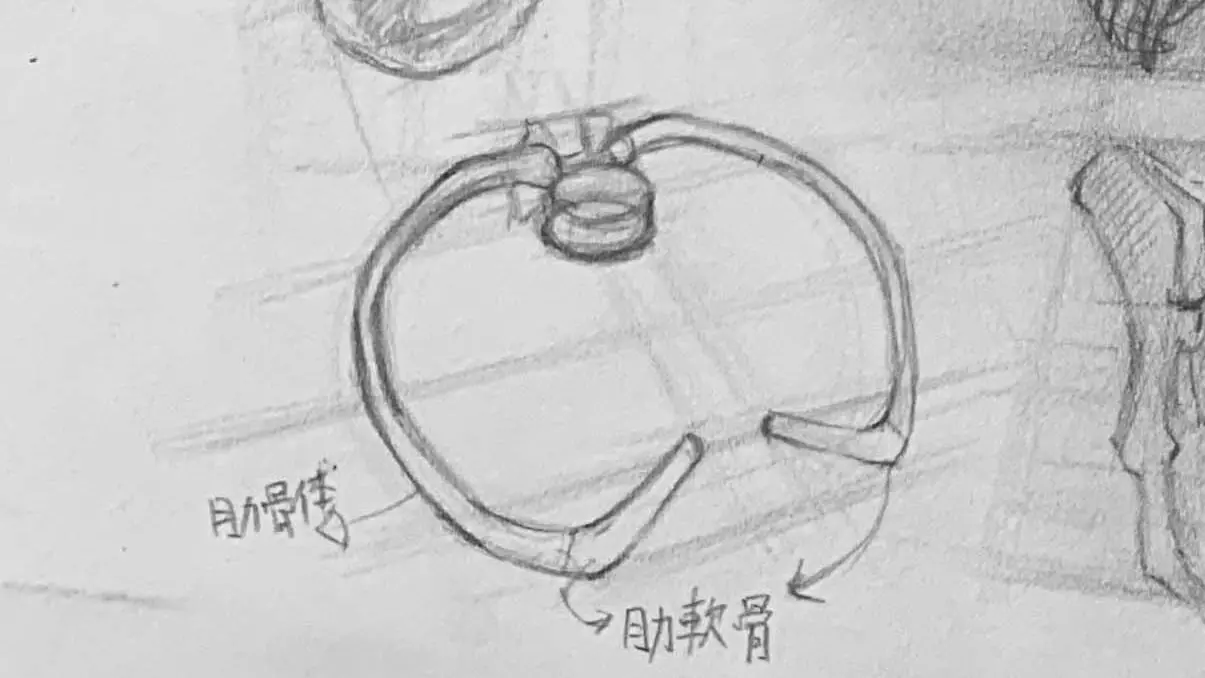
The posterior ends of the ribs are connected to the thoracic spine joints rather than being suspended independently.
For example, each rib is like a cantilever that attaches to the spine with a ball joint.
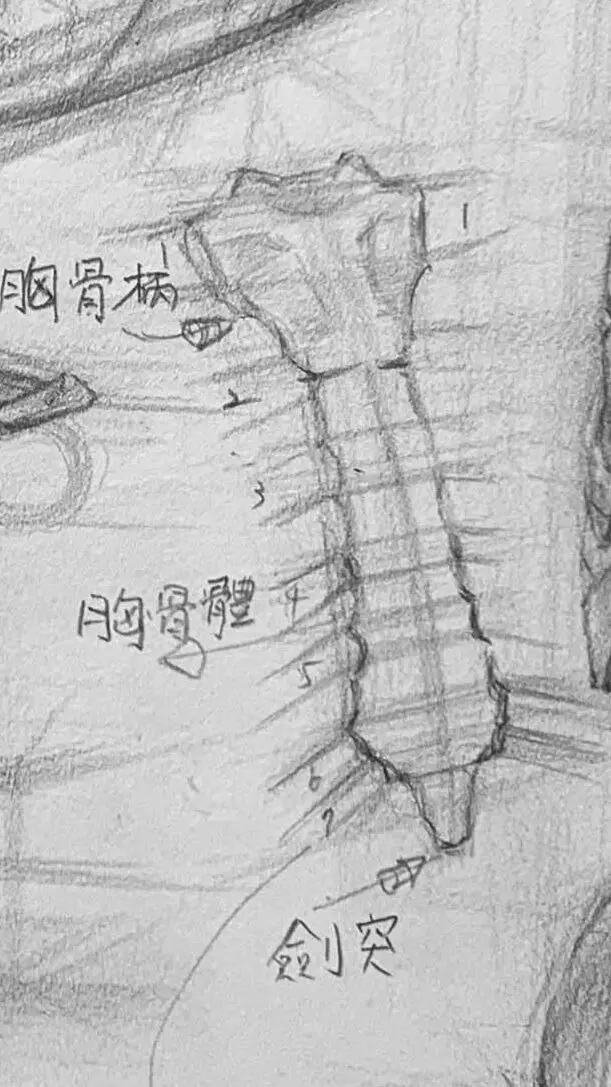
It is located in the center of the chest cavity and resembles a long, flat plate of bone, with the front ends of the right and left ribs connecting to the sternum.
At the base is a "rapier", which is a small, pointed bone.
The spine is not a straight line, but has a natural "slight S curve"! A straight spine will make the character look like a straight up and down log.
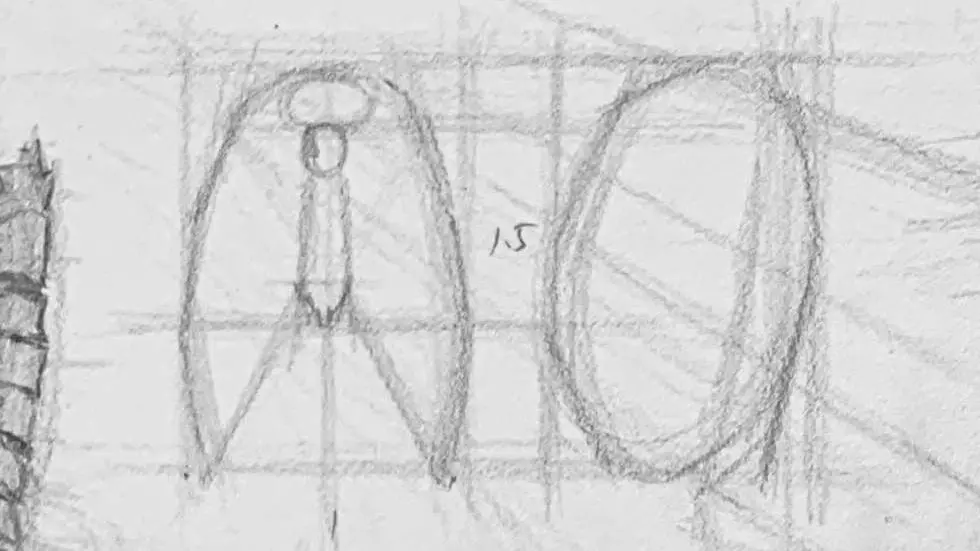
1. Practice tracing the curves and slopes of the ribs of the thorax from a geometric frame.
2. Structural exercises for rib stacking.
3. Turn the front and rear view into a side view.
4. Practice switching from frontal skeleton to lateral stereo.
―――――――――――――――――
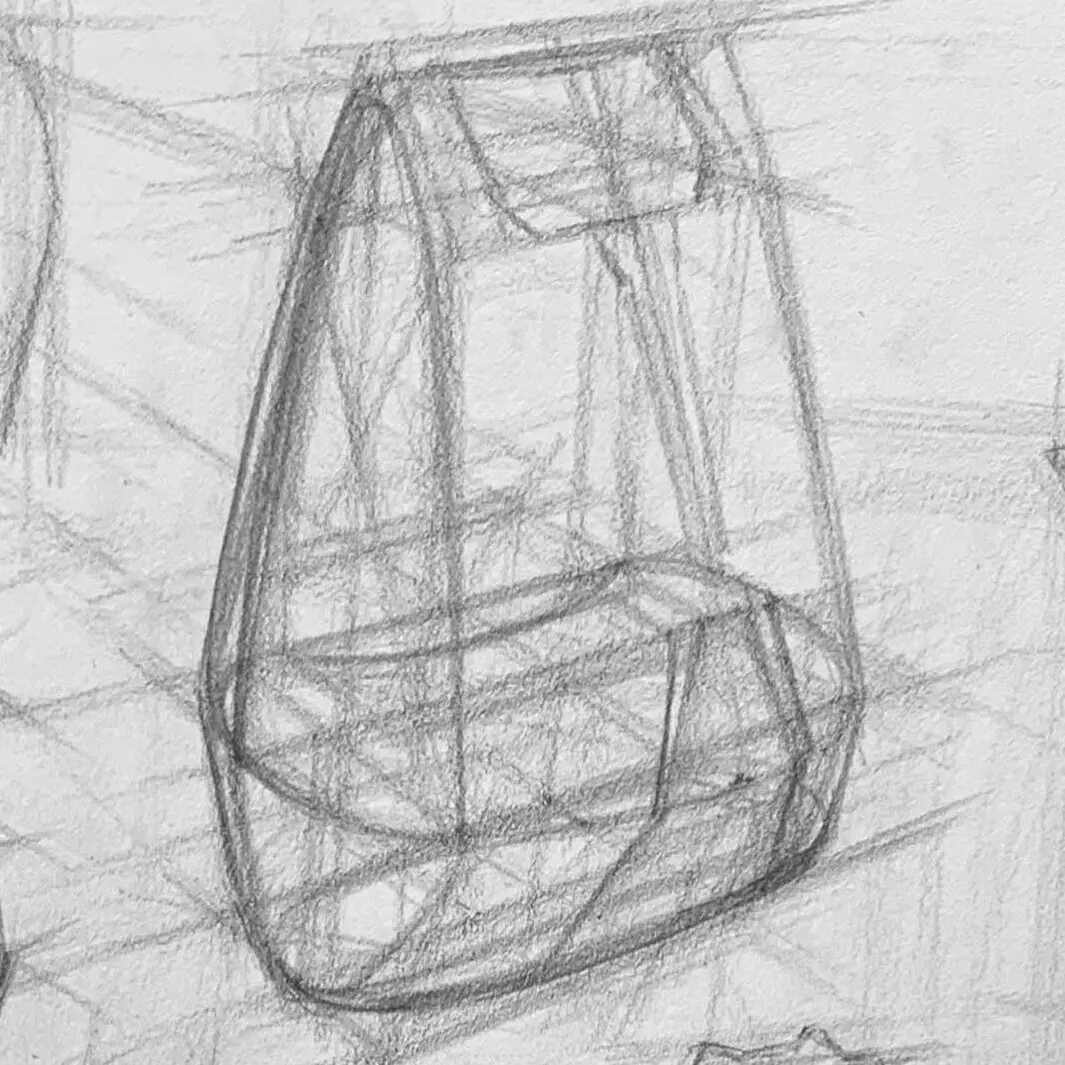
It supports the weight of the upper body and connects the legs, and is shaped like an inverted triangular bowl.
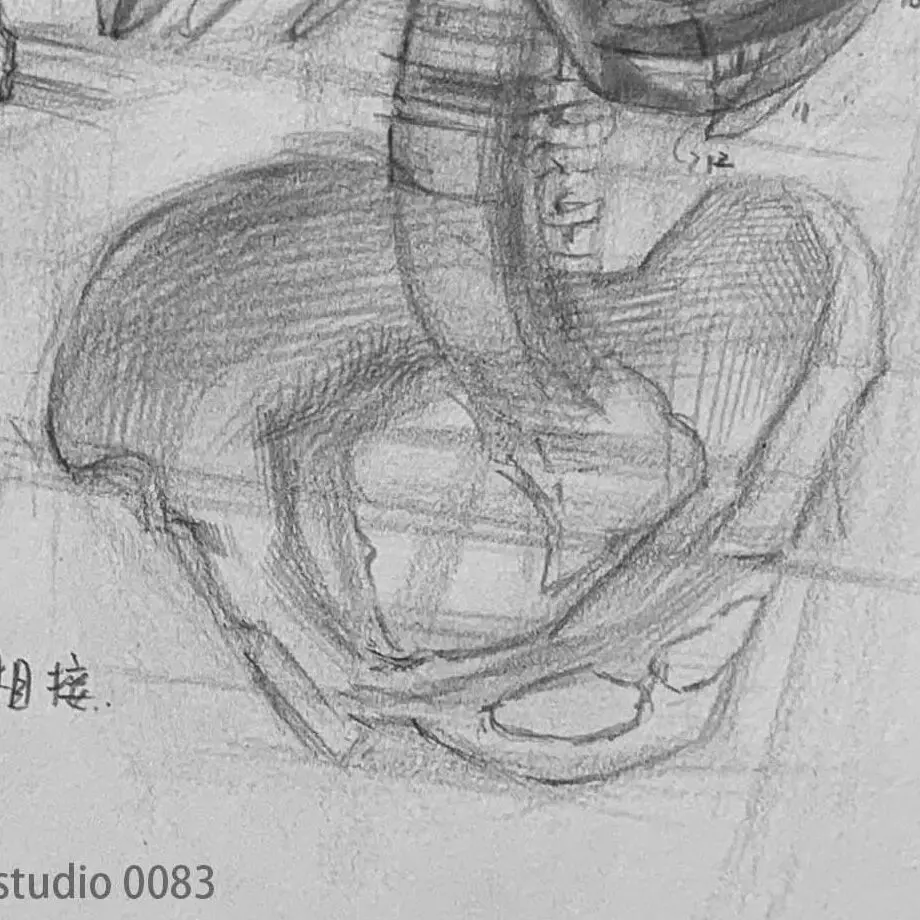
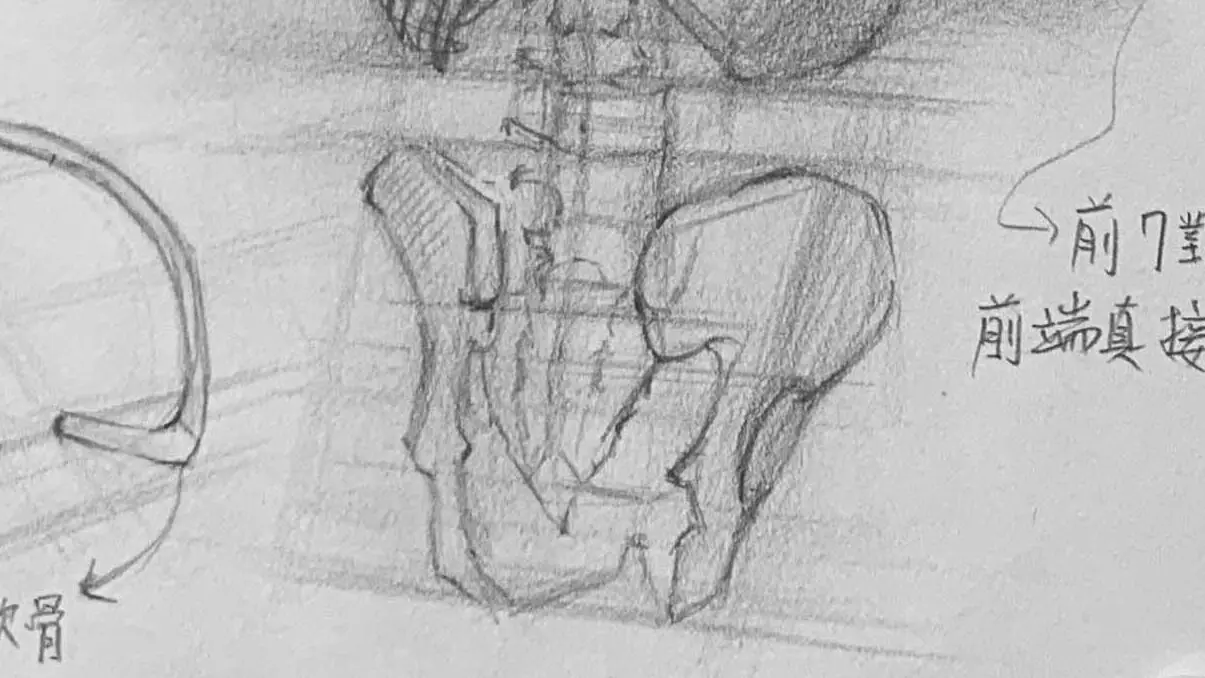

tip: The iliac bones protrude from both sides of the pelvis and can be used as an observation point during twisting movements.
Remember that when drawing the trunk skeleton:
Understanding chest painting in layers through such a structure.
You'll find that even with simple lines, you can create a supportive, naturally flowing torso.
Body!
―――――――――――――――――
We are beginning to move into an understanding of muscle as a "cloth over bone" that is layered on top of each other, and we are beginning to understand that muscle is a "cloth over bone" that is layered on top of each other.
It determines the body's appearance in terms of lines, strength, and posture.
tip:
The direction of the structure of the center of the abdomen can be slightly implied, even on a body where the muscle lines are not obvious.
tip:
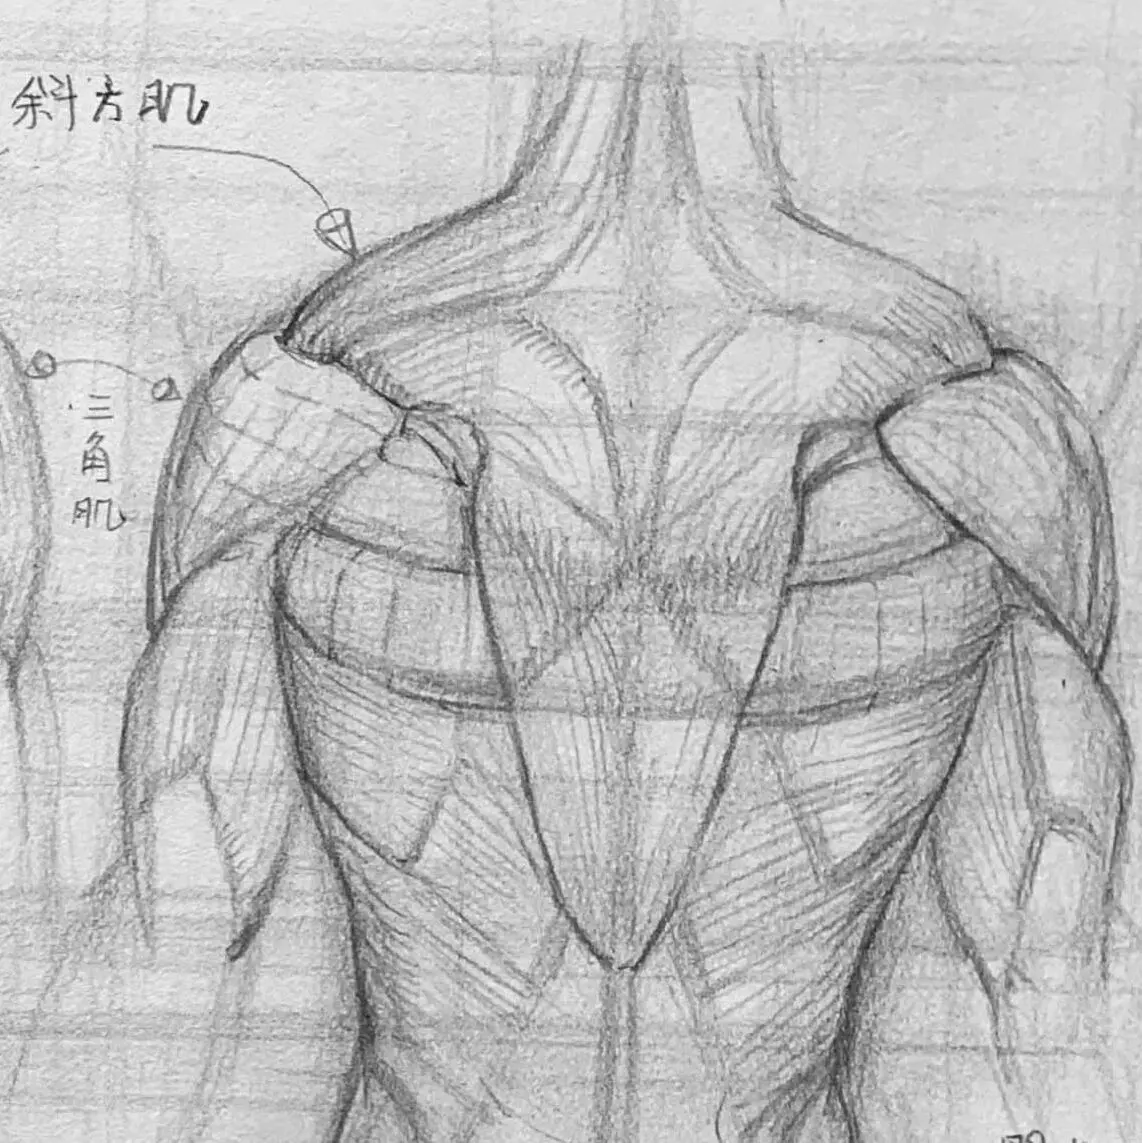
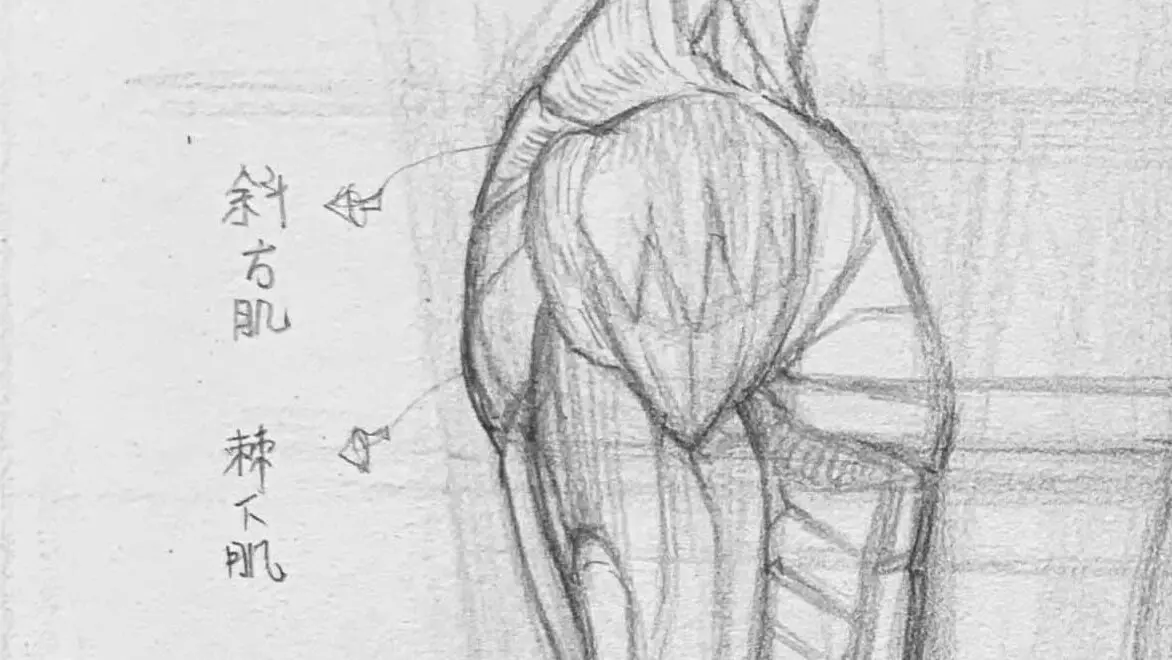
When the shoulders are relaxed, the trapezius muscles extend smoothly;
When shrugged or tensed, the trapezius contour is more defined and pronounced.
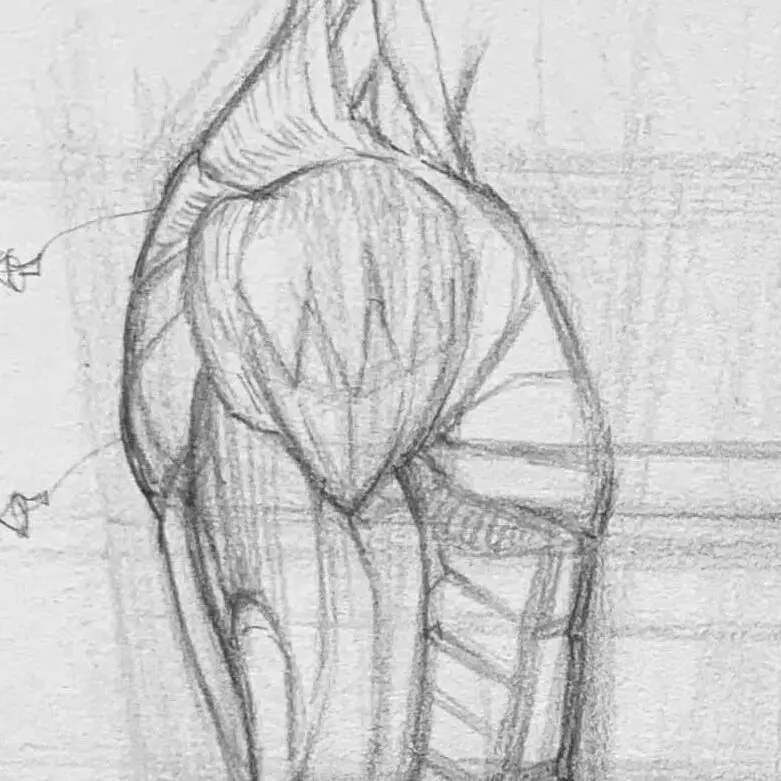
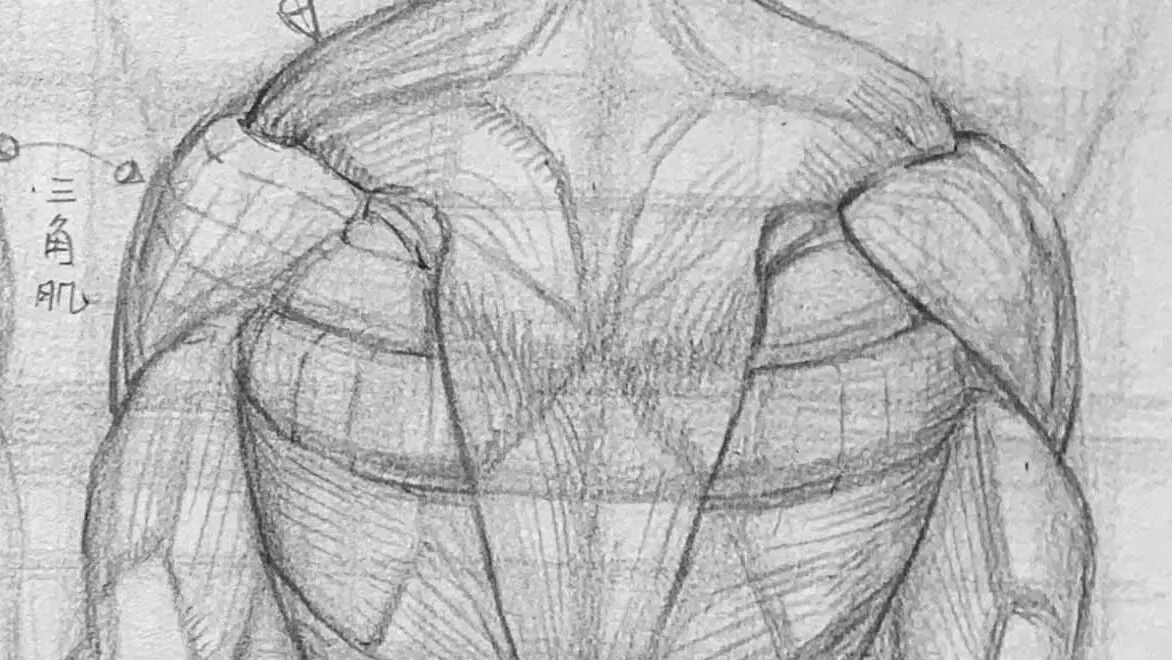
It is located in the lower part of the back and is shaped like a fan with a large area spread out.
The function is to pull the arms back and down.
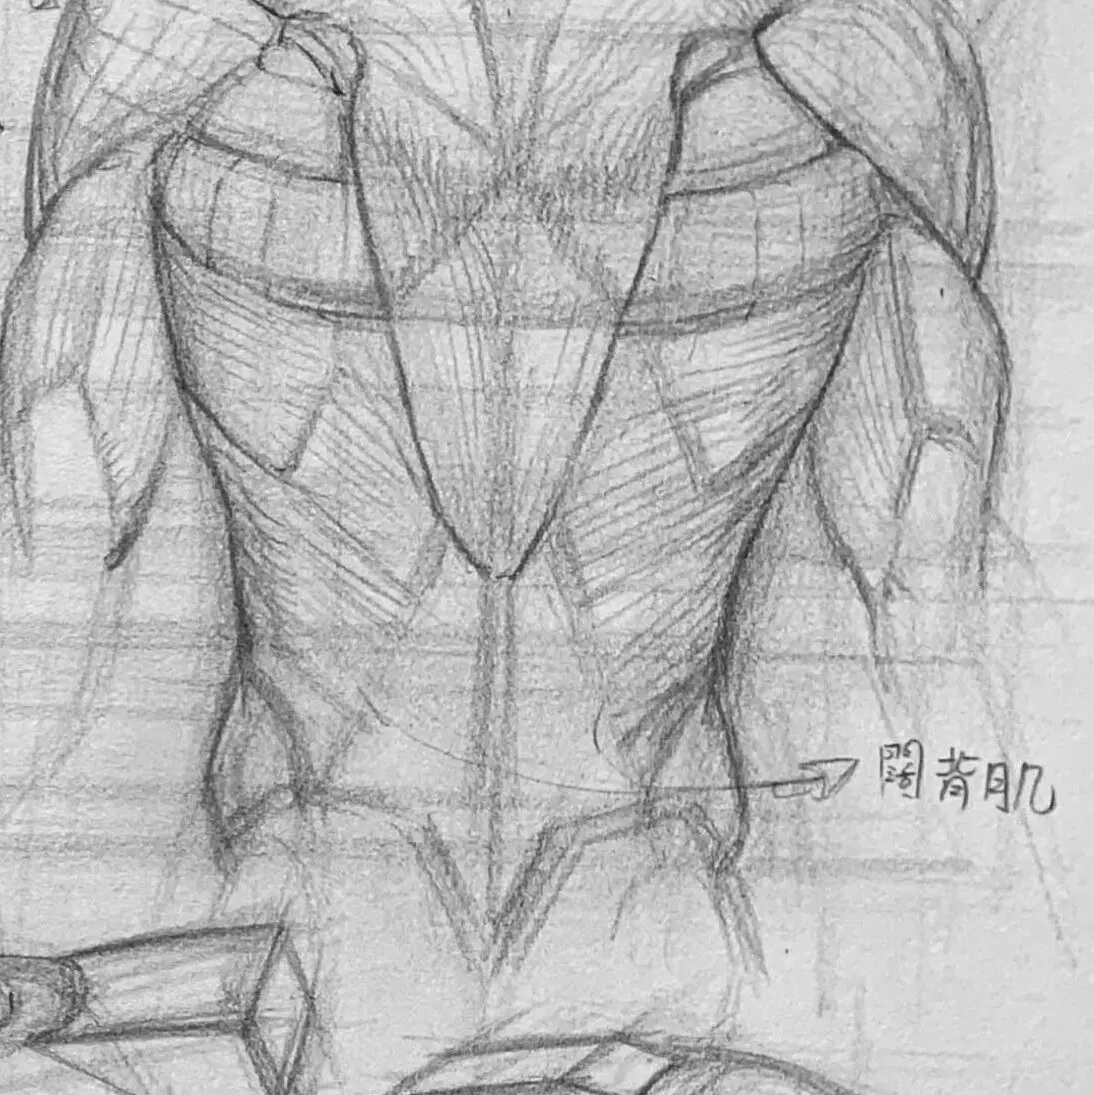
tip:
The wide back muscle is the key to making the back look "spread out", so pay attention to the transition between it and the waist.
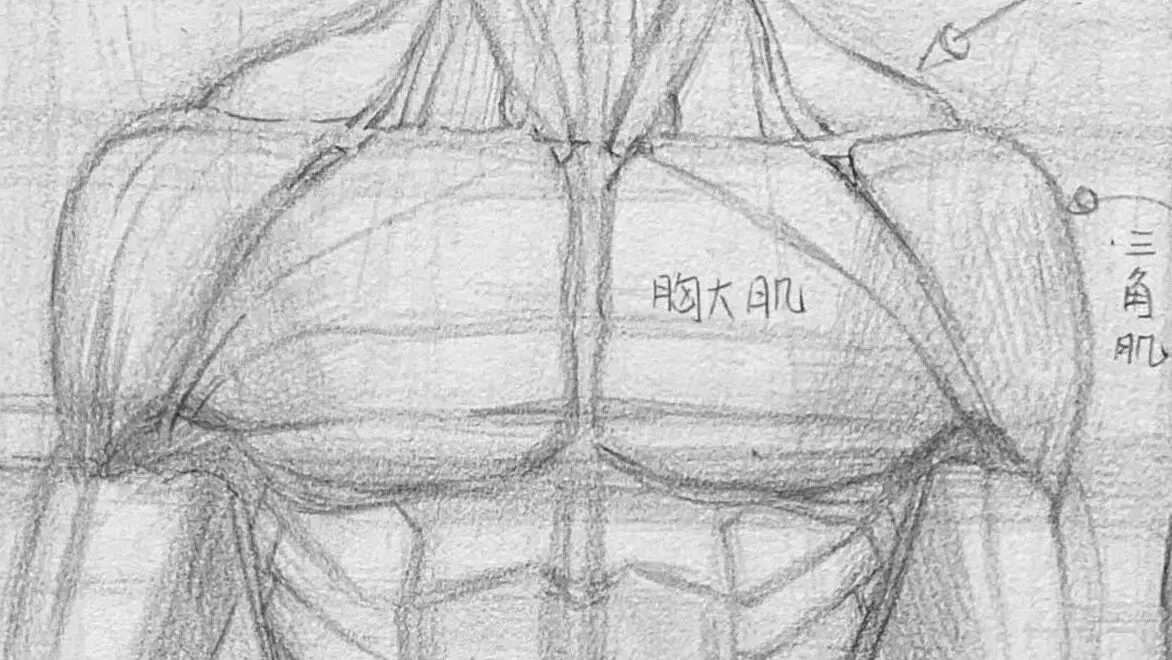
Wraps around the shoulders to allow for multi-directional rotation and lifting of the arms.
It wraps around the outside of the shoulder and is shaped like a thick triangle.
They are divided into anterior, middle and posterior bundles, which are responsible for arm movements in different directions.
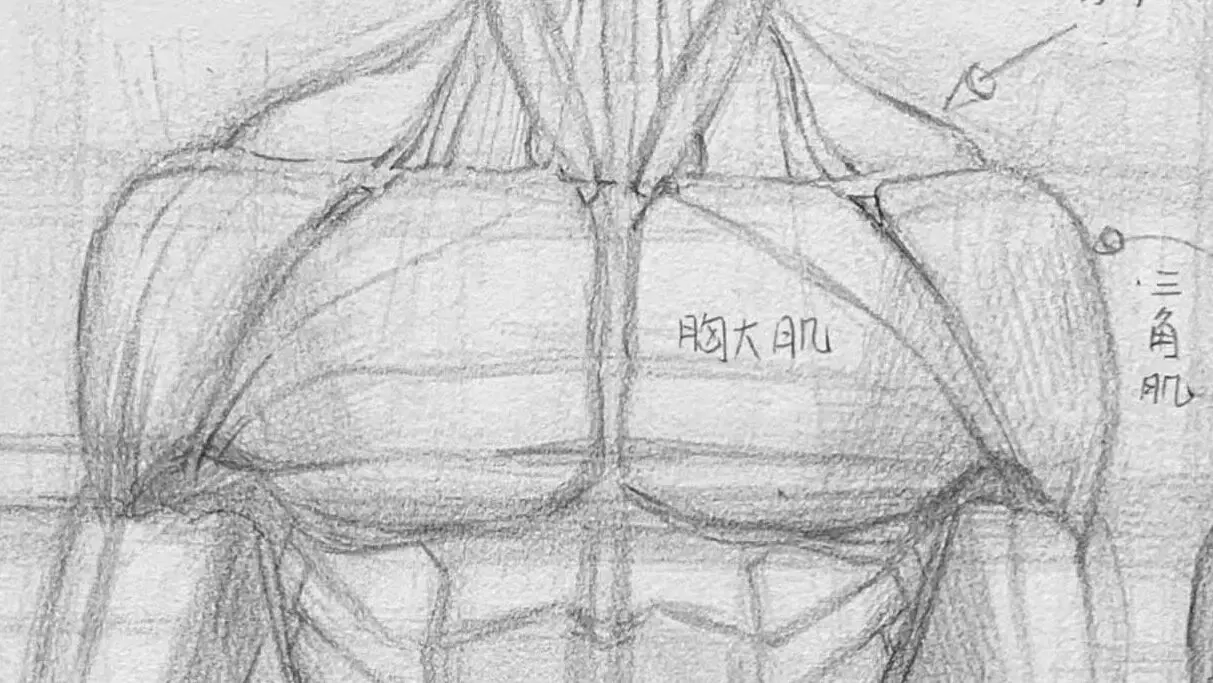
Tip:
When drawing the side movement, the natural rotation of the deltoid muscle can greatly enhance the smoothness of the connection between the shoulder and the arm.
Remember that when understanding muscles:
Let's start with the skeletal foundation; the muscles are attached to and follow the skeleton.
Grasp the large shaped muscles (chest, back, abdomen, shoulders) to create an overall impression.
Then step by step, we'll observe the details.
―――――――――――――――――
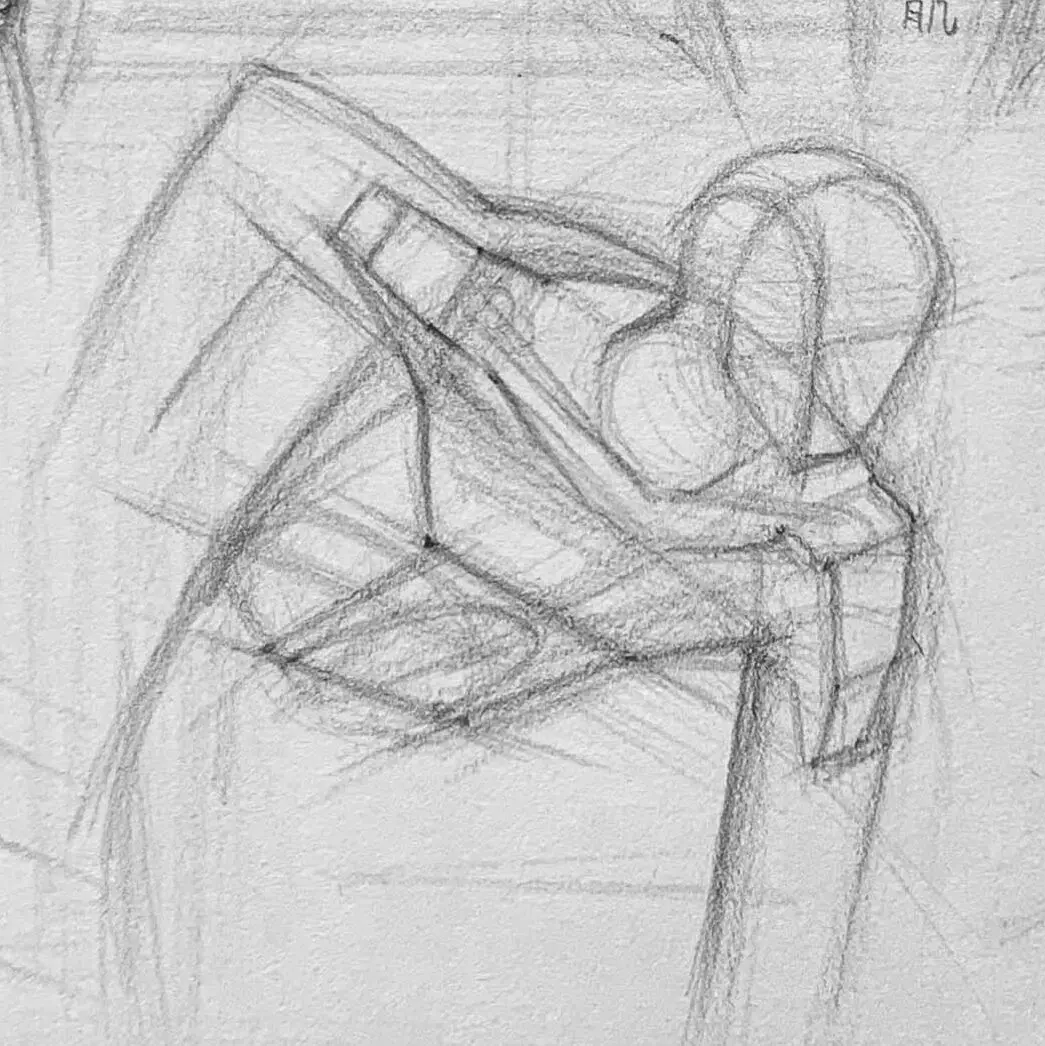
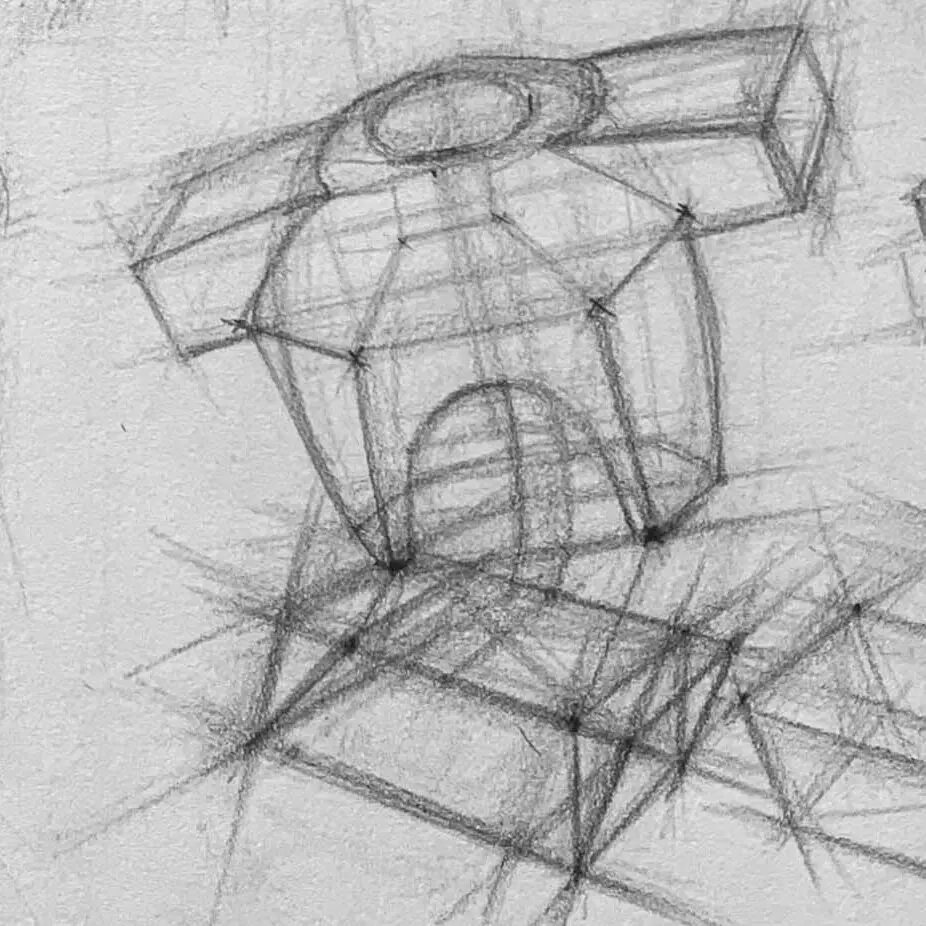
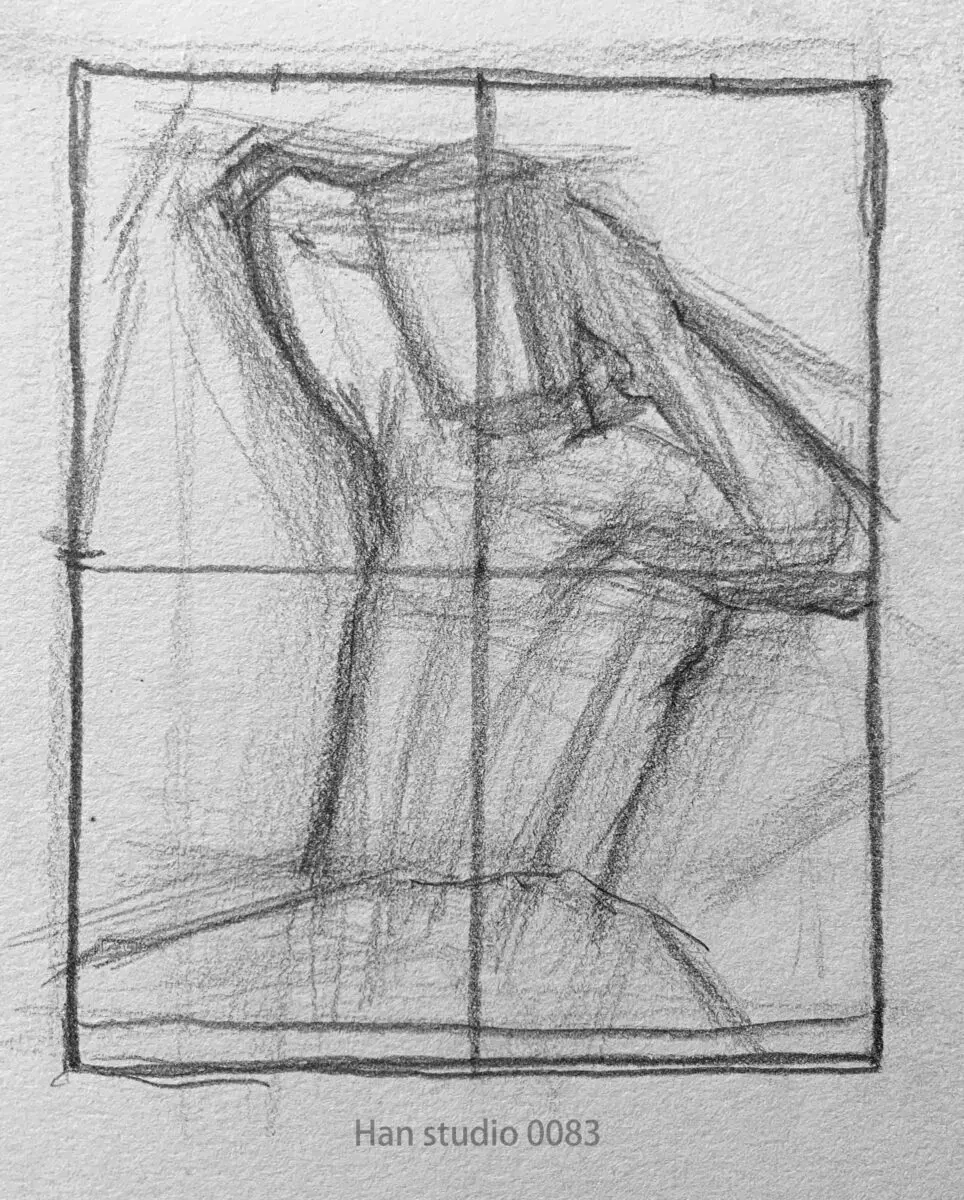
The human body moves in so many lines, so fast.Geometric shapes to stabilize and capture center of gravity, orientation and scale
In particularCorresponding angles of the thoracic and pelvic regions.The Government will decide on the overall trend of the situation.
To draw the torso we need to find the point of the structure where the crosses are made in the example below.
These positions are the turning points of the block shape, that is, where the shaded volume is generated. It is recommended to simplify the muscles into geometrical shapes first, so that we can control the checking of the structural perspective.
| Structure Name | Simplified Blocks | Functional Description | Starting Point Observation Suggestions |
|---|---|---|---|
| thoracic cavity | Variations of octagonal or cylindrical bodies | Immobilizes thoracic spine, connects shoulder harnesses | Neck → sternocleidomastoid on both sides → sternal angle |
| pelvic | Flat square, triangular | Lower Body Pivot, Abdominal Heave | Base of the spine → both flanks of the ilium → sciatic point |
| Shoulder Strap | Horizontal Bar + Sphere | Clavicle orientation affects forward and backward arm movements. | Clavicle→shoulder→arm sphere |
| Neck | Shorter Columns | Connecting area from the 7th thoracic vertebrae | Can be extended in line with the chest indentation |

After understanding the above introduced torso structure knowledge points, we enter the application of portrait drawing.
When drawing a half-body, it is recommended that you use a draft to finalize the body's movement first. Don't rush on the light and dark in the preliminary stage, prioritize the shape problem.
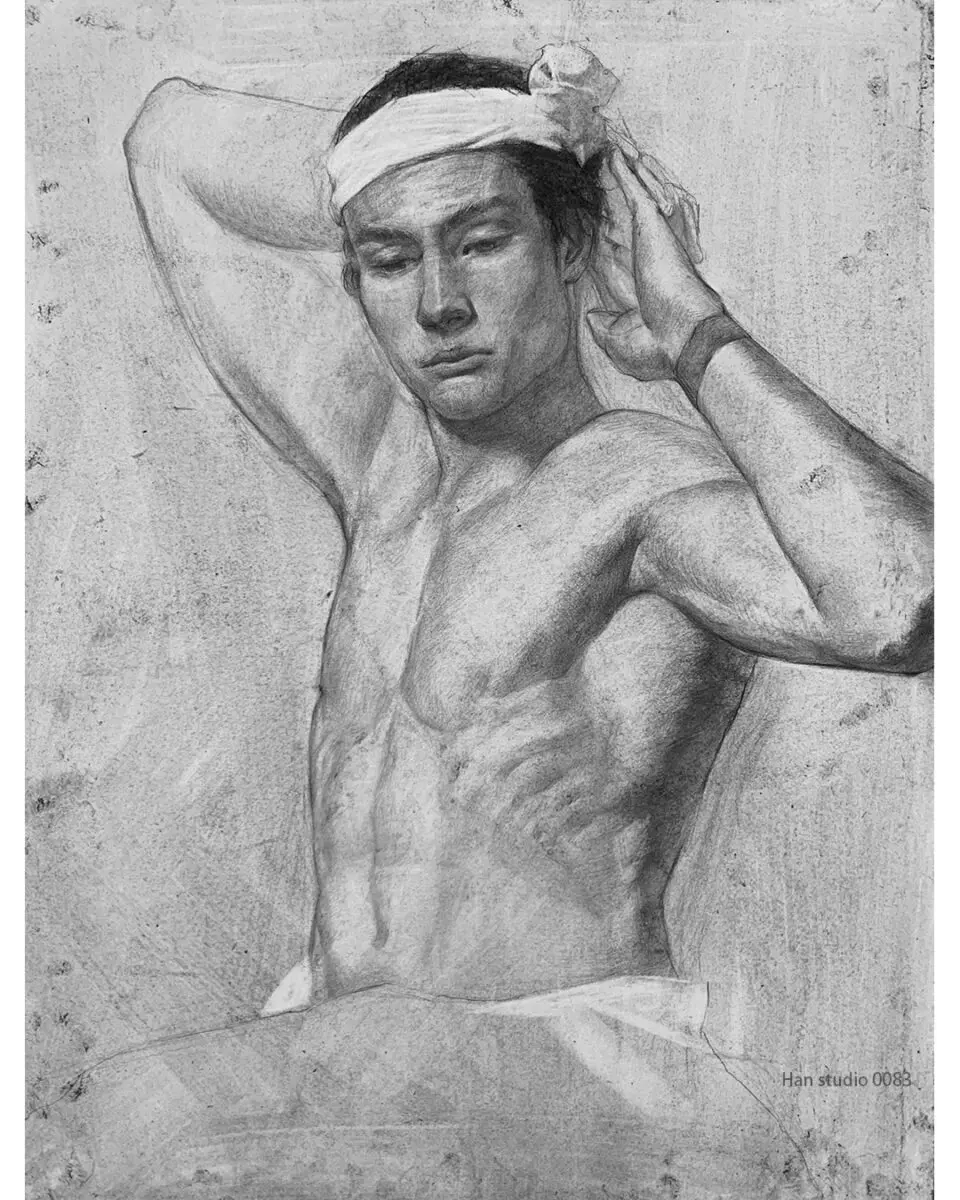
The above is an introduction to drawing the thorax and torso. Do you have any difficulties in drawing the thorax? Feel free to leave a comment or send me a private message.Instagram Exchanges.
―――――――――――――――――
If you want to learn to draw, but don't know how to start, or are interested in understanding what drawing is all about.
Welcome to join line Contact meIn my classroom, I organize the way I learn to draw in a clear and organized way.
Click here to learn more about the Painting Program
―――――――――――――――――
Human Skull Sketch: Learn Anatomy for Accurate Portraits
Introduction to Arm Painting: Detailed Analysis of Skeletal Simplification and Movement Mechanisms
How to accurately grasp the proportions of the hand and sketch the structure of the joints.
How to Draw Ears:Simplified Ear Structure and Shading Tips
Facial Muscle Structure Analysis: Enhancing the Stereoscopic Sense of Figure Sketching
From Simple Contours to Detail: Mastering the Sketching of Eyes
Capturing Realism in Lip Drawing: Key Structures and Shading
Portrait Sketching Tips: Three Keys to Understanding Head Structure